Login to WABLI with your GitHub account by visiting the following url: https://wabli.netlify.app.
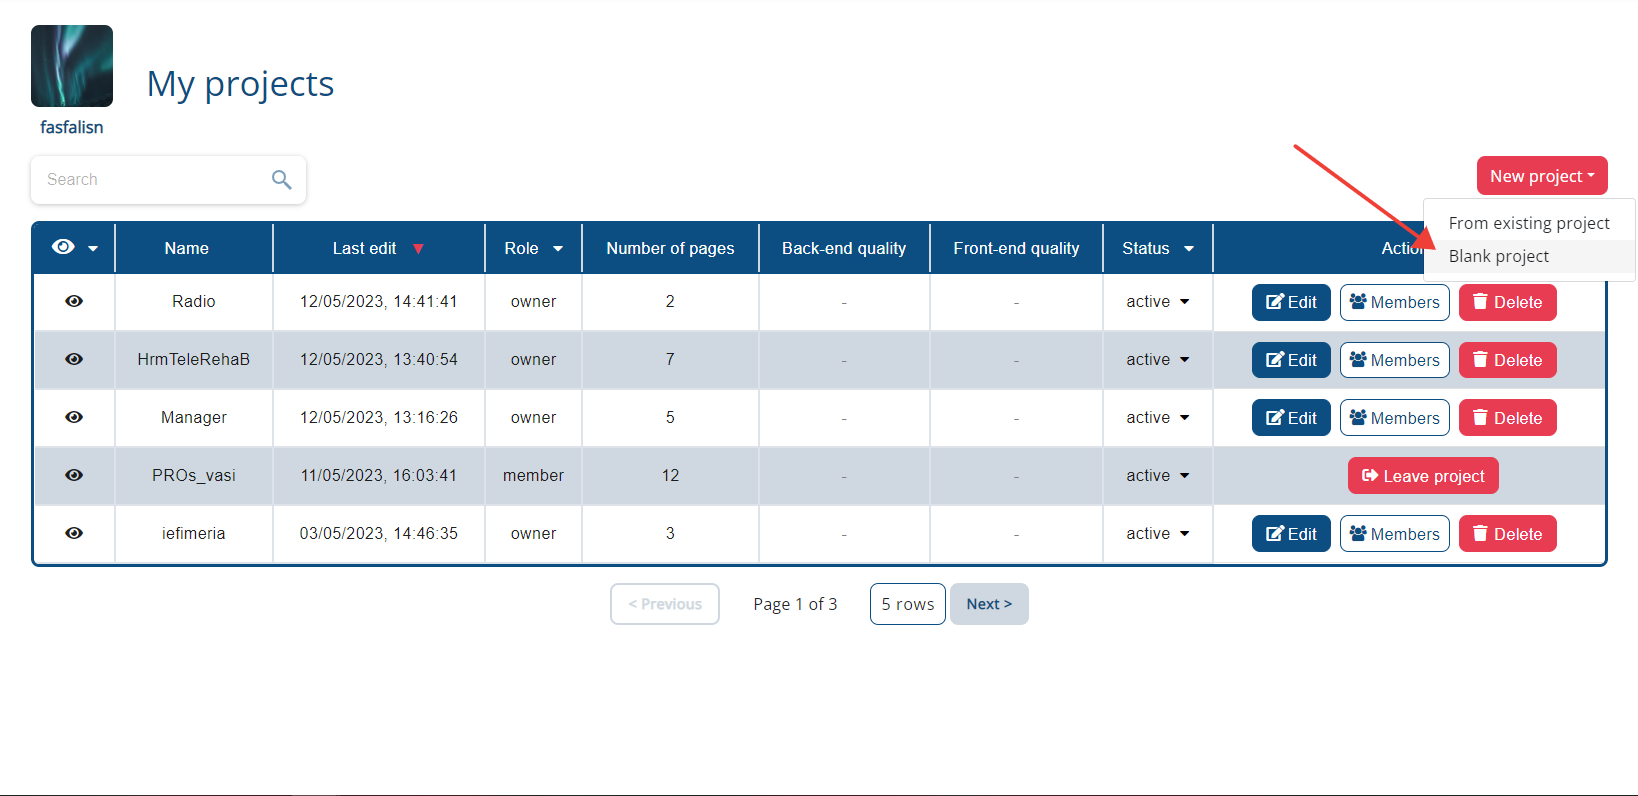
Create a new project from the landing page by clicking on the "Create new project" button, and selecting "Blank project".
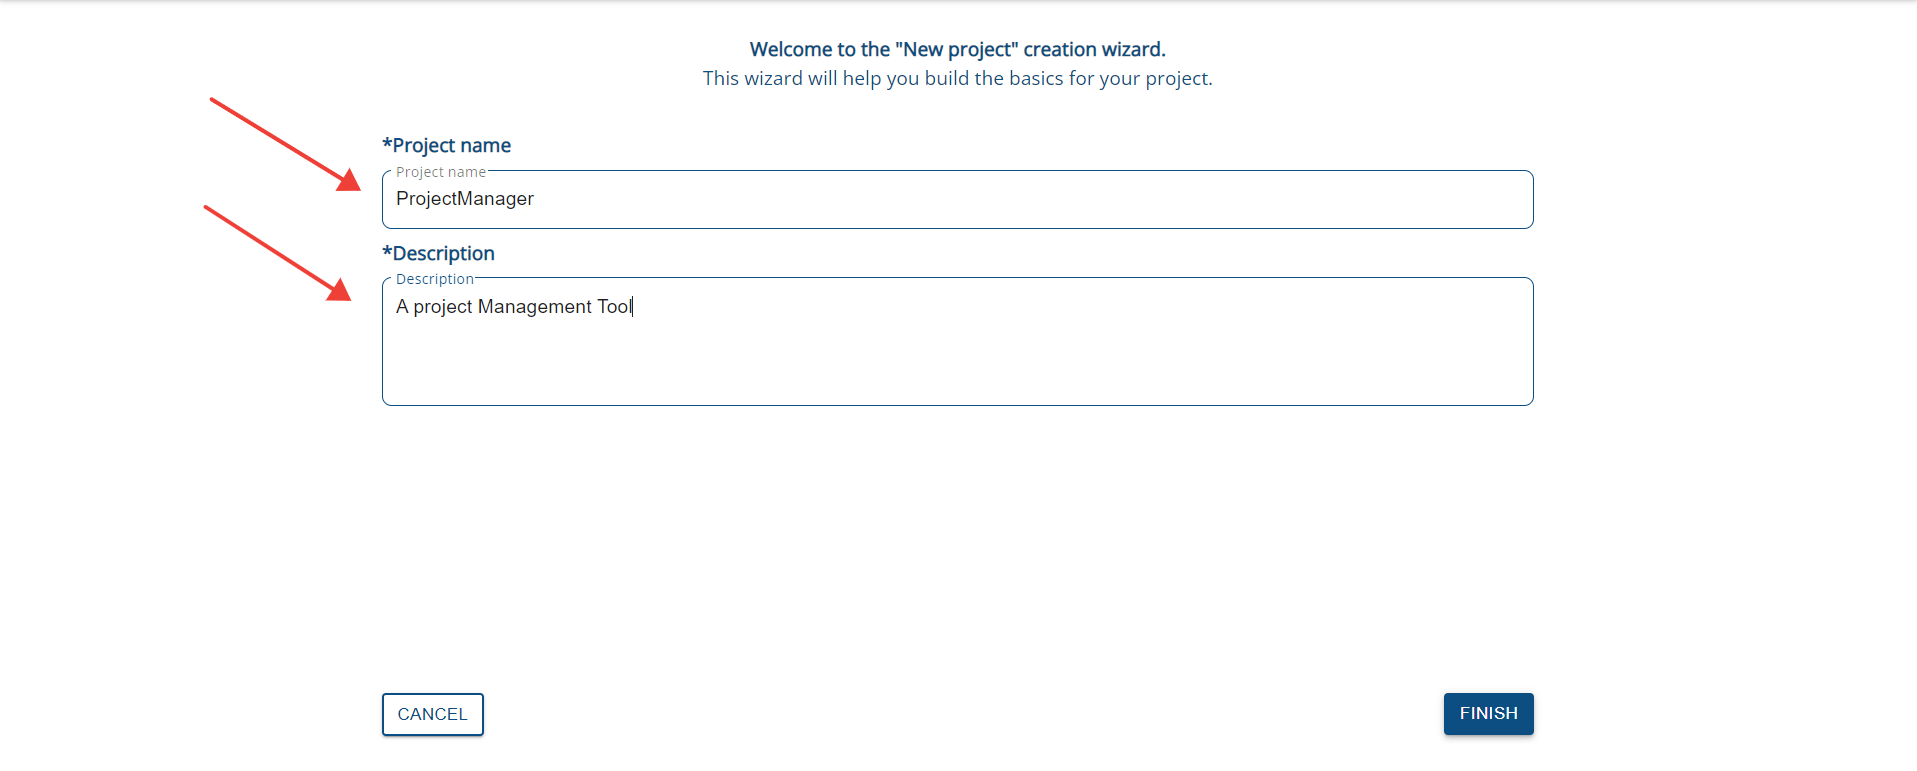
Then, complete the details of your project (Project name, Description) and click 'Finish'.
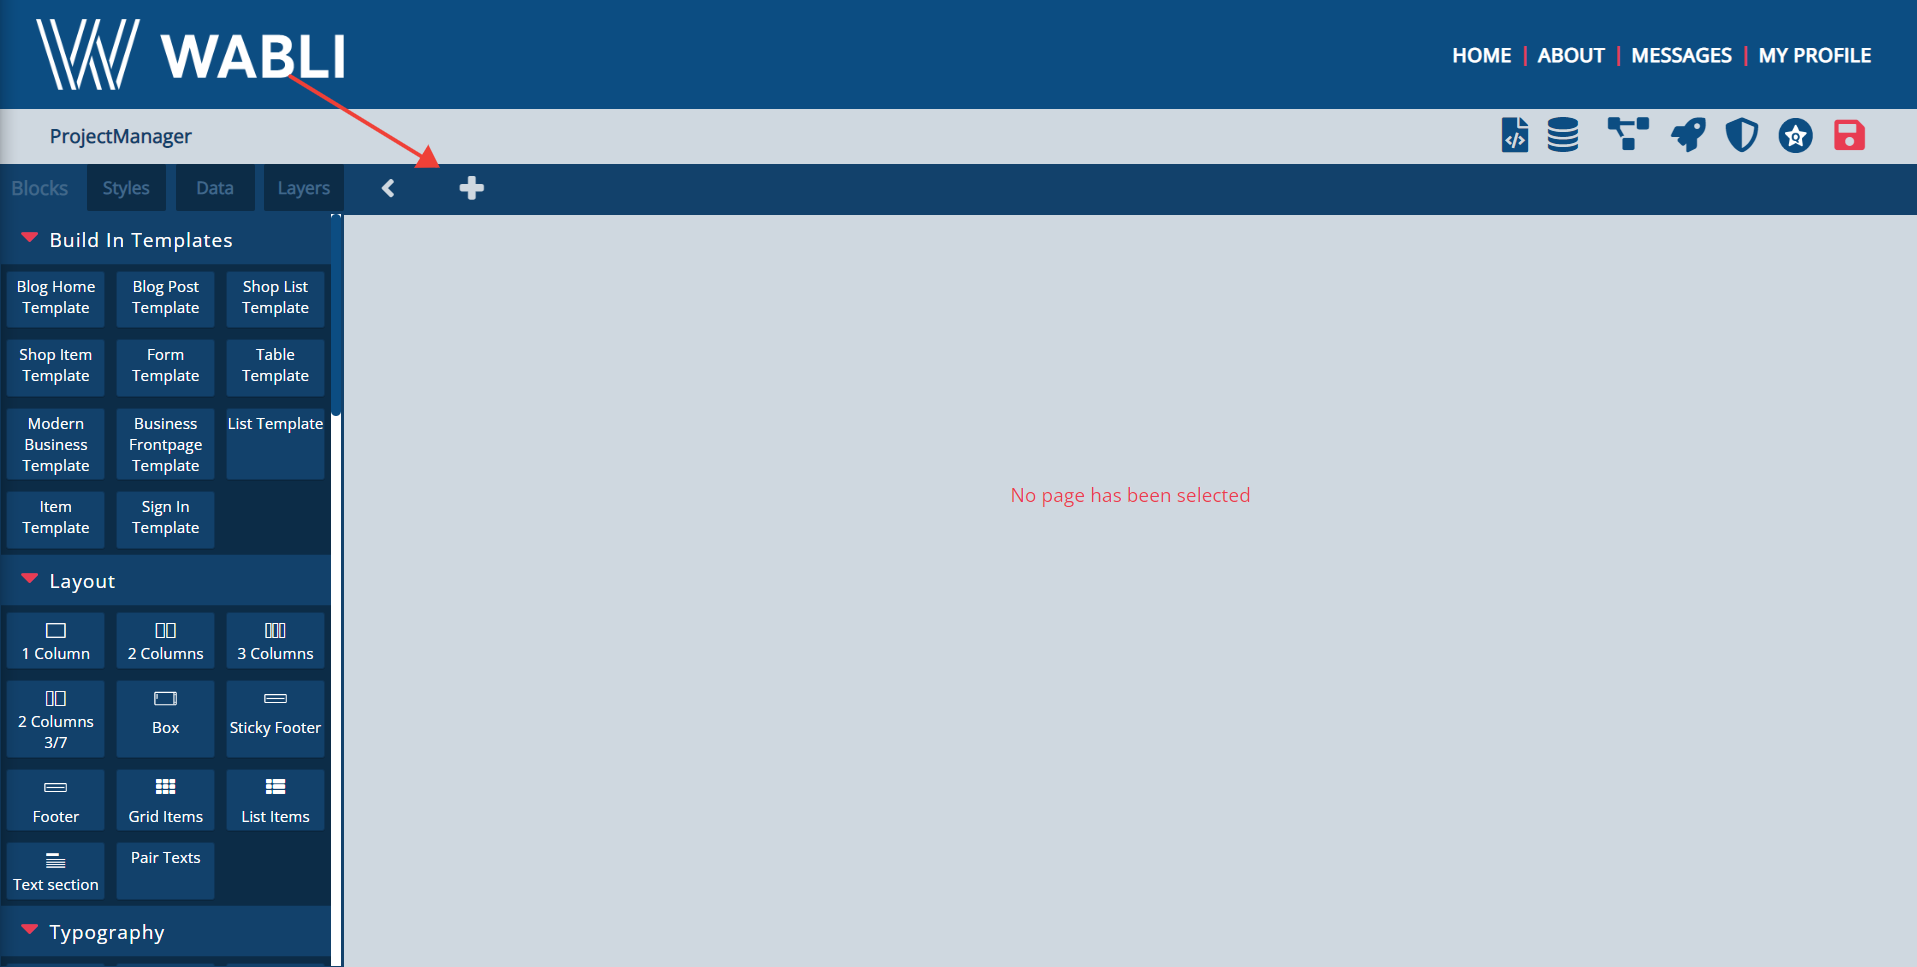
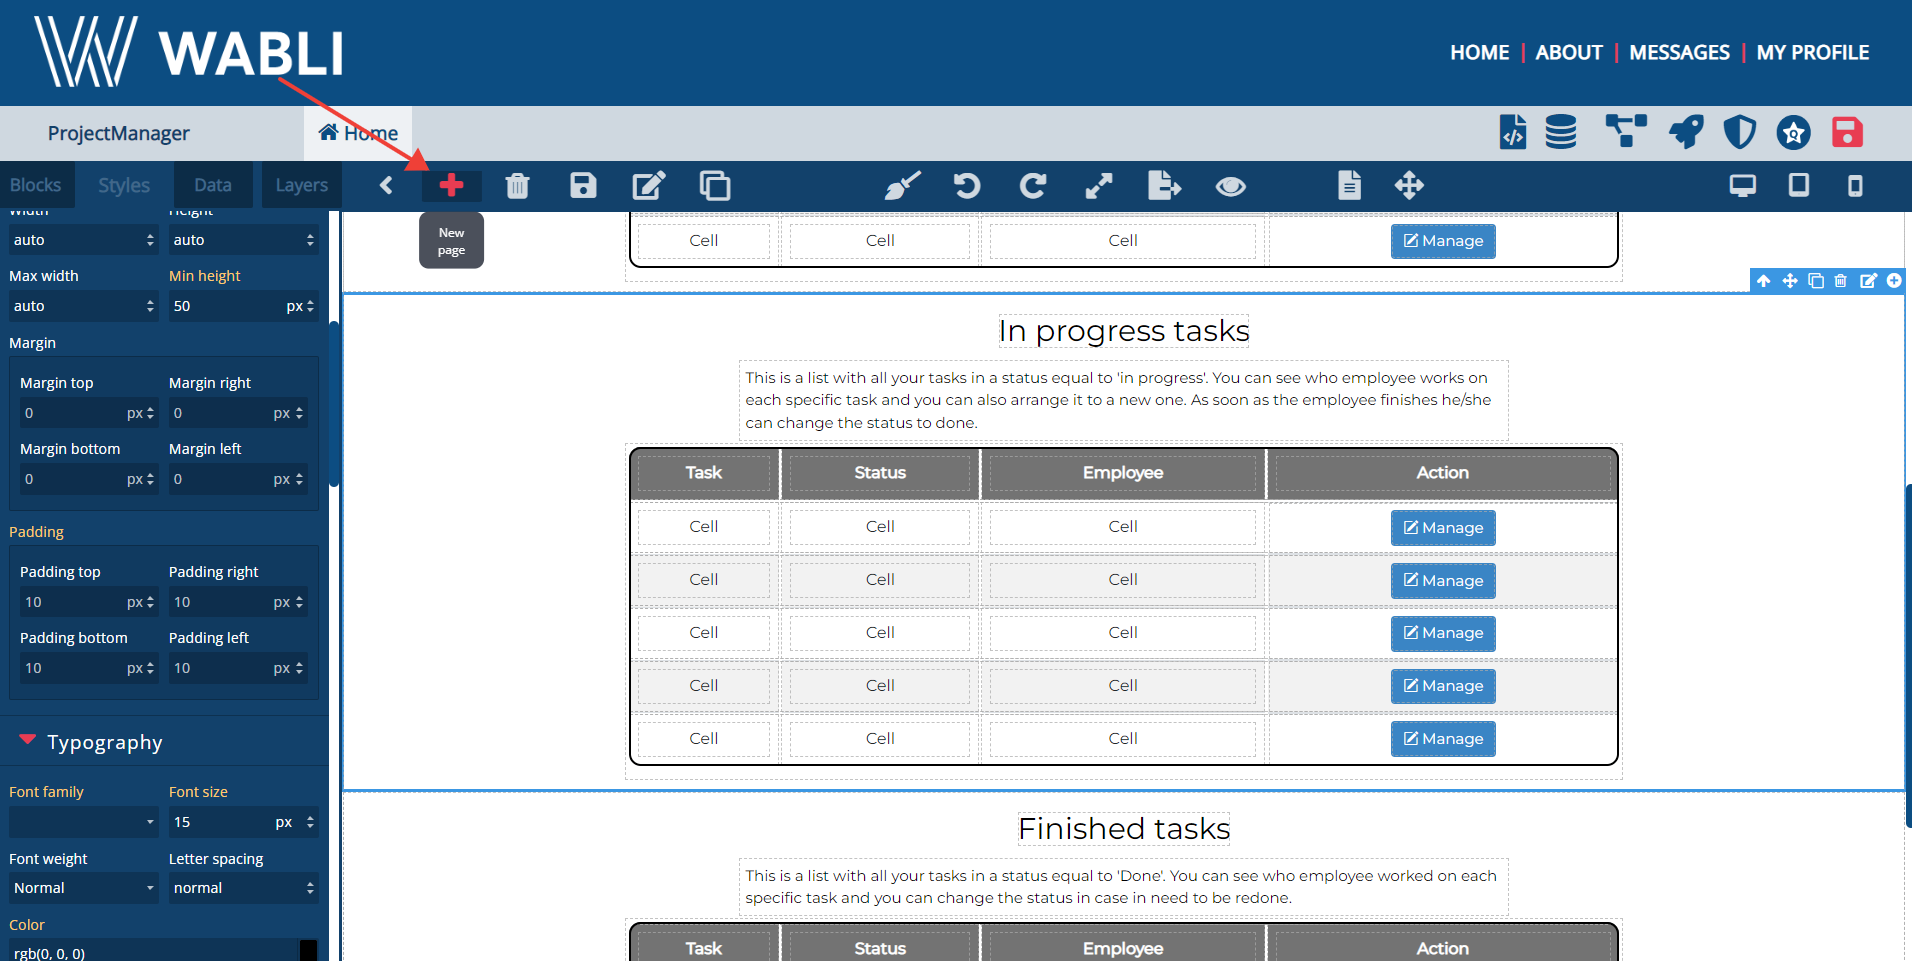
In orded to start modifying your project, you firstly need to create a new page. You can create a new page by clicking on the "+" button.
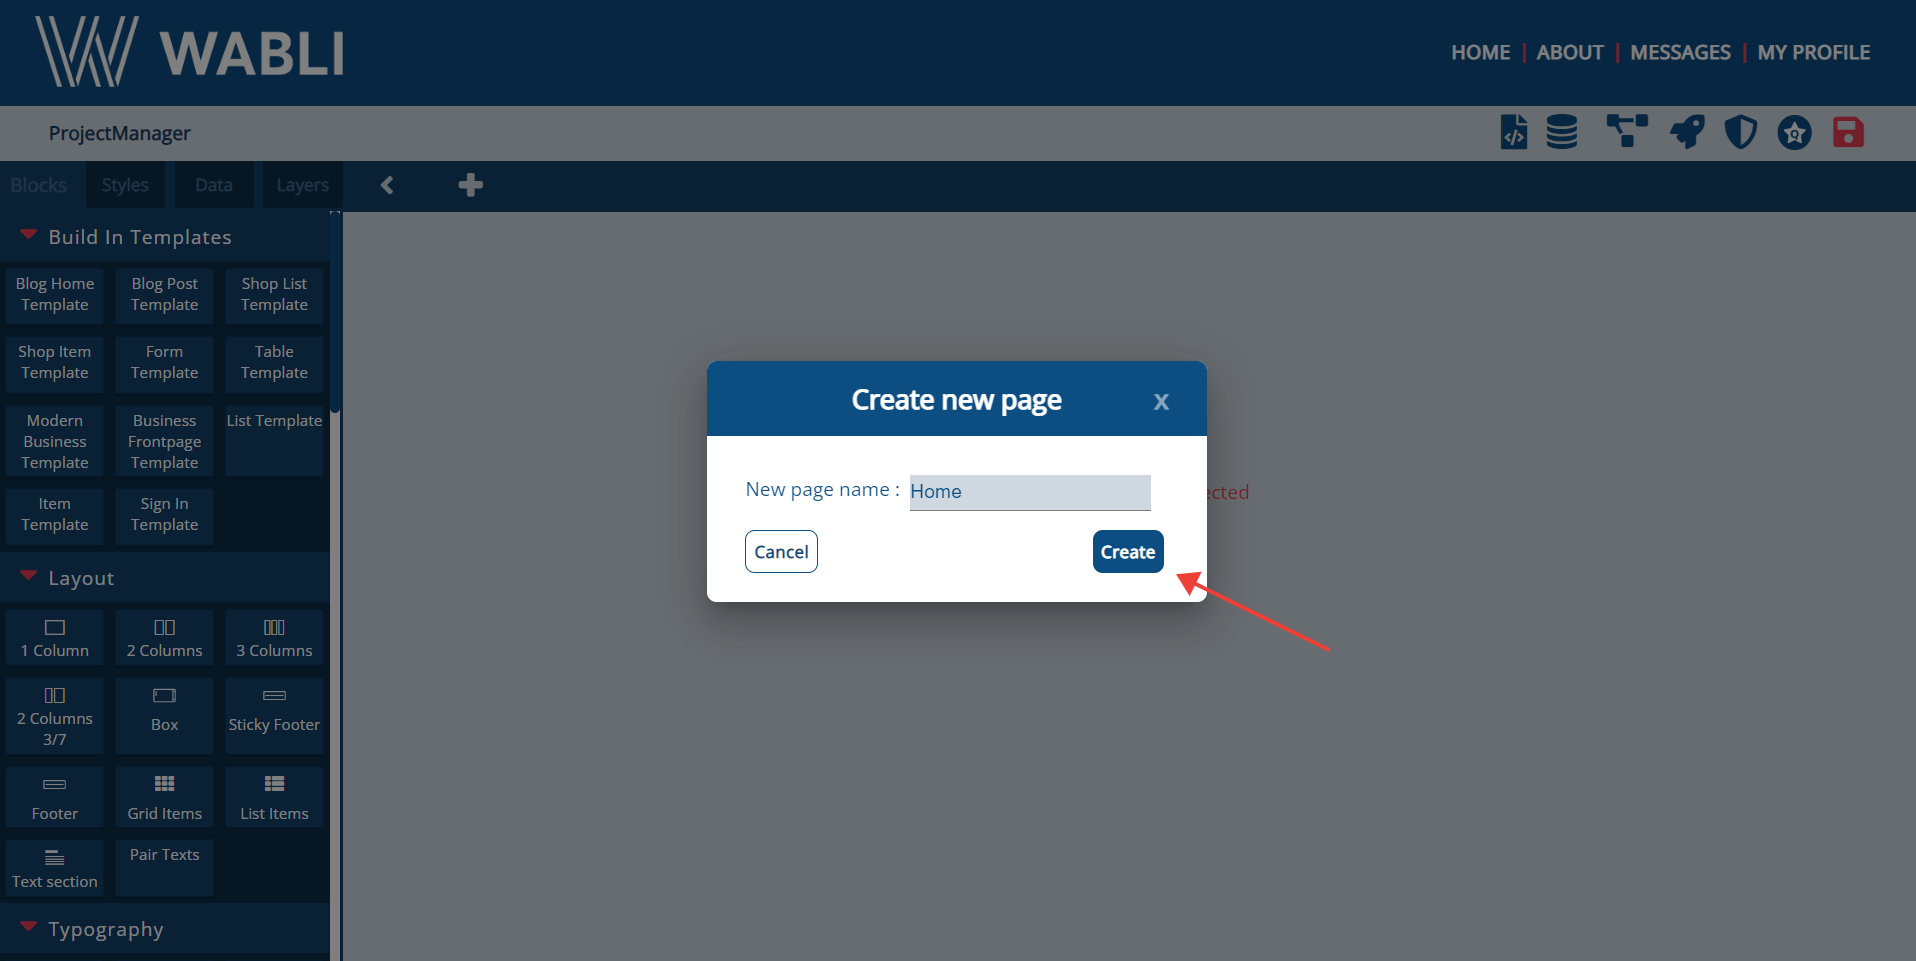
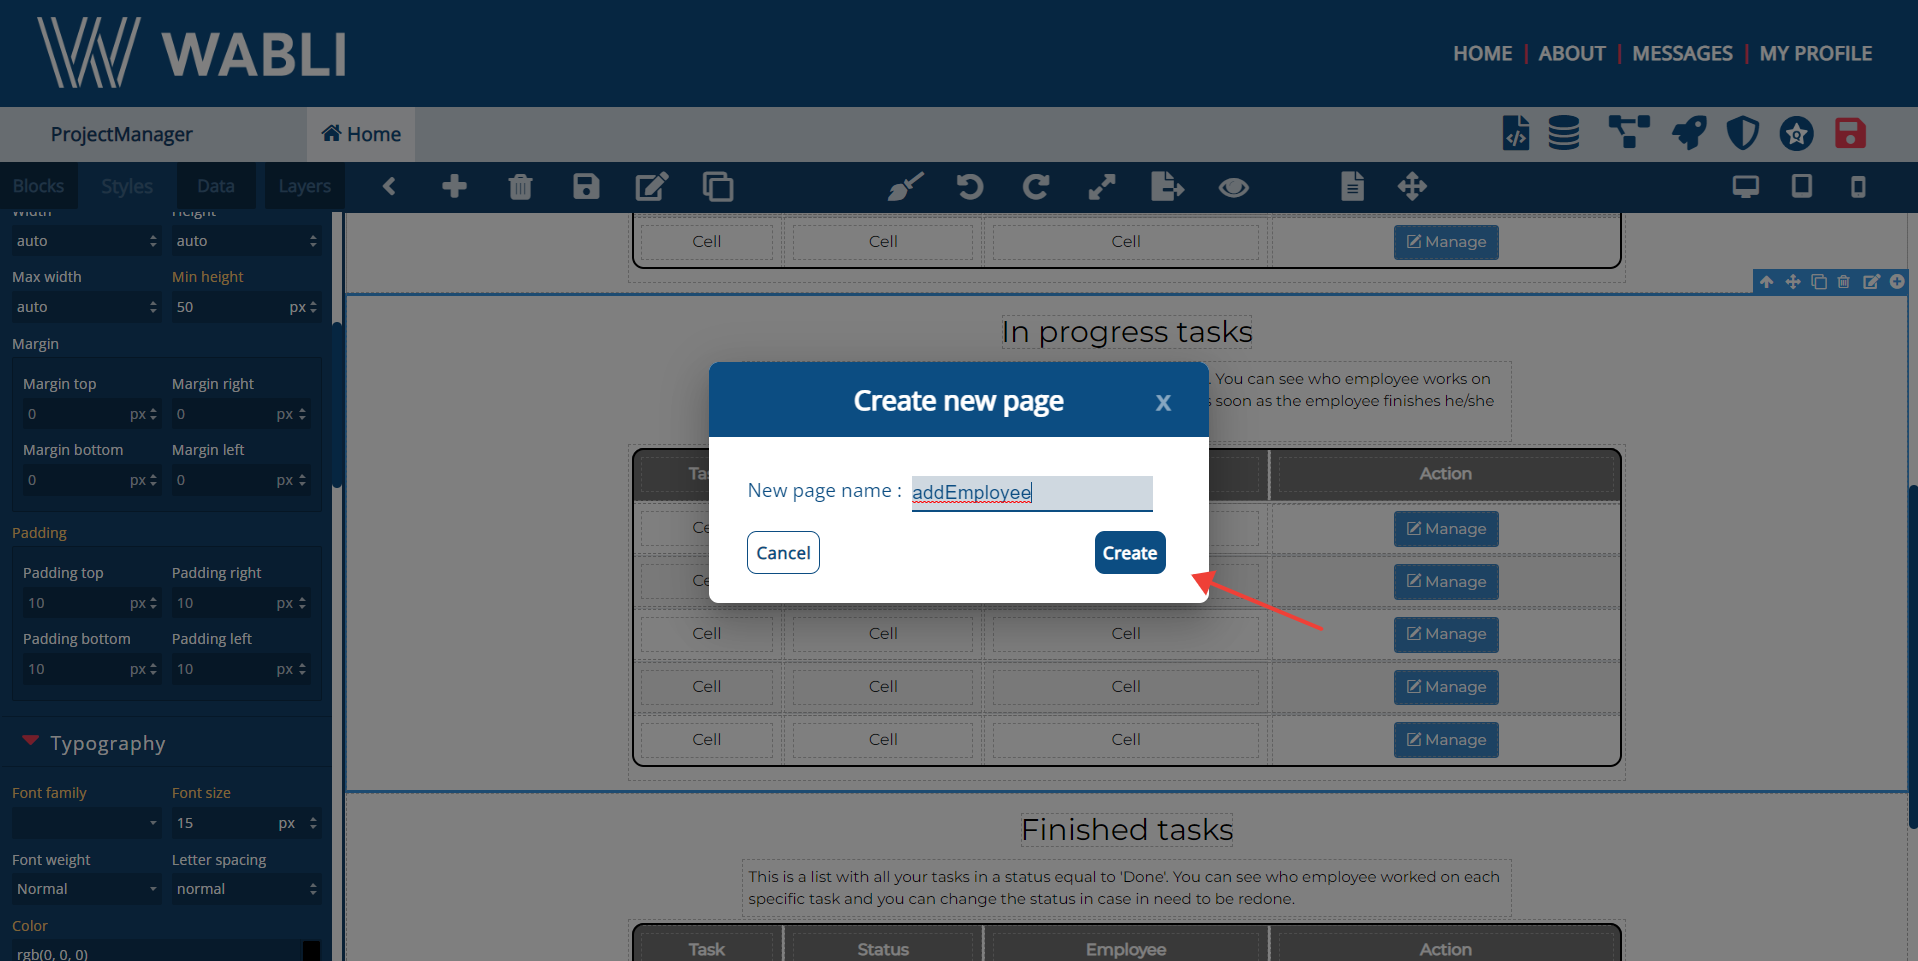
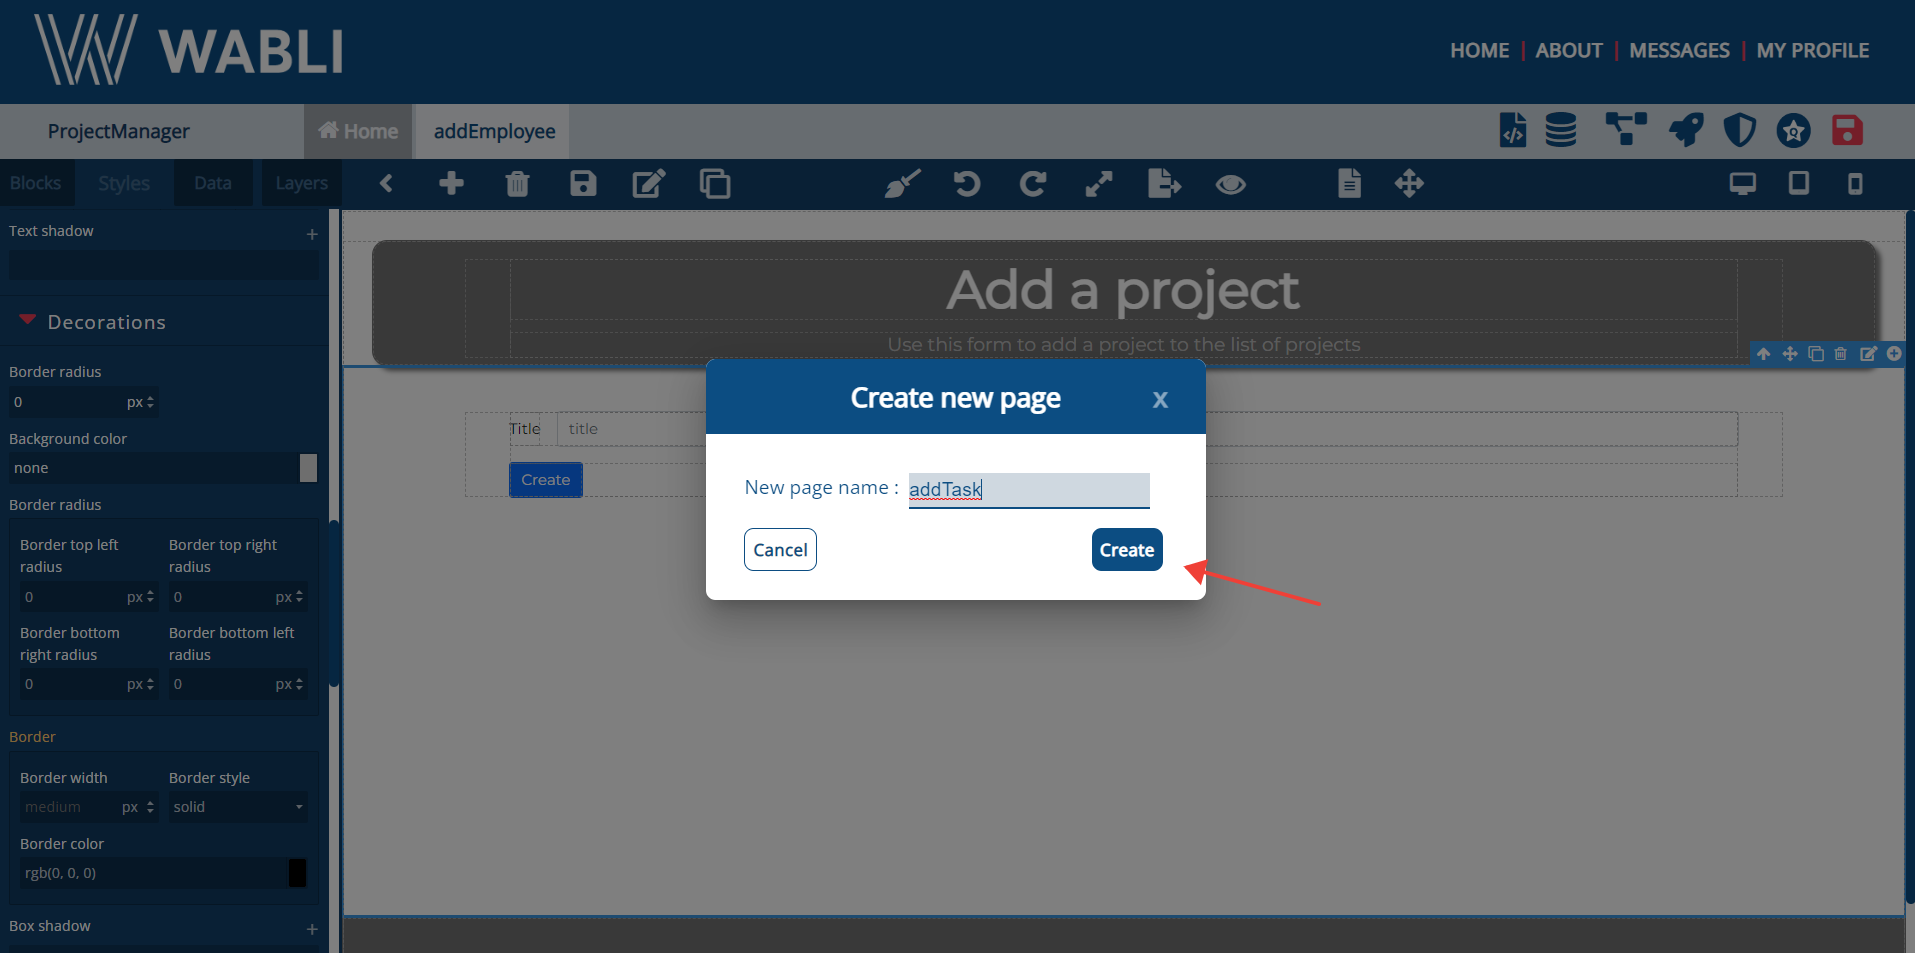
Name your page and click "Create" button.
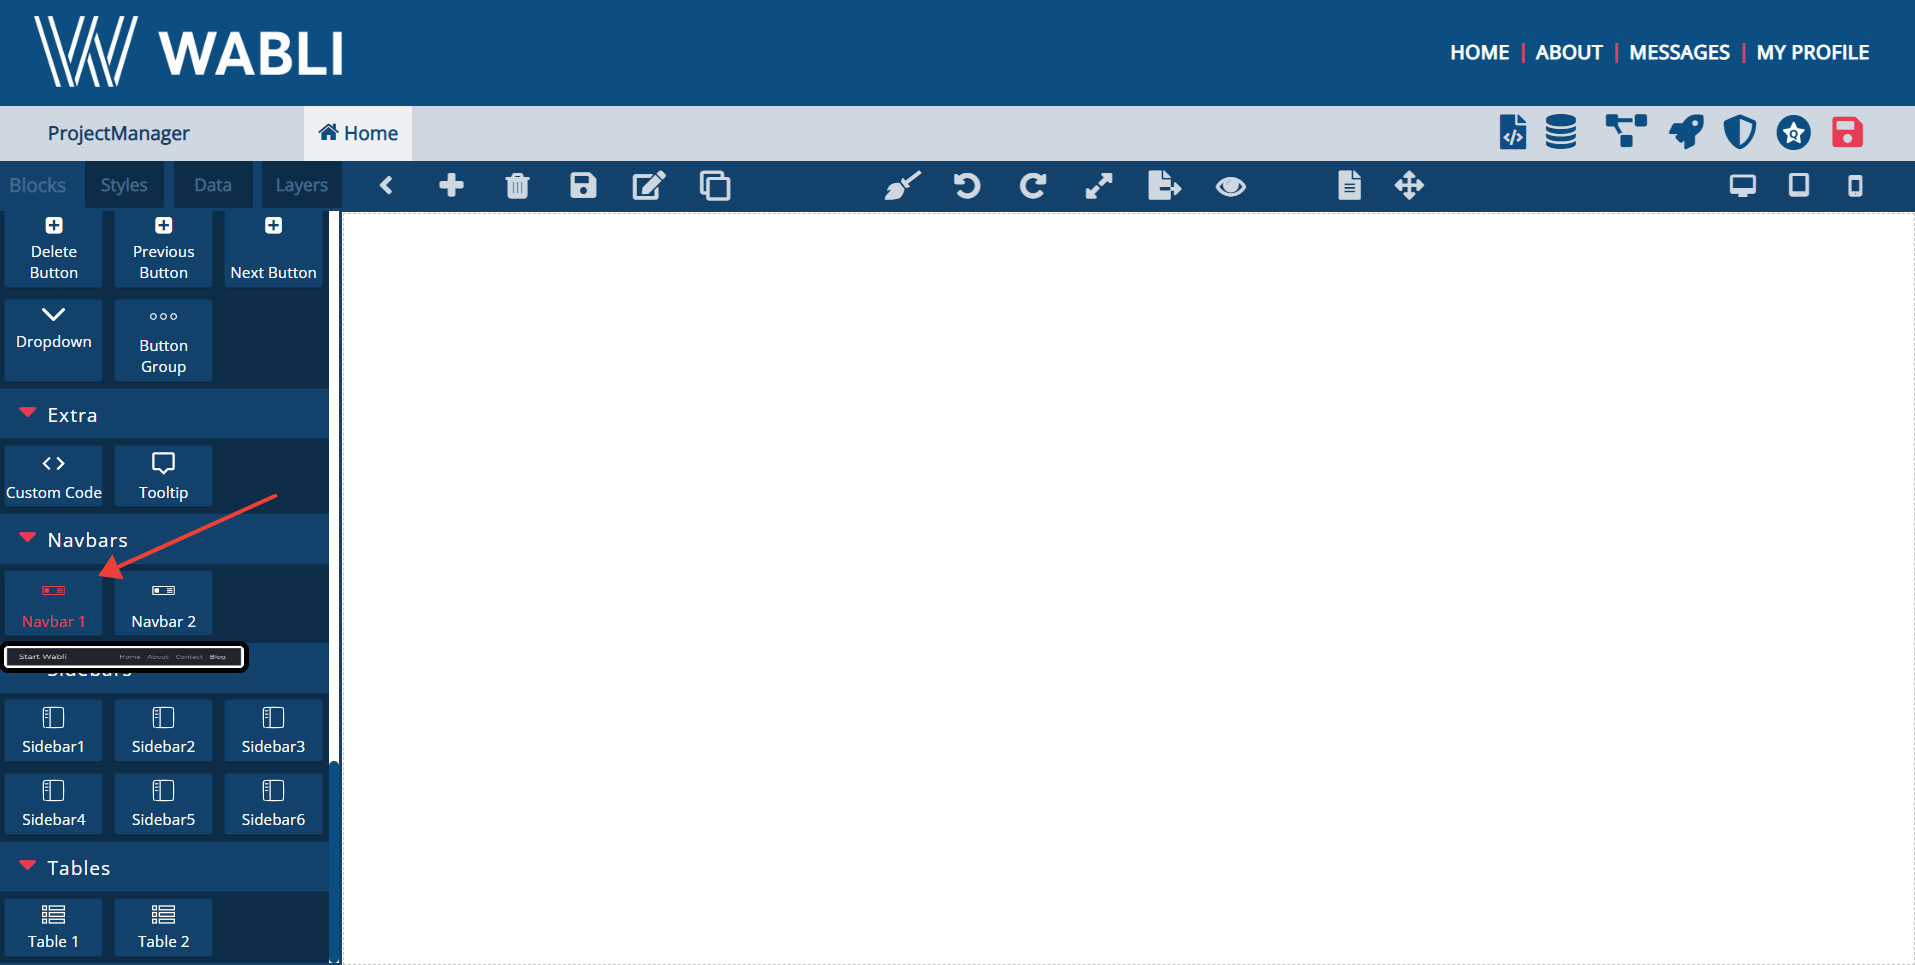
You can now start designing your project using the block elements on the left side of your screen.
Drag and drop a Navigation bar inside your first page.
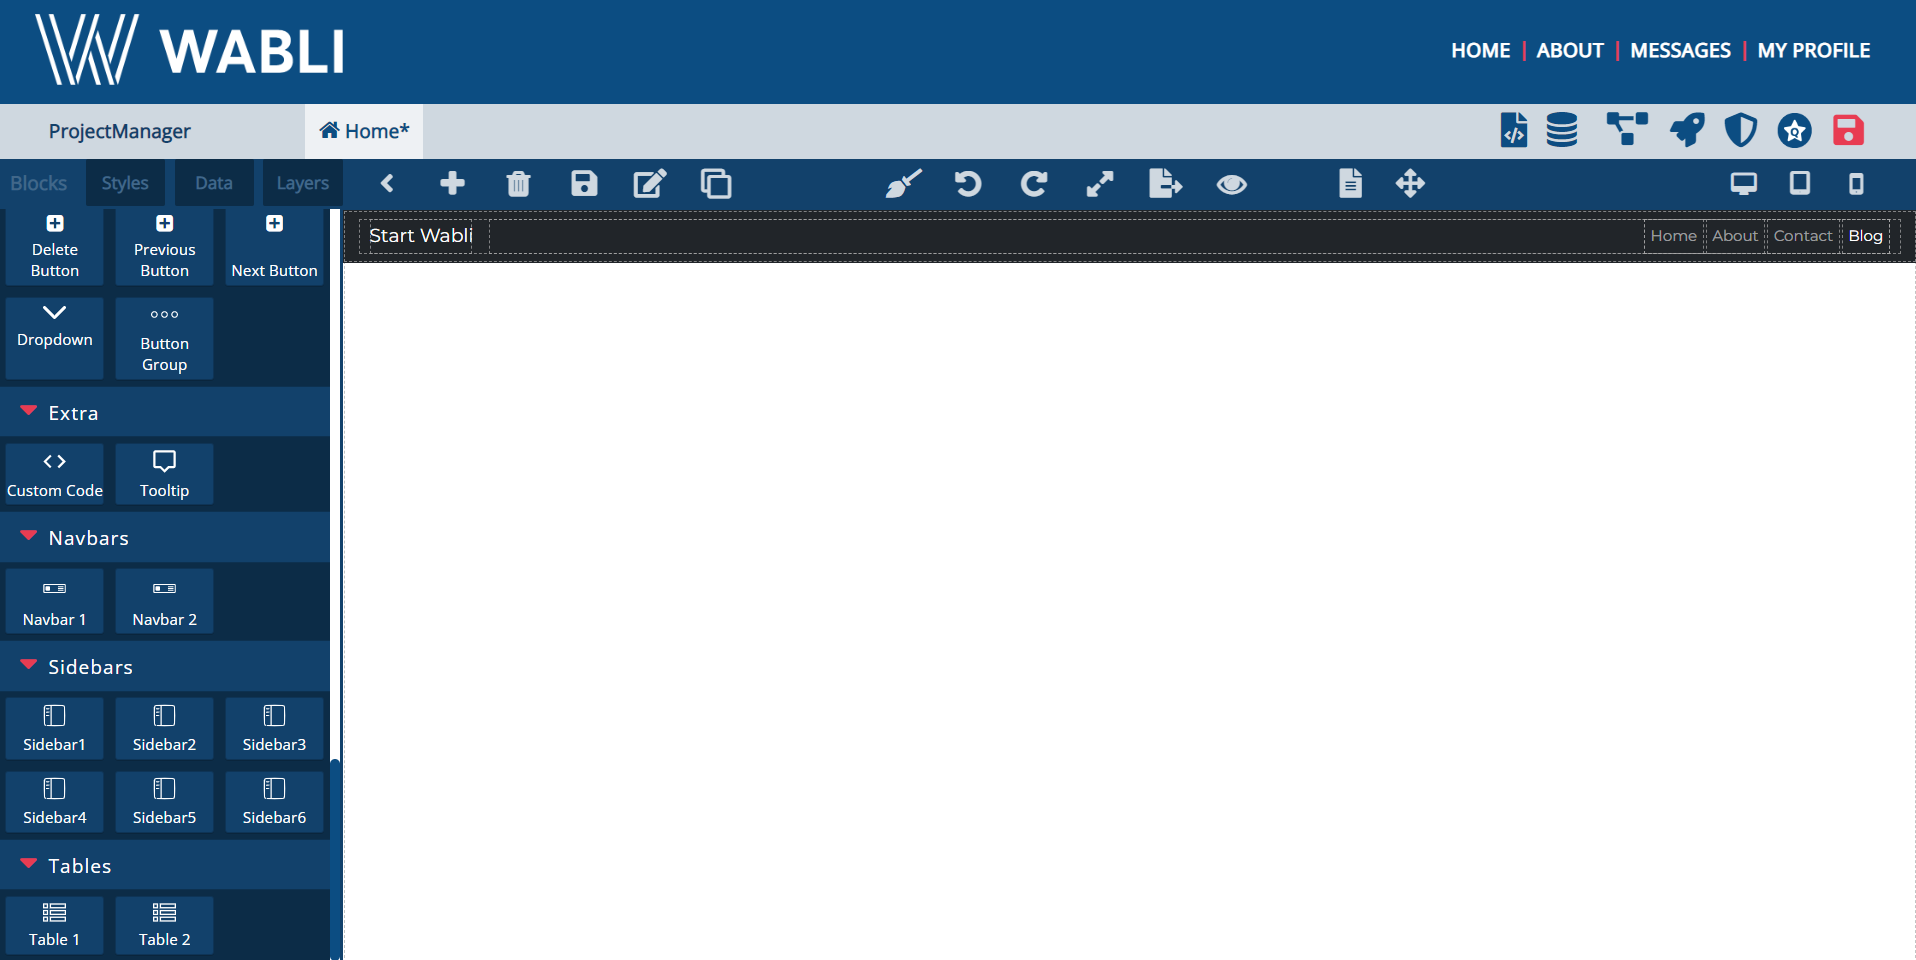
Edit the navbar by clicking on it and
selecting the "Styles" button. We created
ours by adding 'margin' = 30px, a background
color and 'border-radius' = 15px.
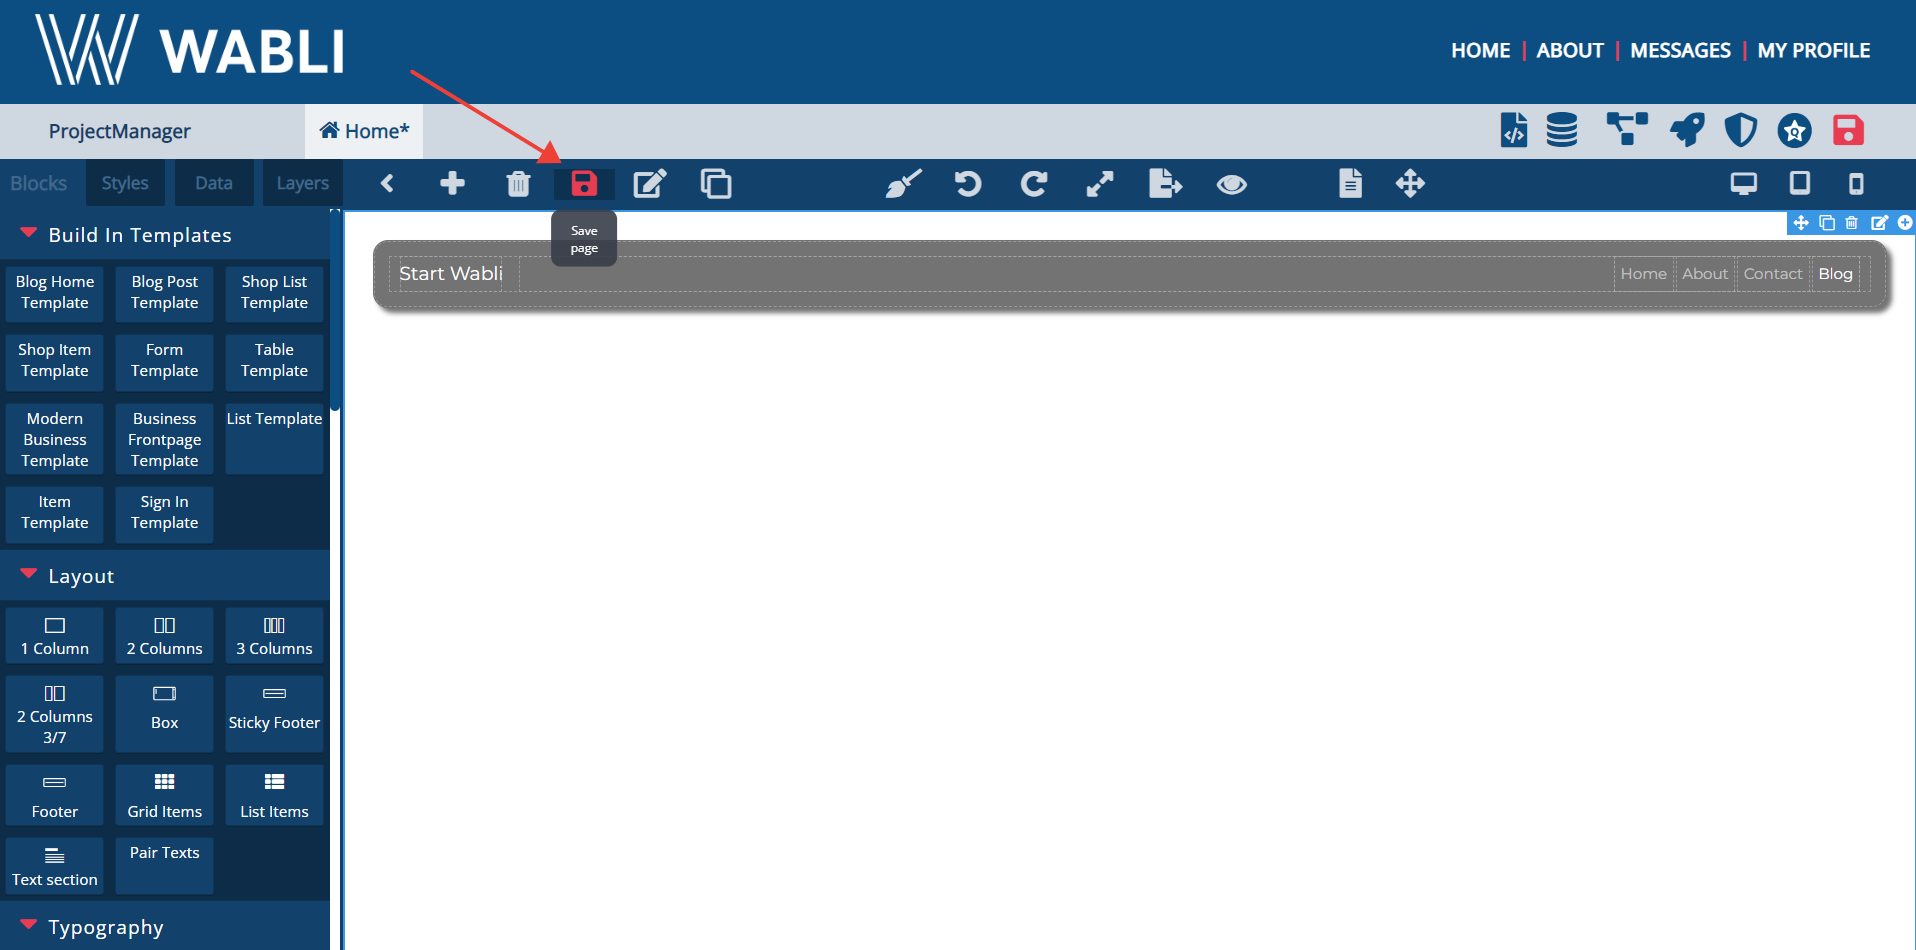
After you finished styling your block, don't
forget to click "Save" button.
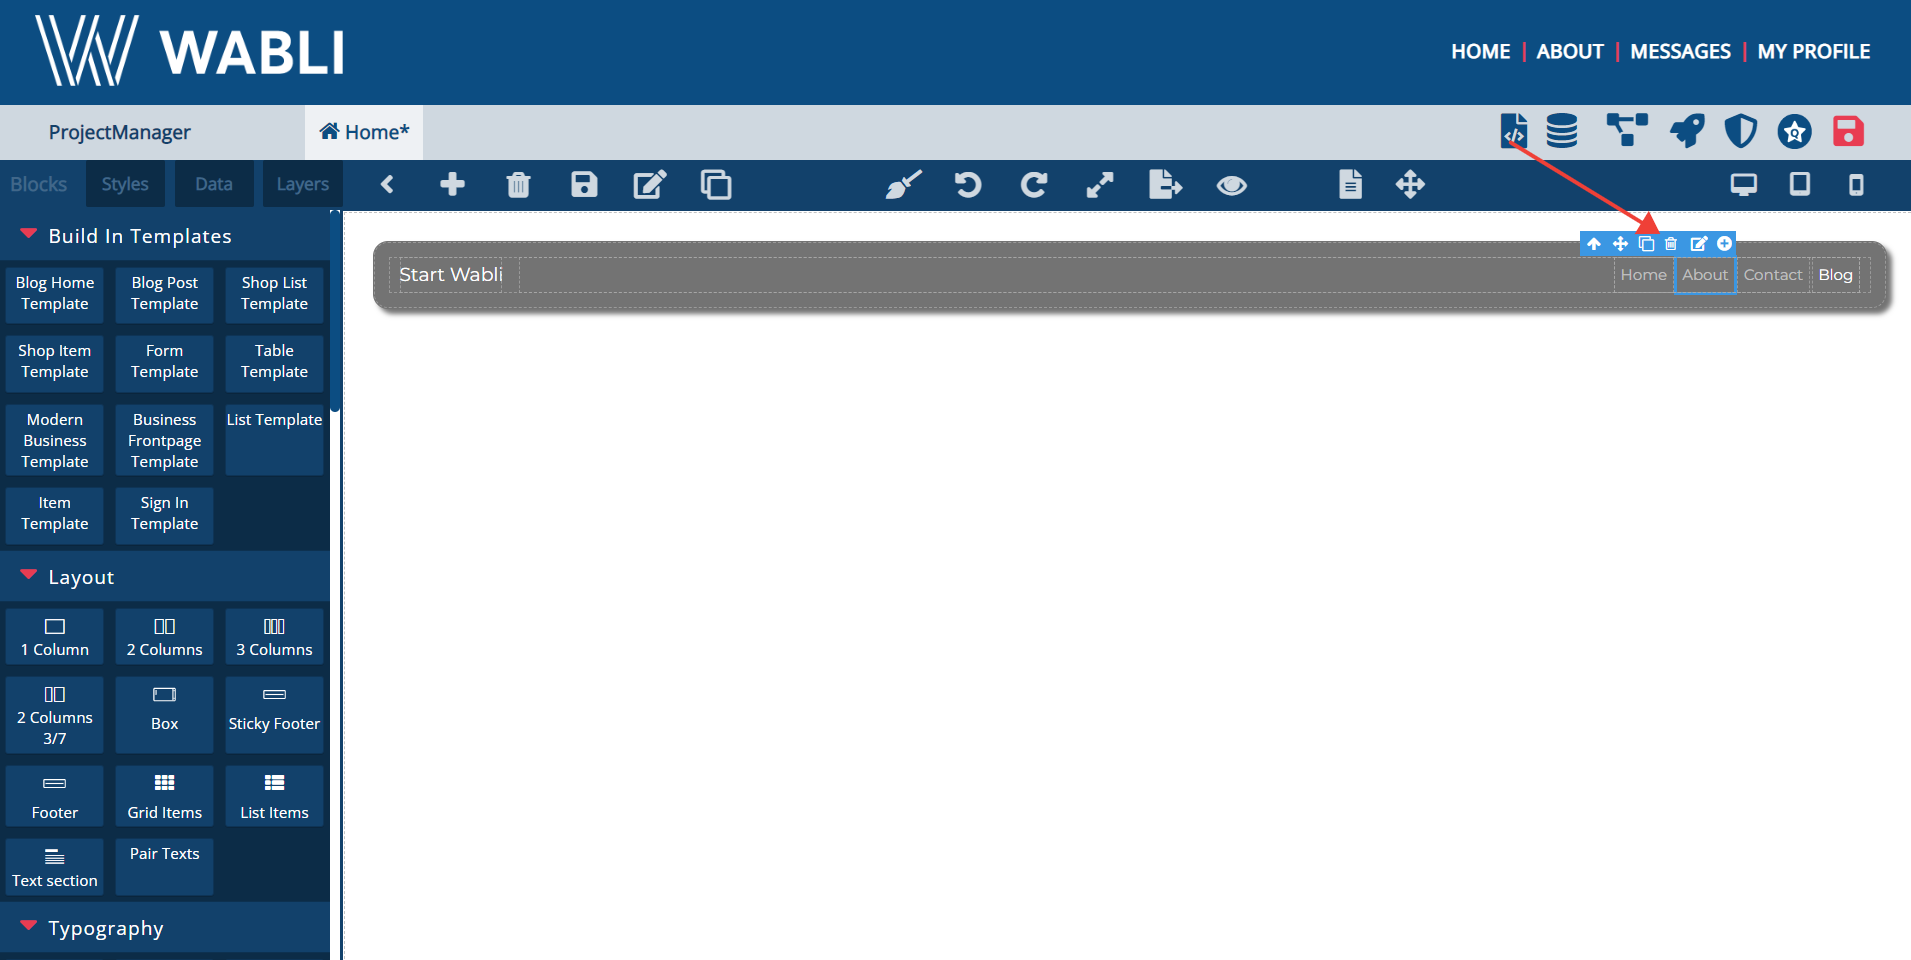
The navigation bar is almost ready. You can now delete the buttons you don't need by selecting them and clicking delete.
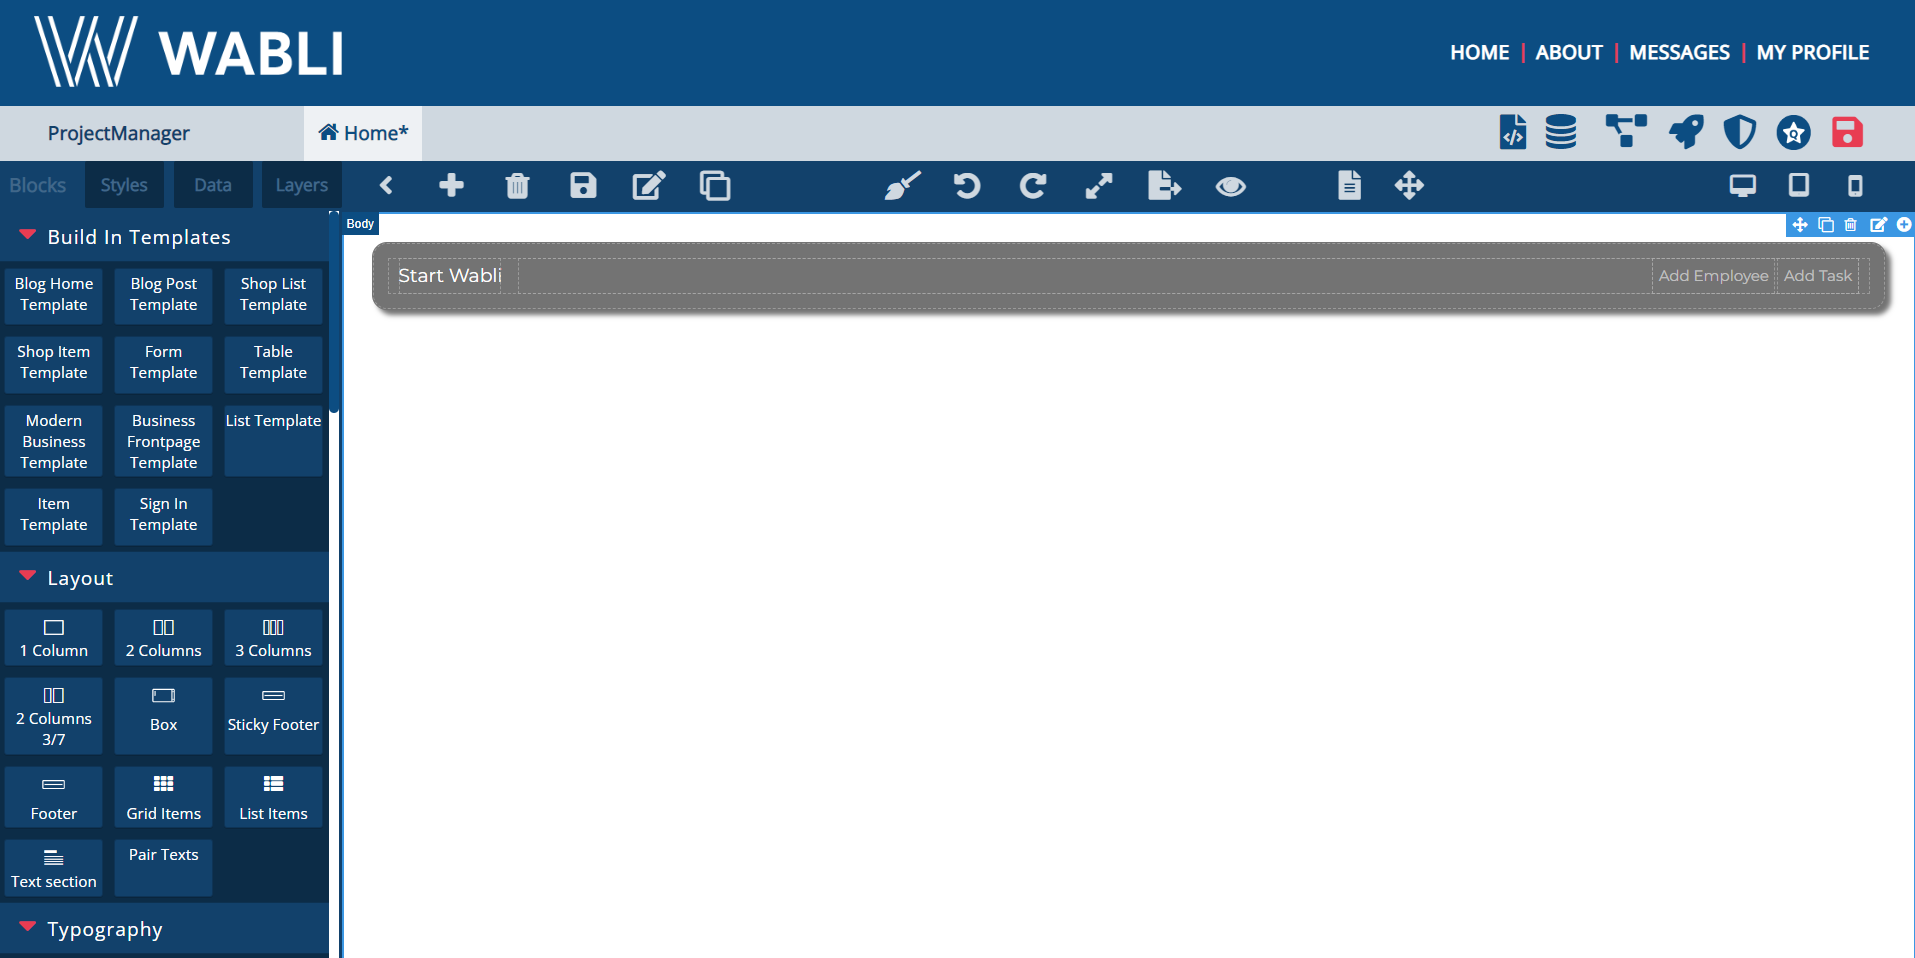
This is the final result of our navigation bar.
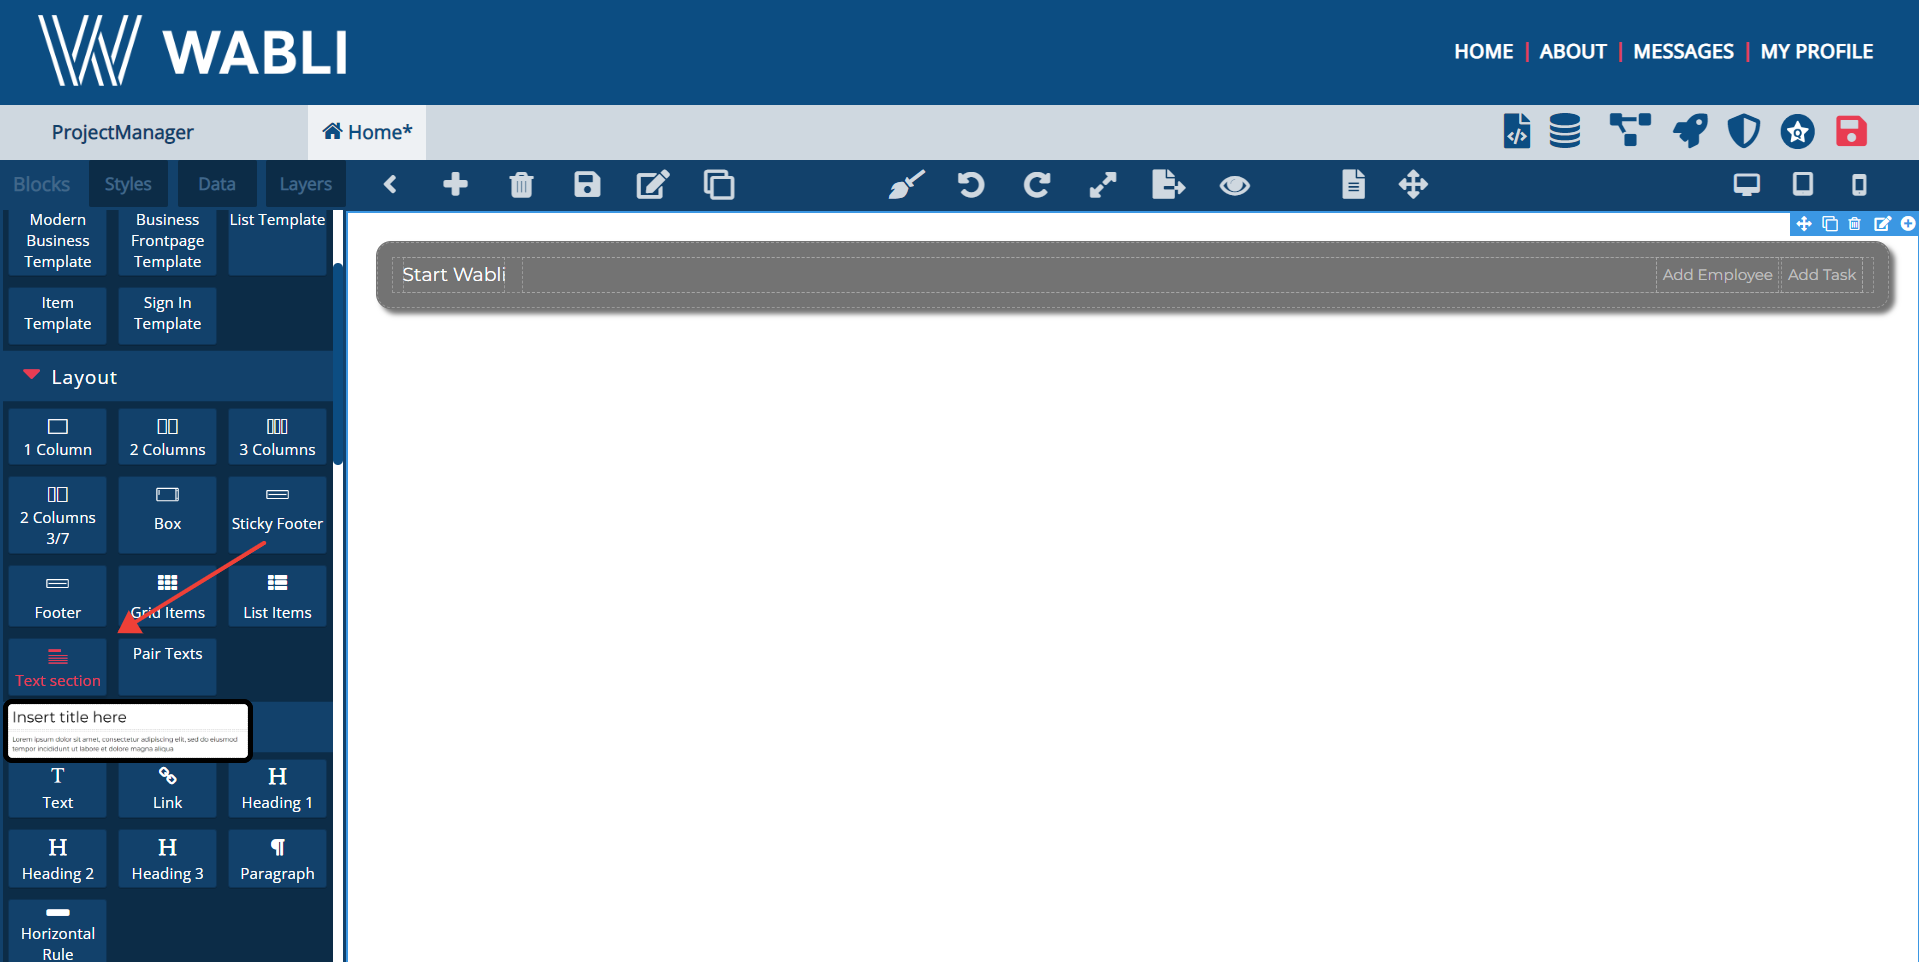
Drag and drop a TextSection underneath the Navigation bar.
Edit the text section by clicking on it and selecting the "Styles" button. We created ours by adding 'margin' = 30px.
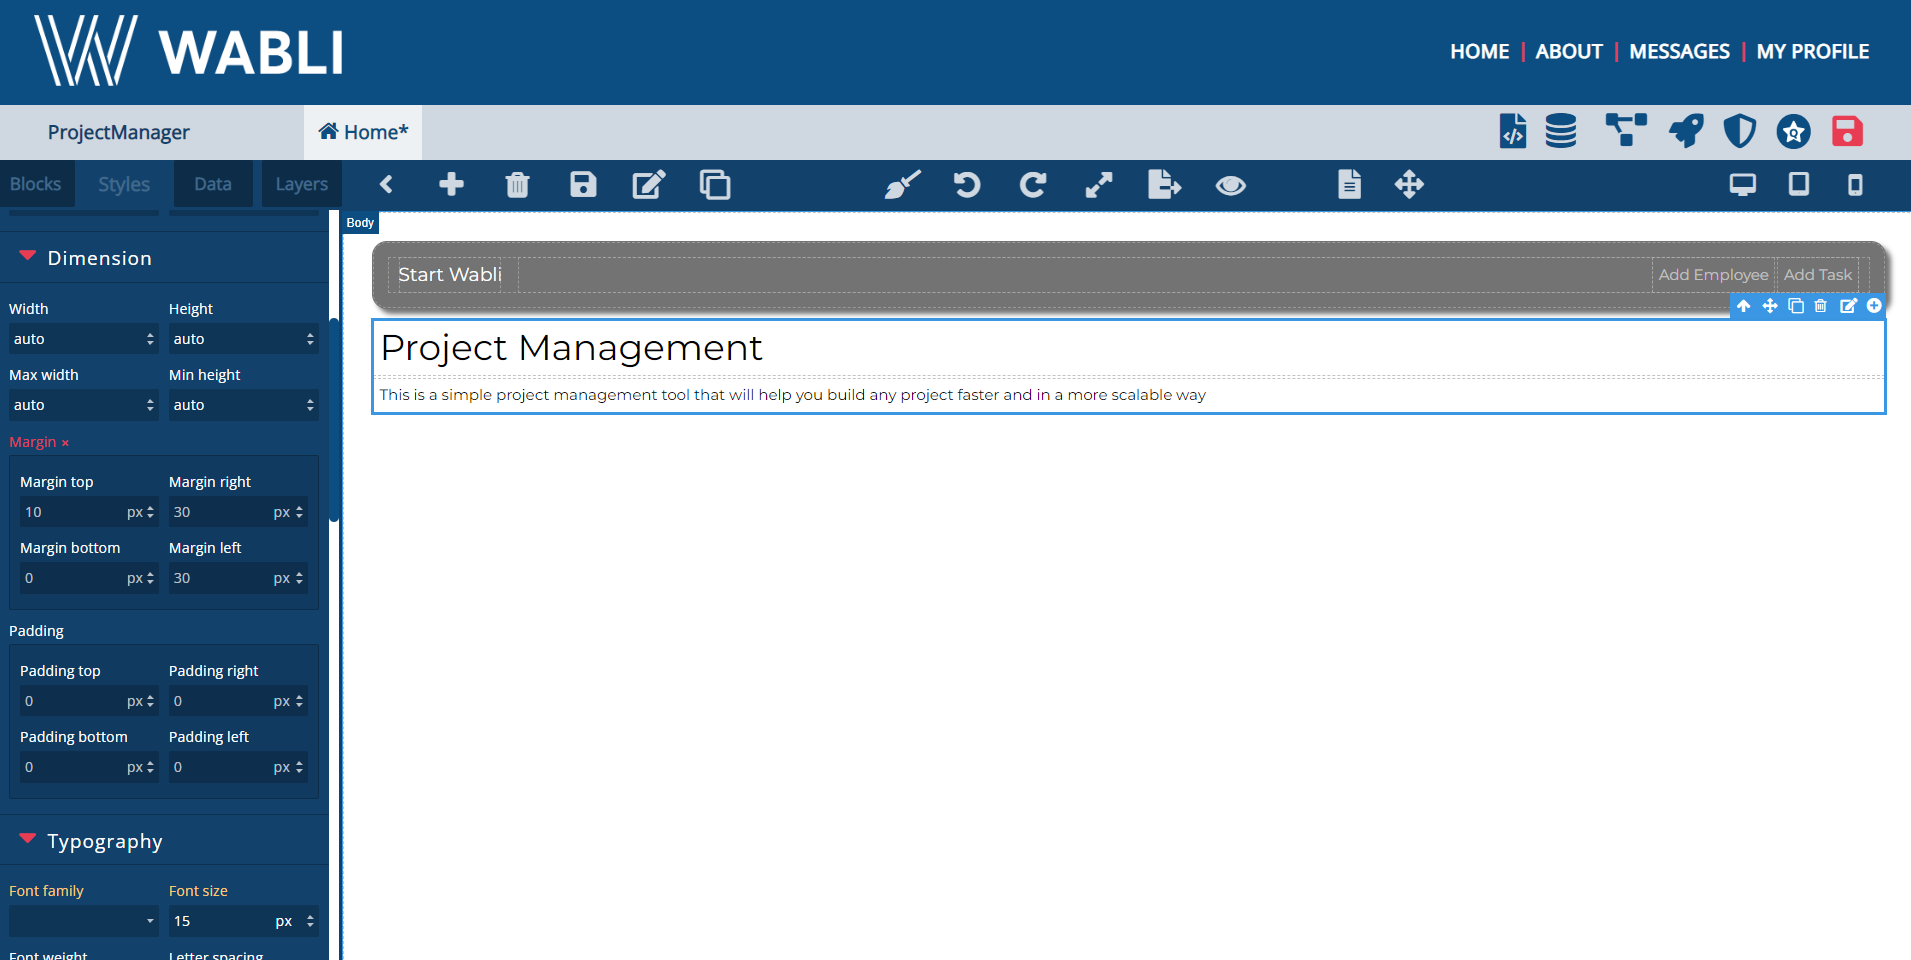
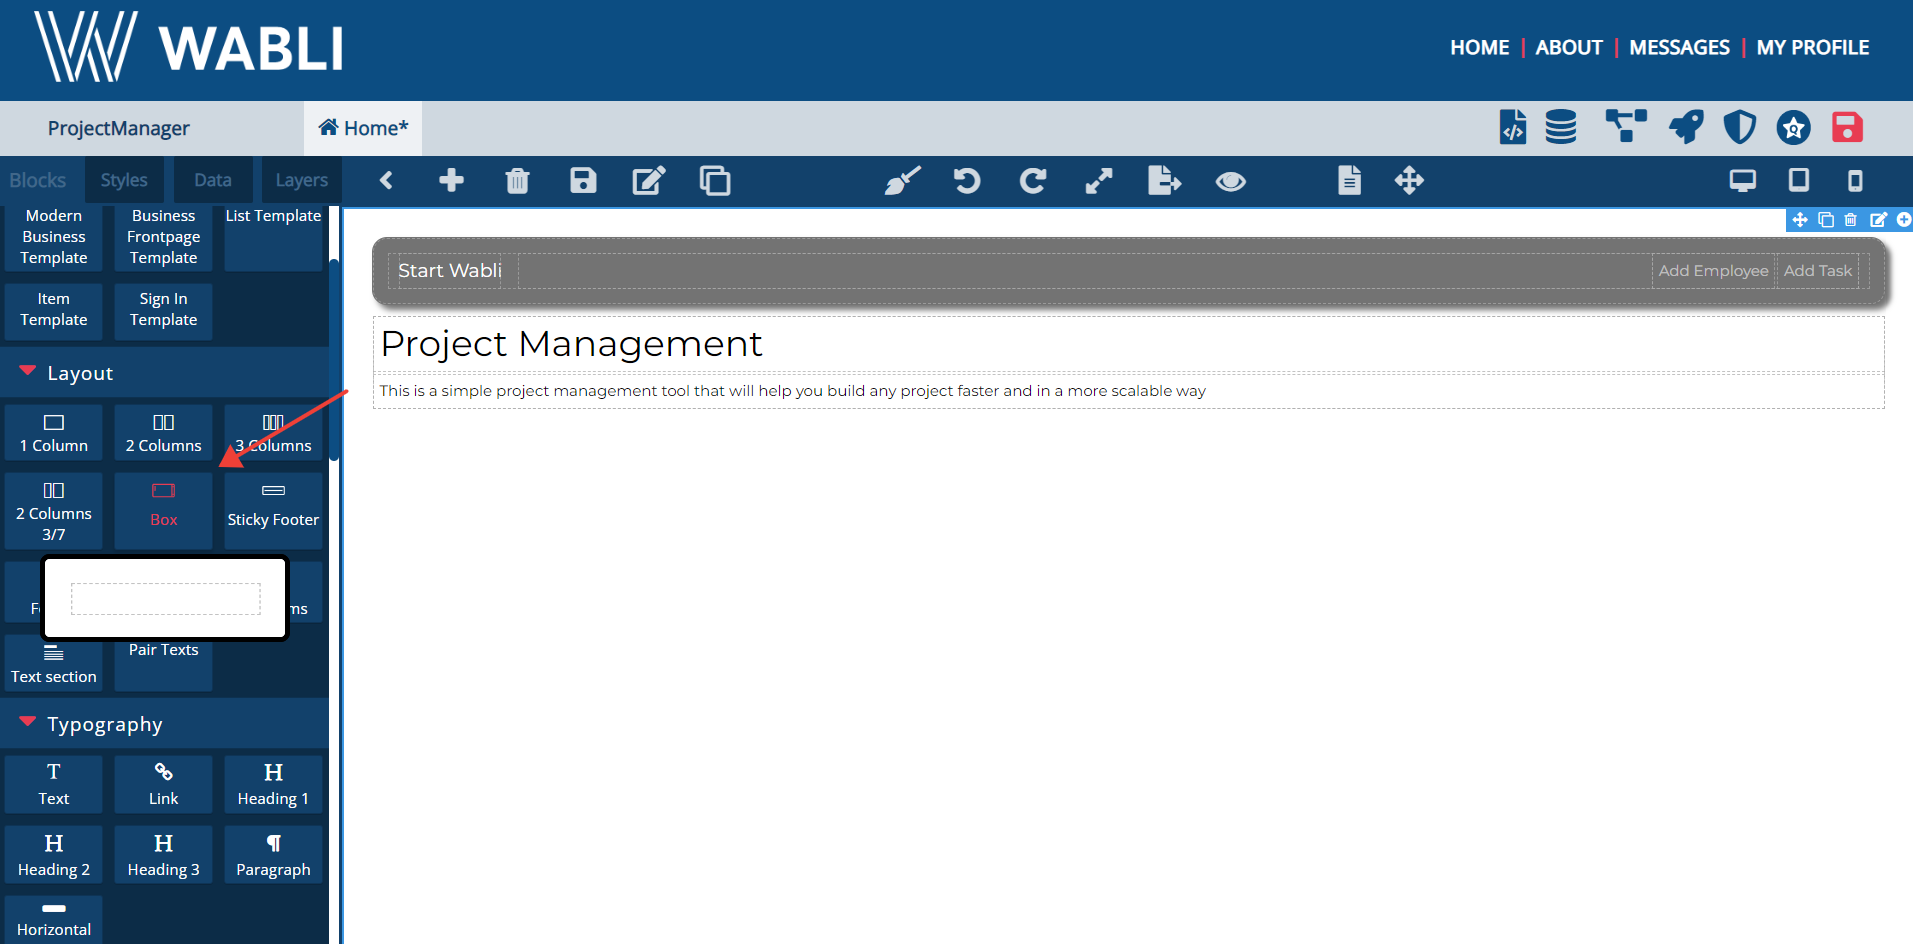
Drag and drop a Box underneath the Text Section, in order to position every block inside of it in a certain way.
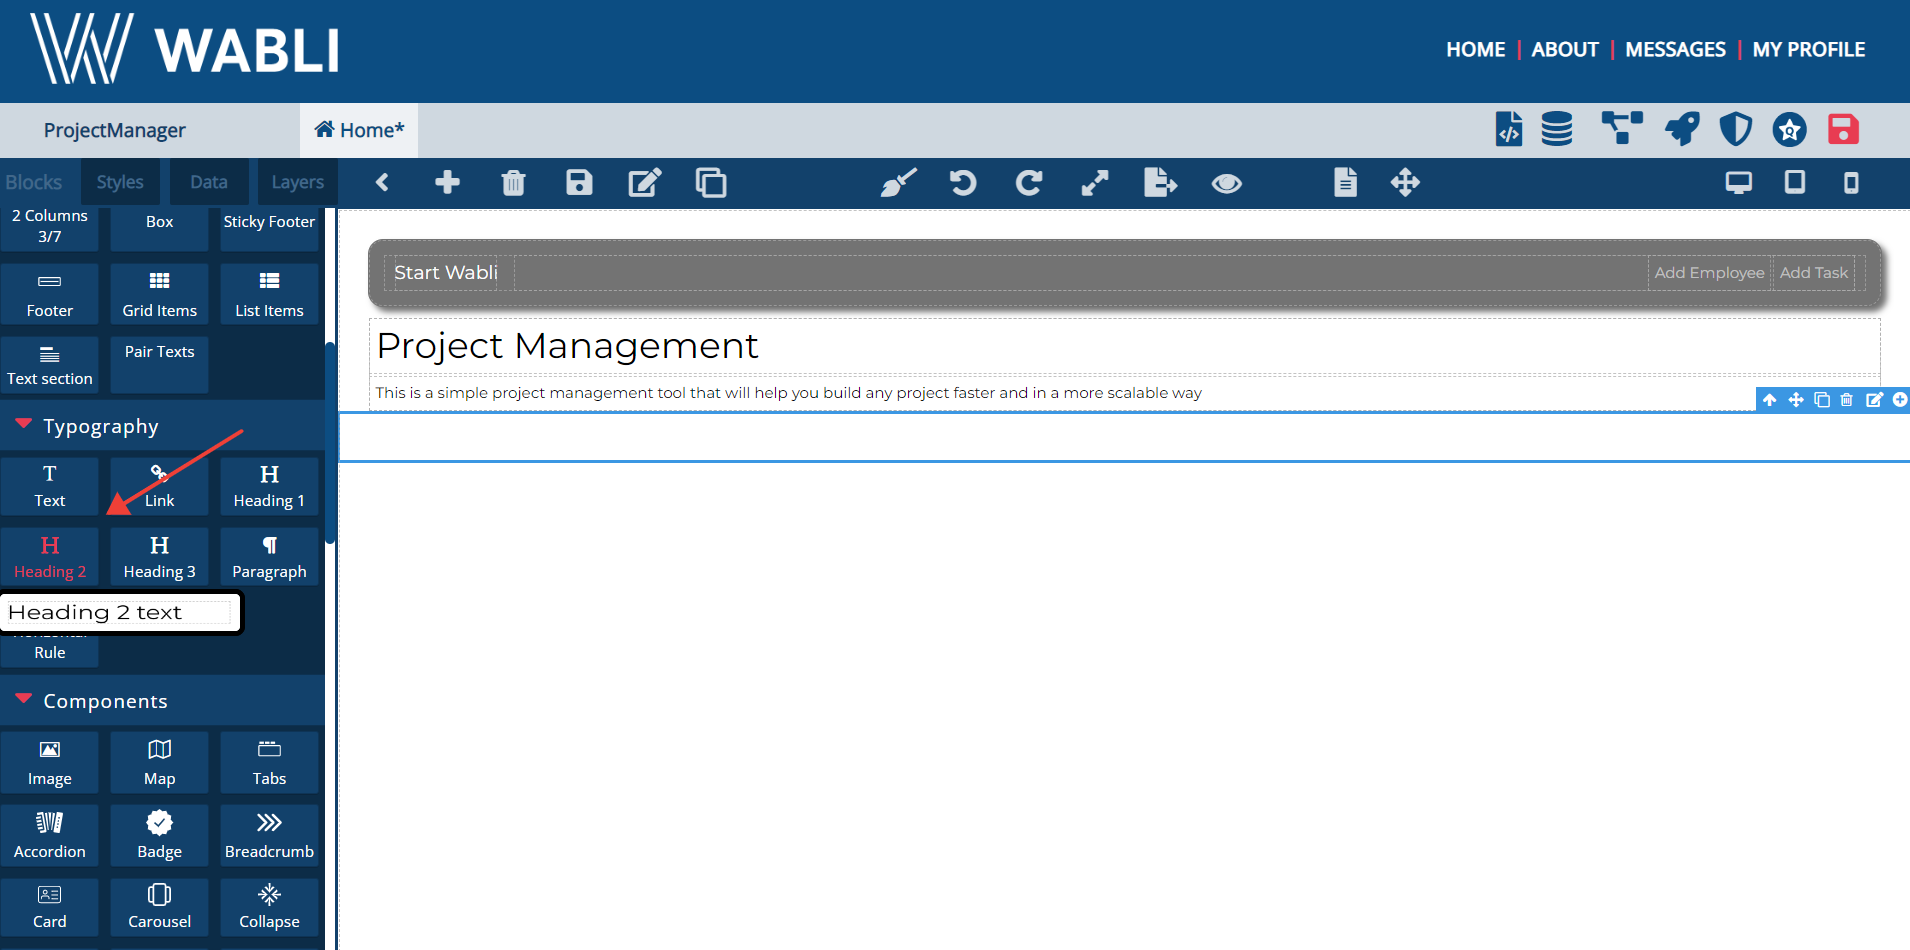
Drag and drop a Heading 2 inside the Box, and change its context.
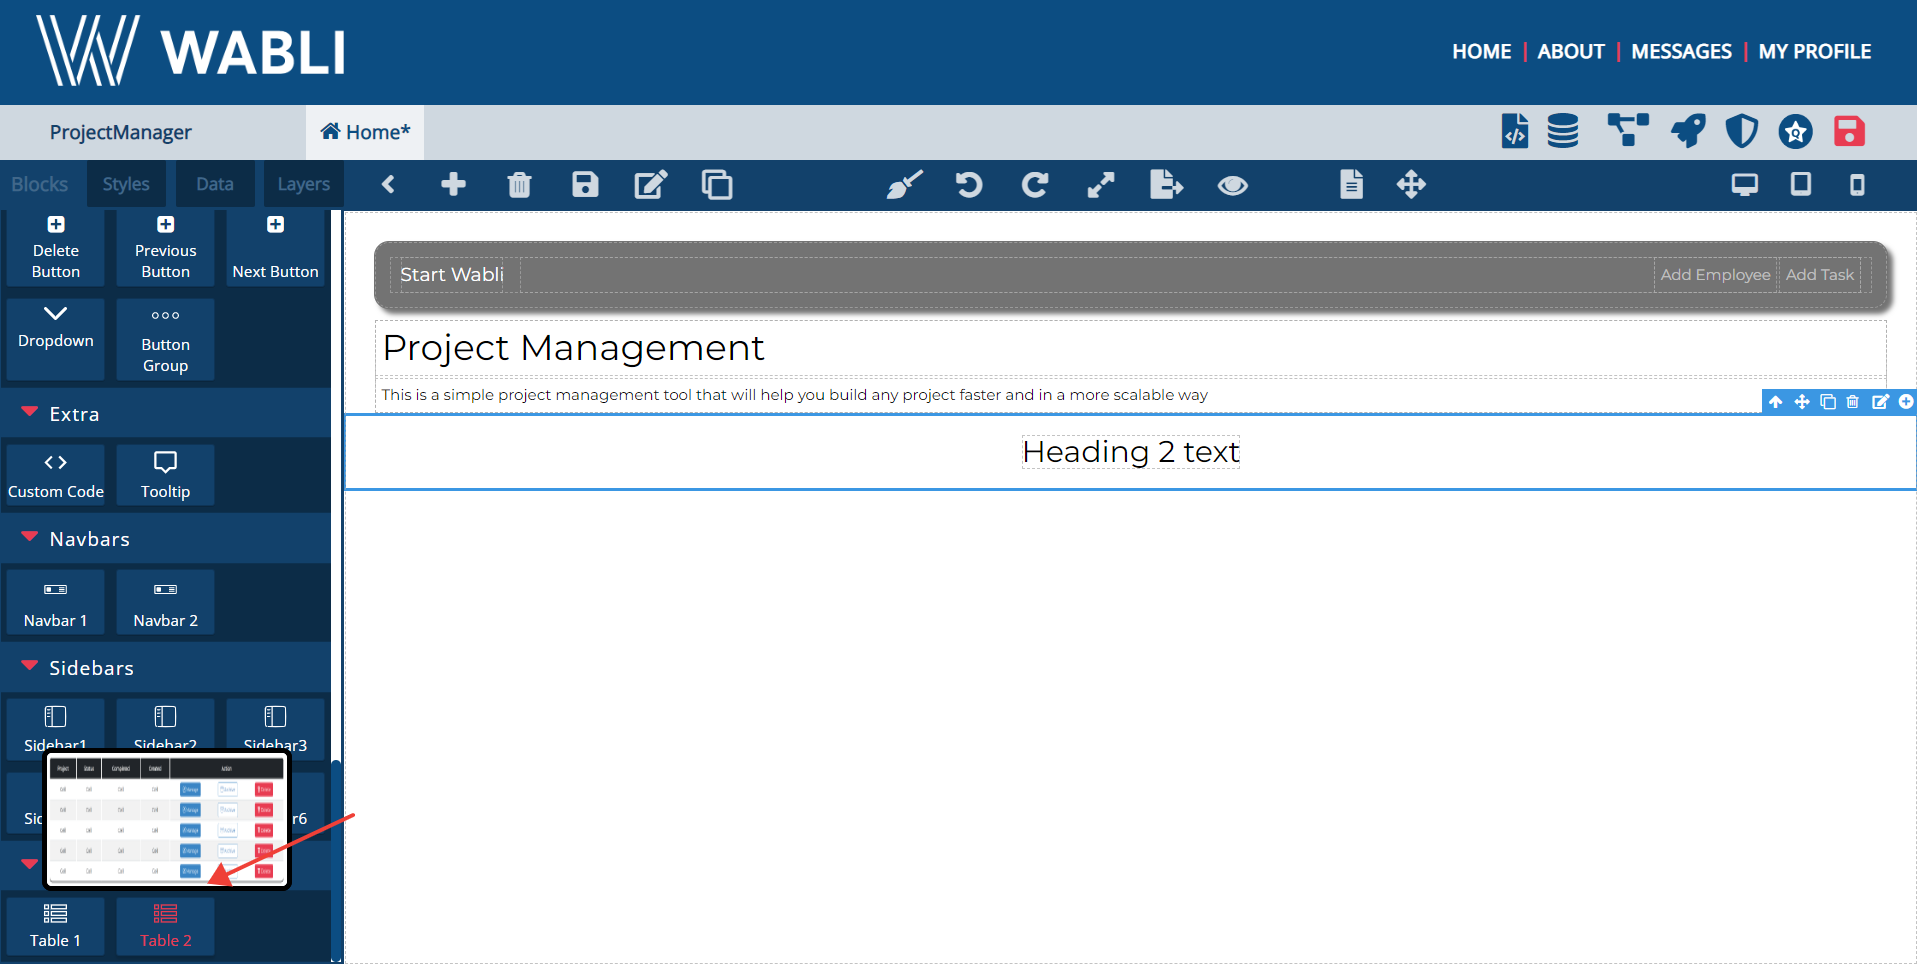
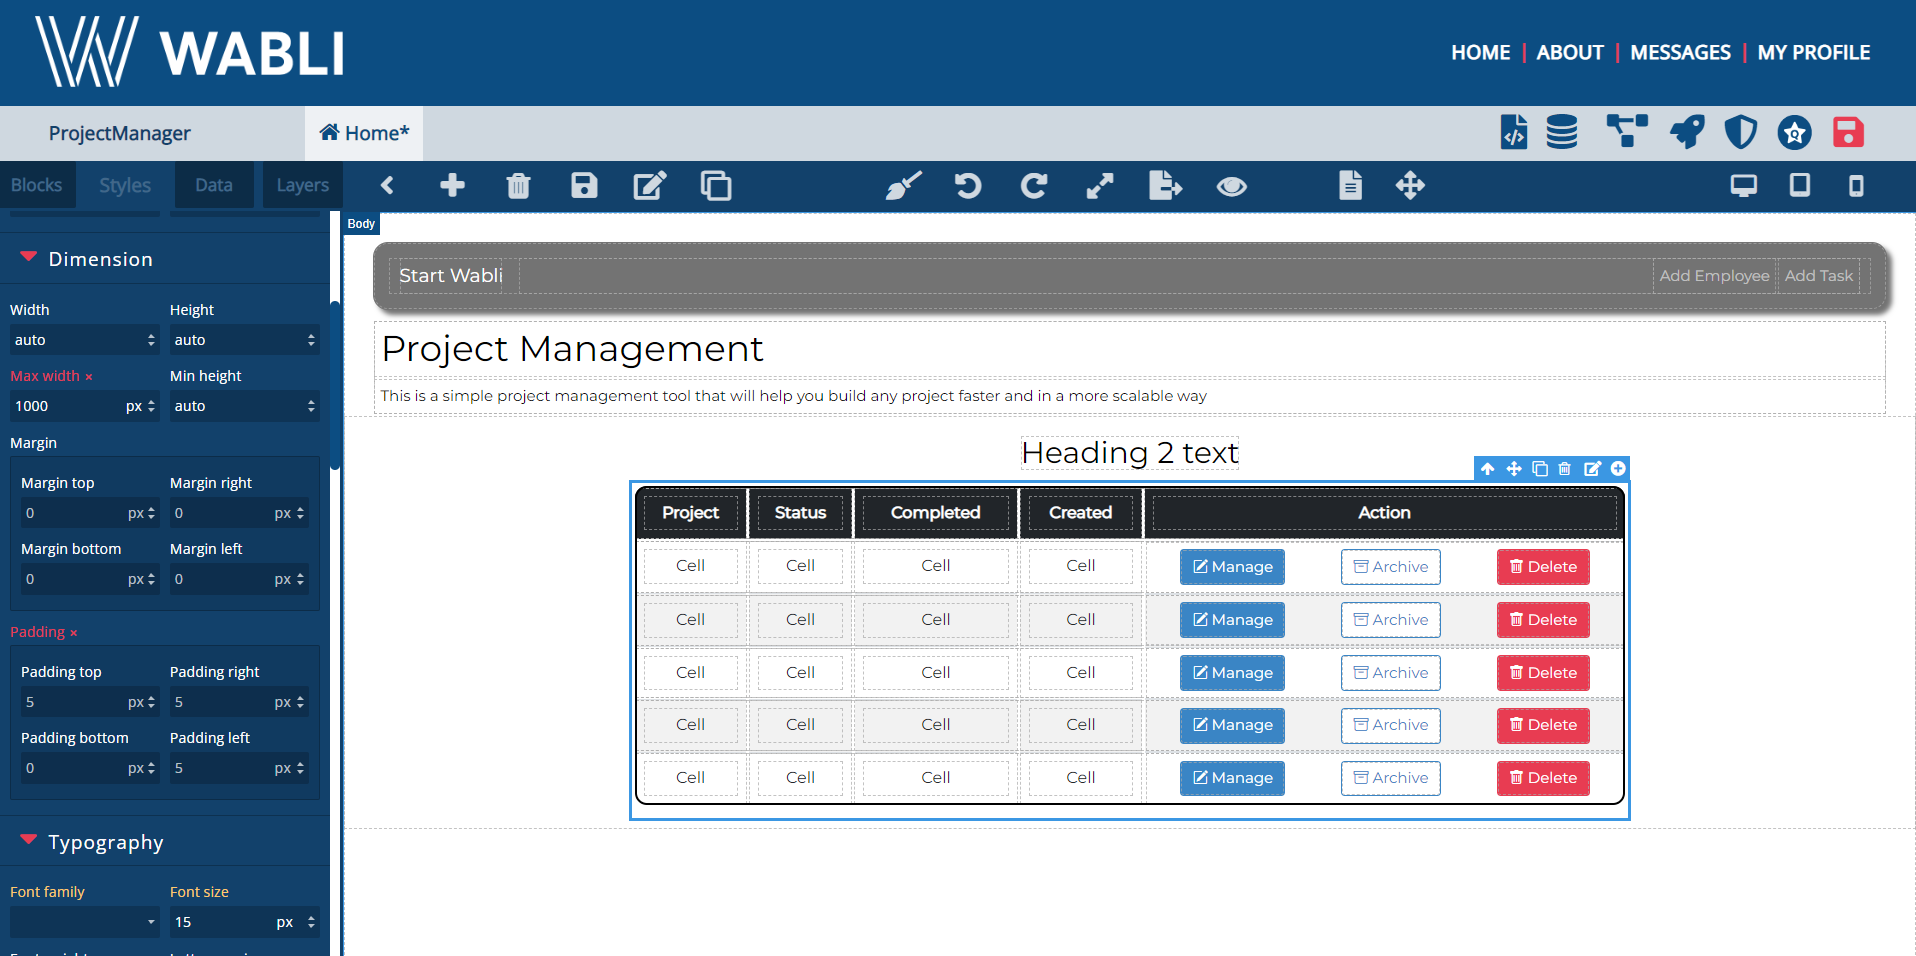
Drag and drop a Table underneath the Heading that's going to store our data.

Edit the table style to make it look the way you want. We added a 'max-width' = 1000px and 'padding' = 10px
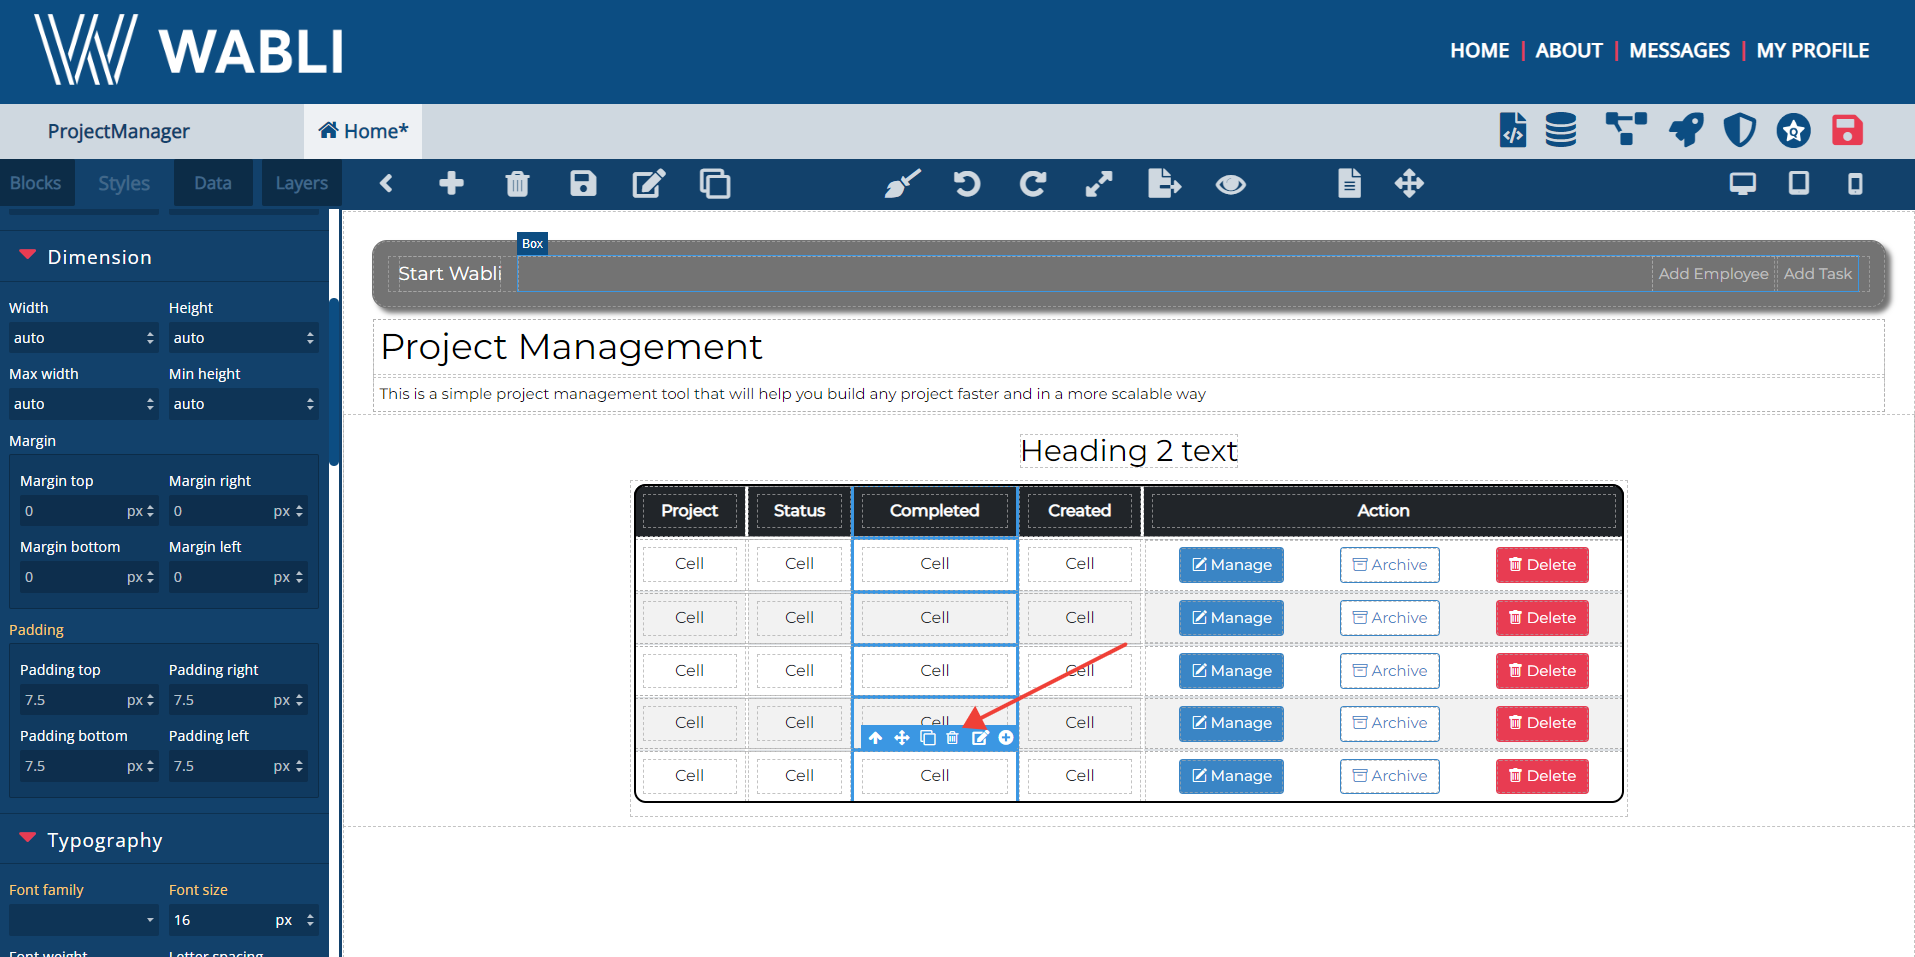
Select the cells you don't need and delete
them by clicking on the "Delete" button. If
you want to select many cells at once, hold
the "Ctrl" button and click on the cells.
You can do the same for the buttons you
don't need.
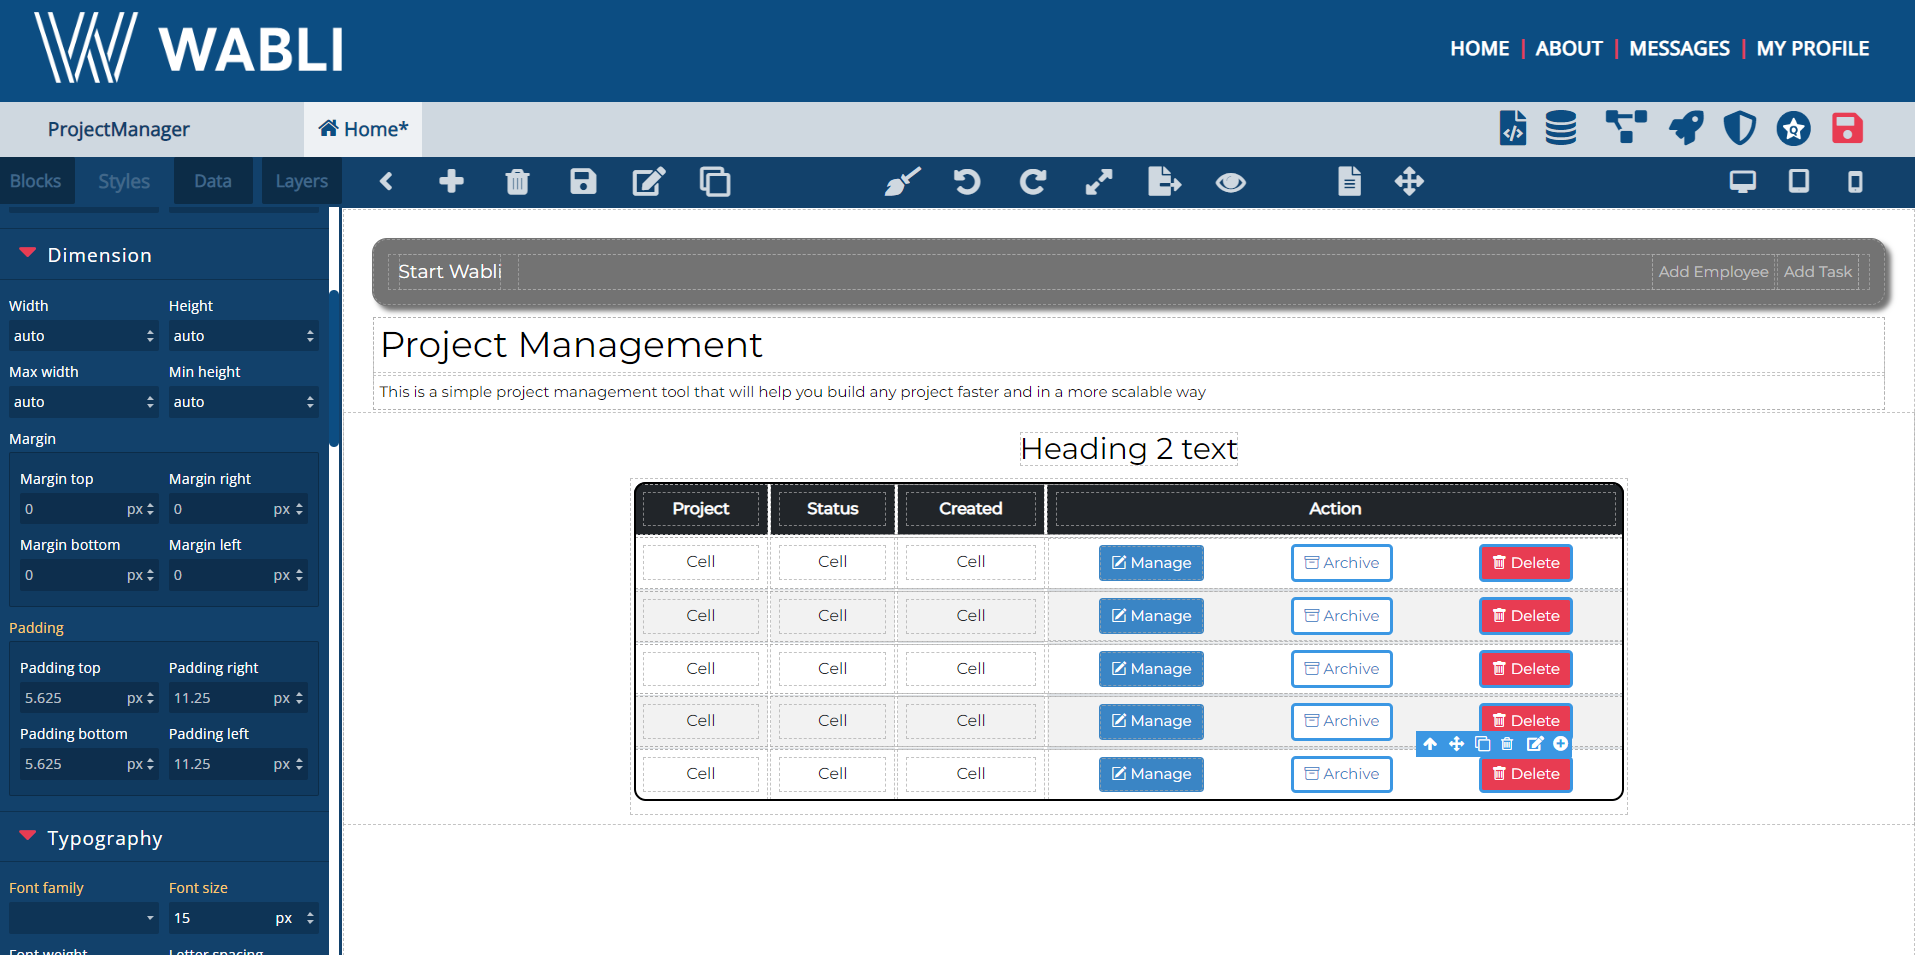
Change the context of the cells you want to keep and their styling. We added a background-color similar to the one in the navbar.
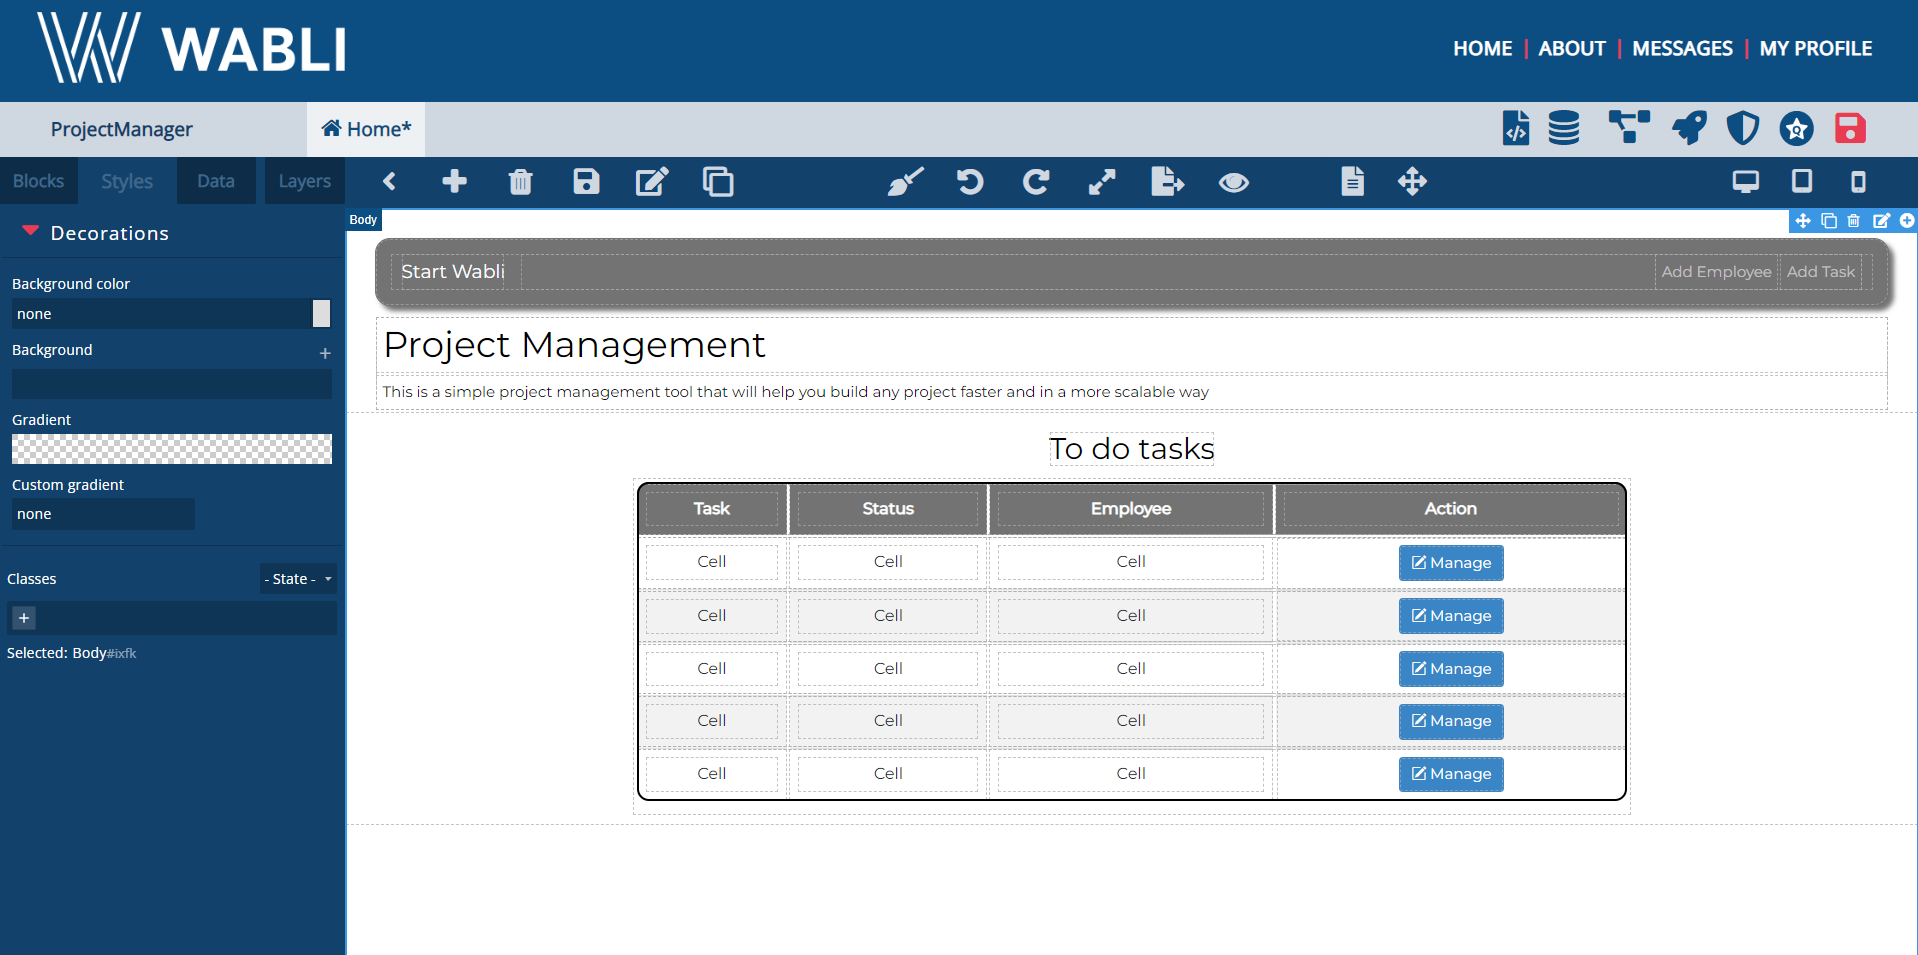
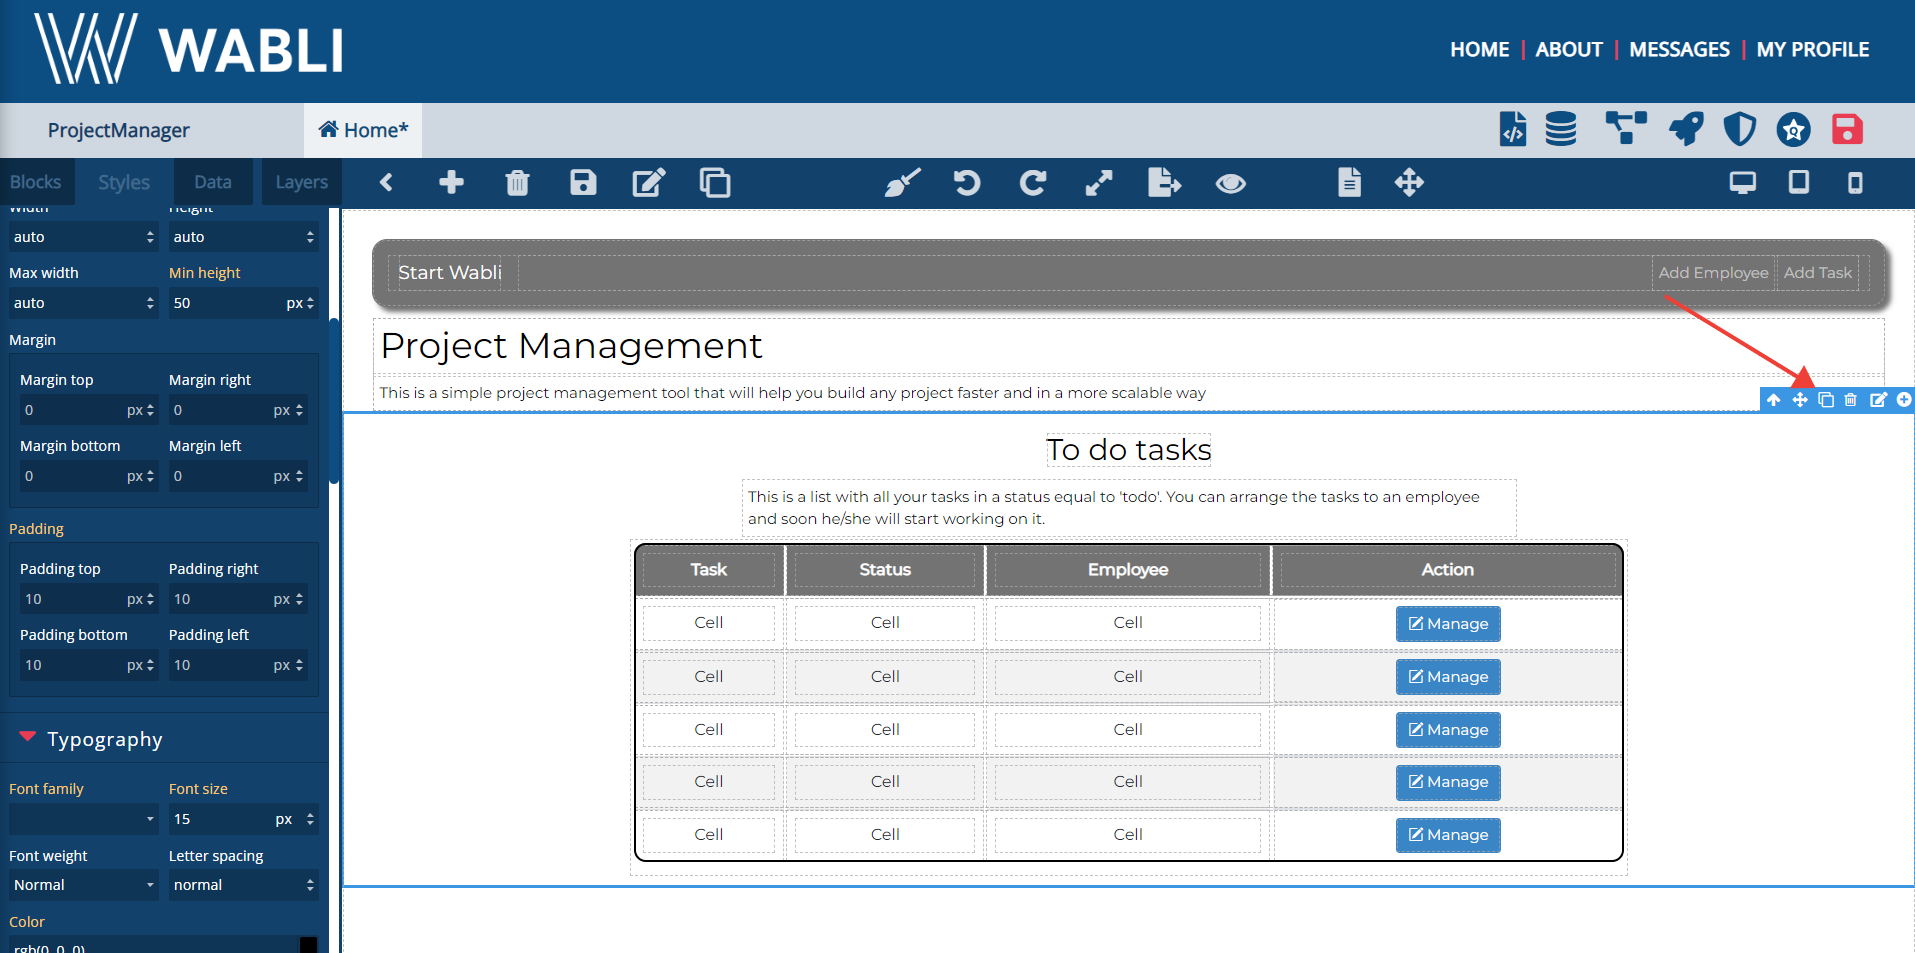
Finally, drag and drop a Text between the Heading and the table to add more details about it and your table section is ready.

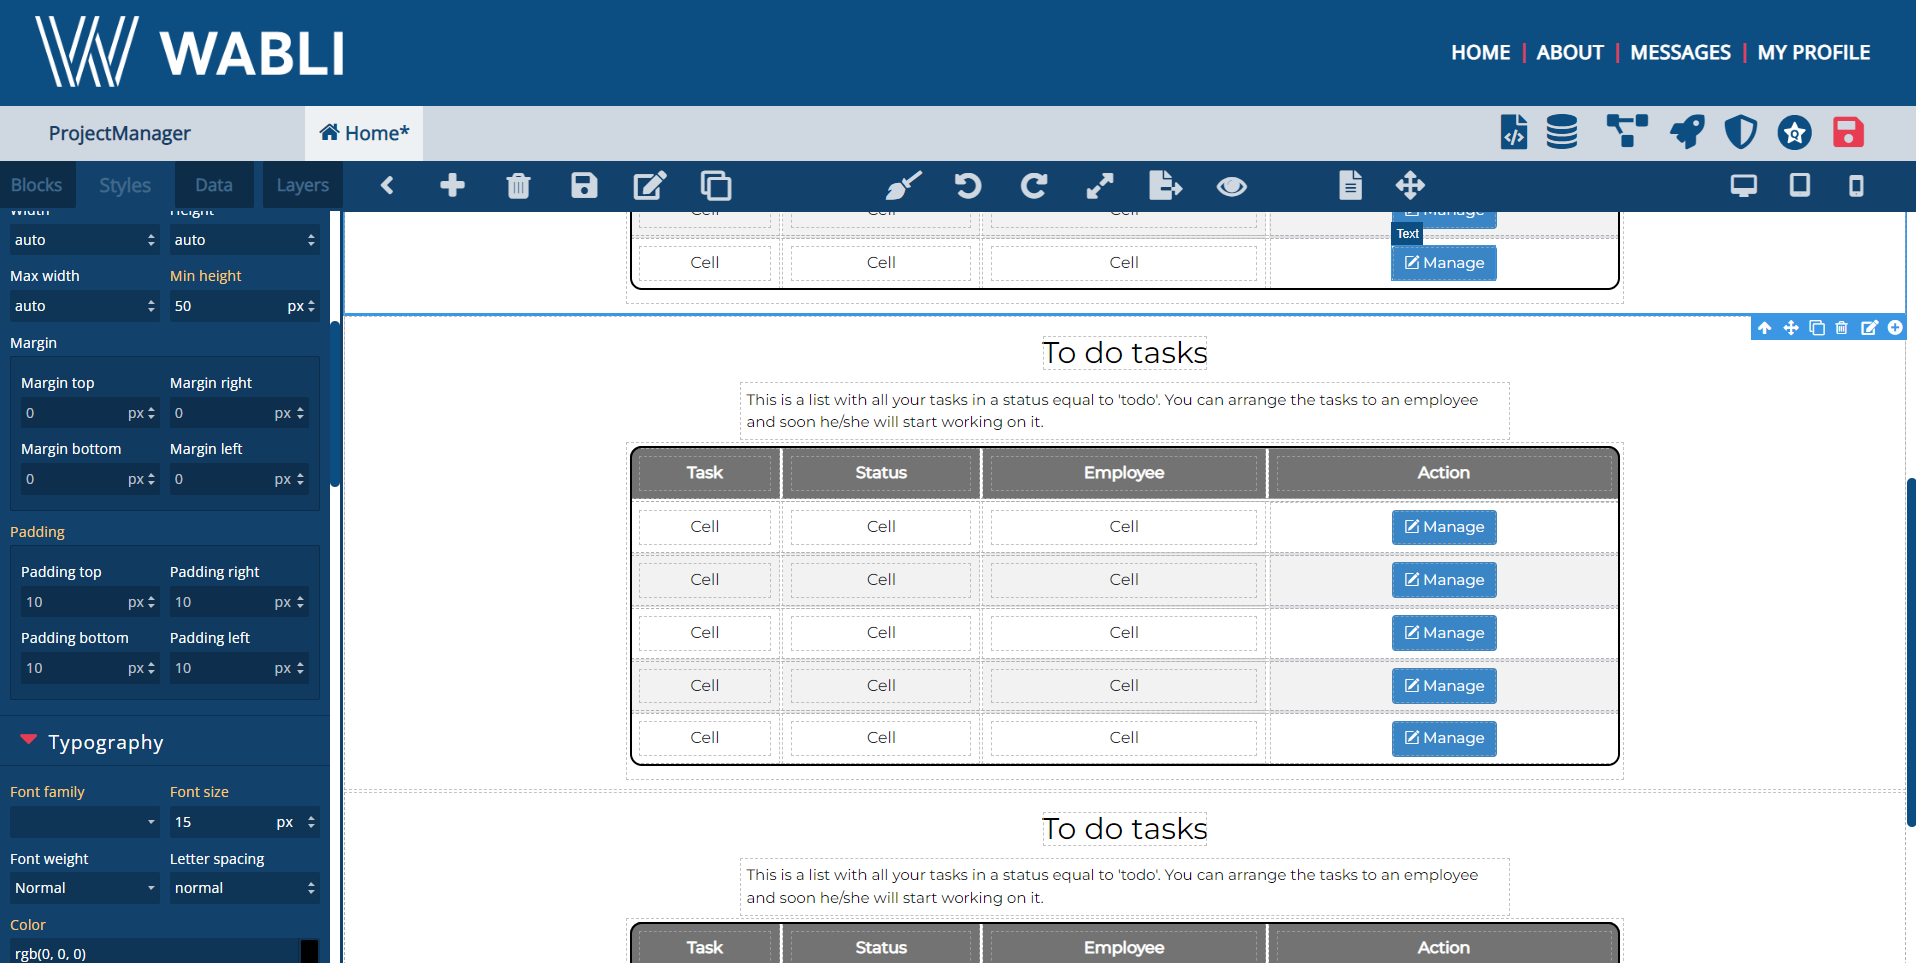
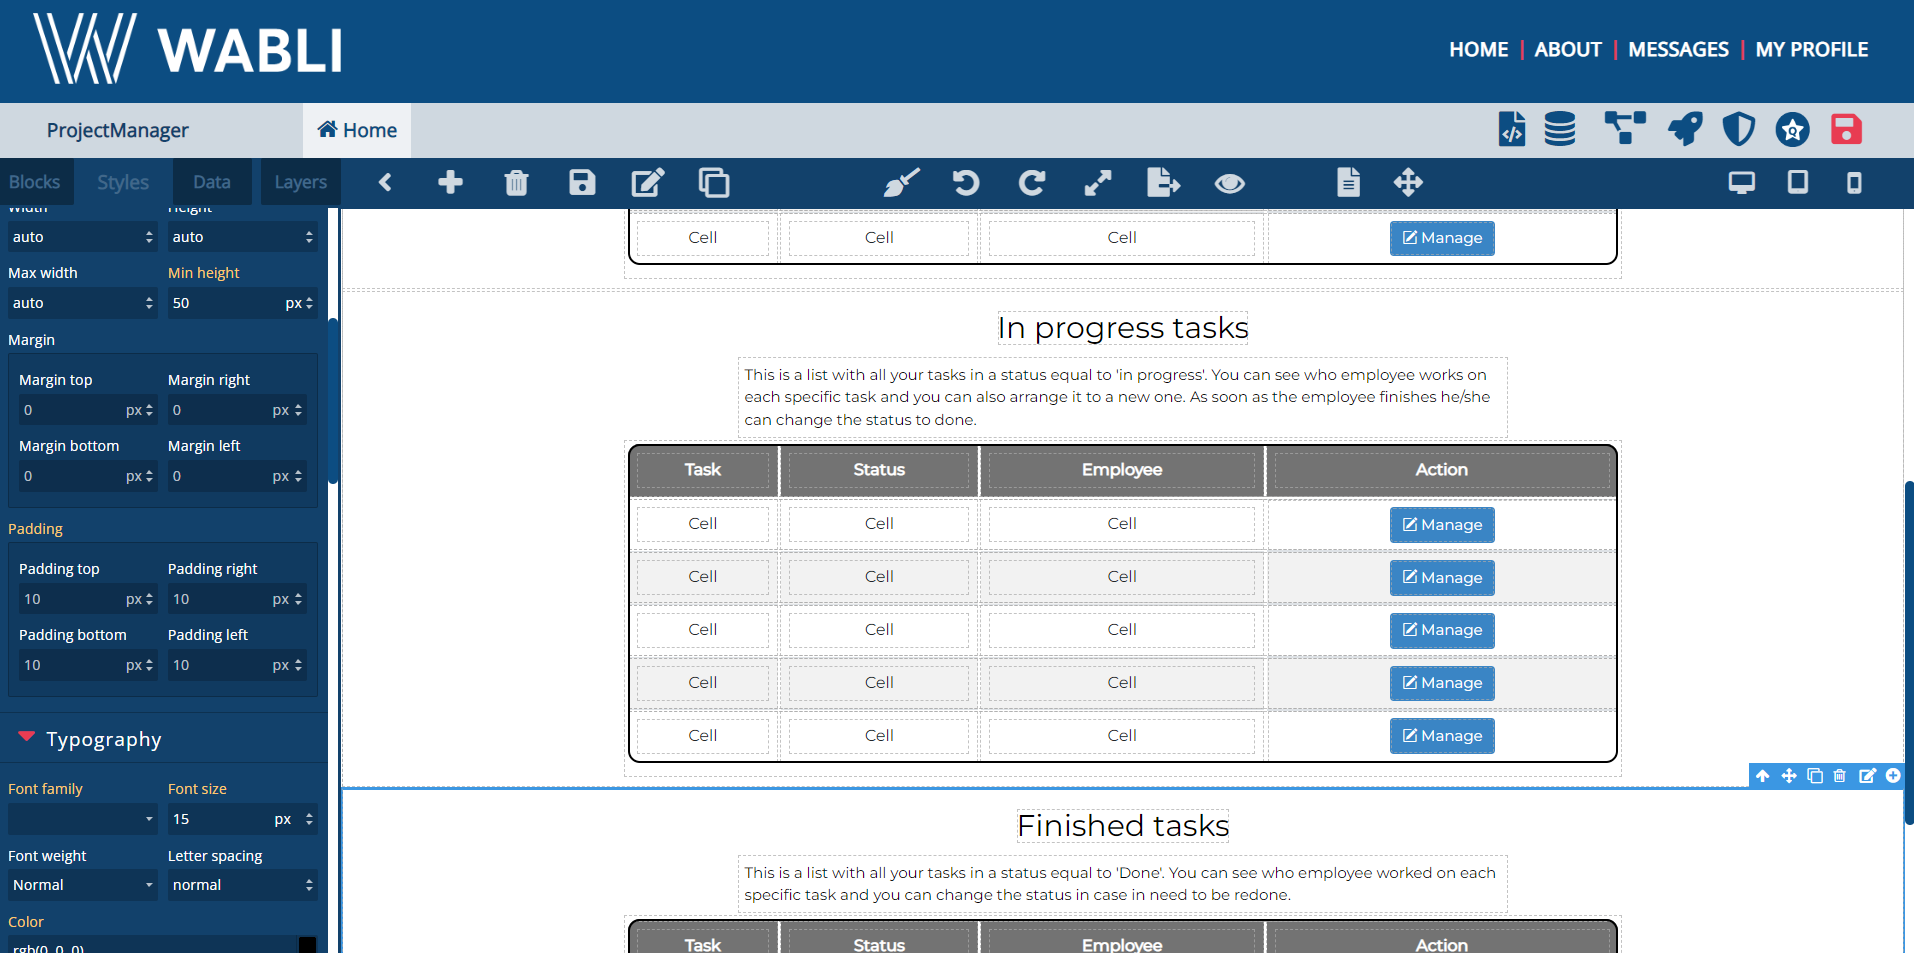
As your table section about the 'todo' tasks is ready, you can proceed to duplicating it twice and changing its context, in order to save time.
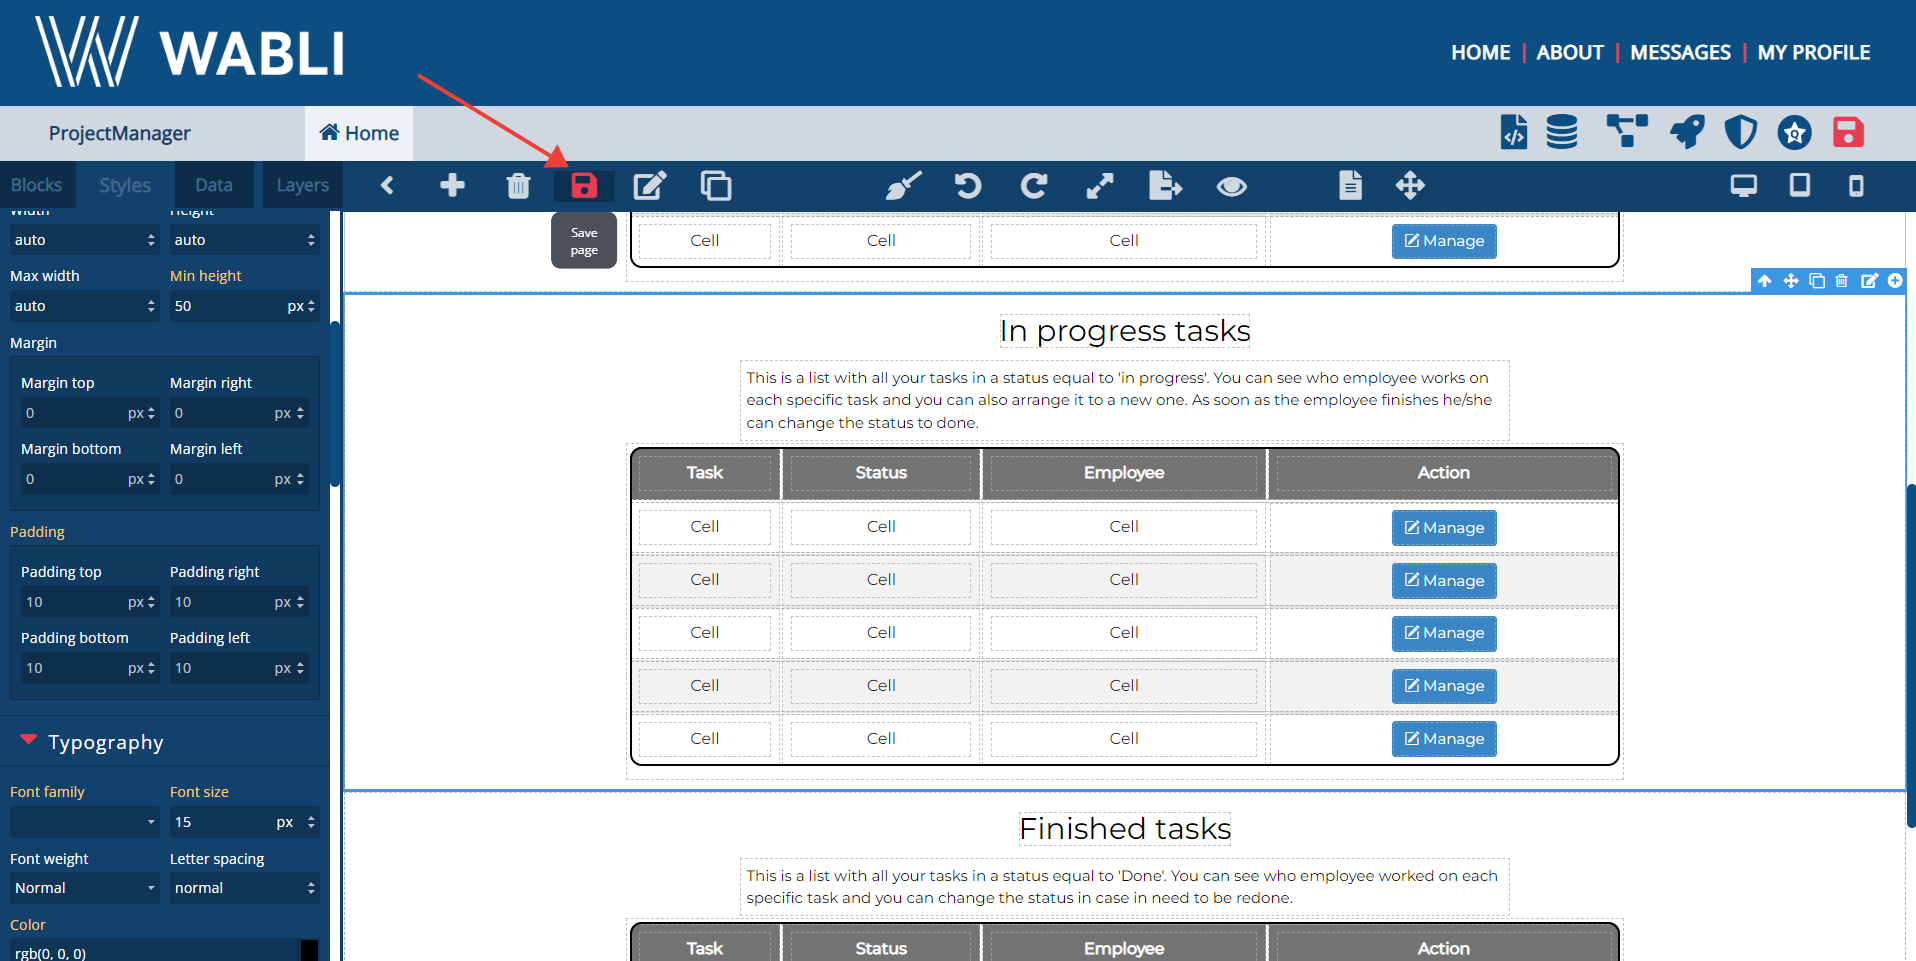
As always, you need to remember saving your project.
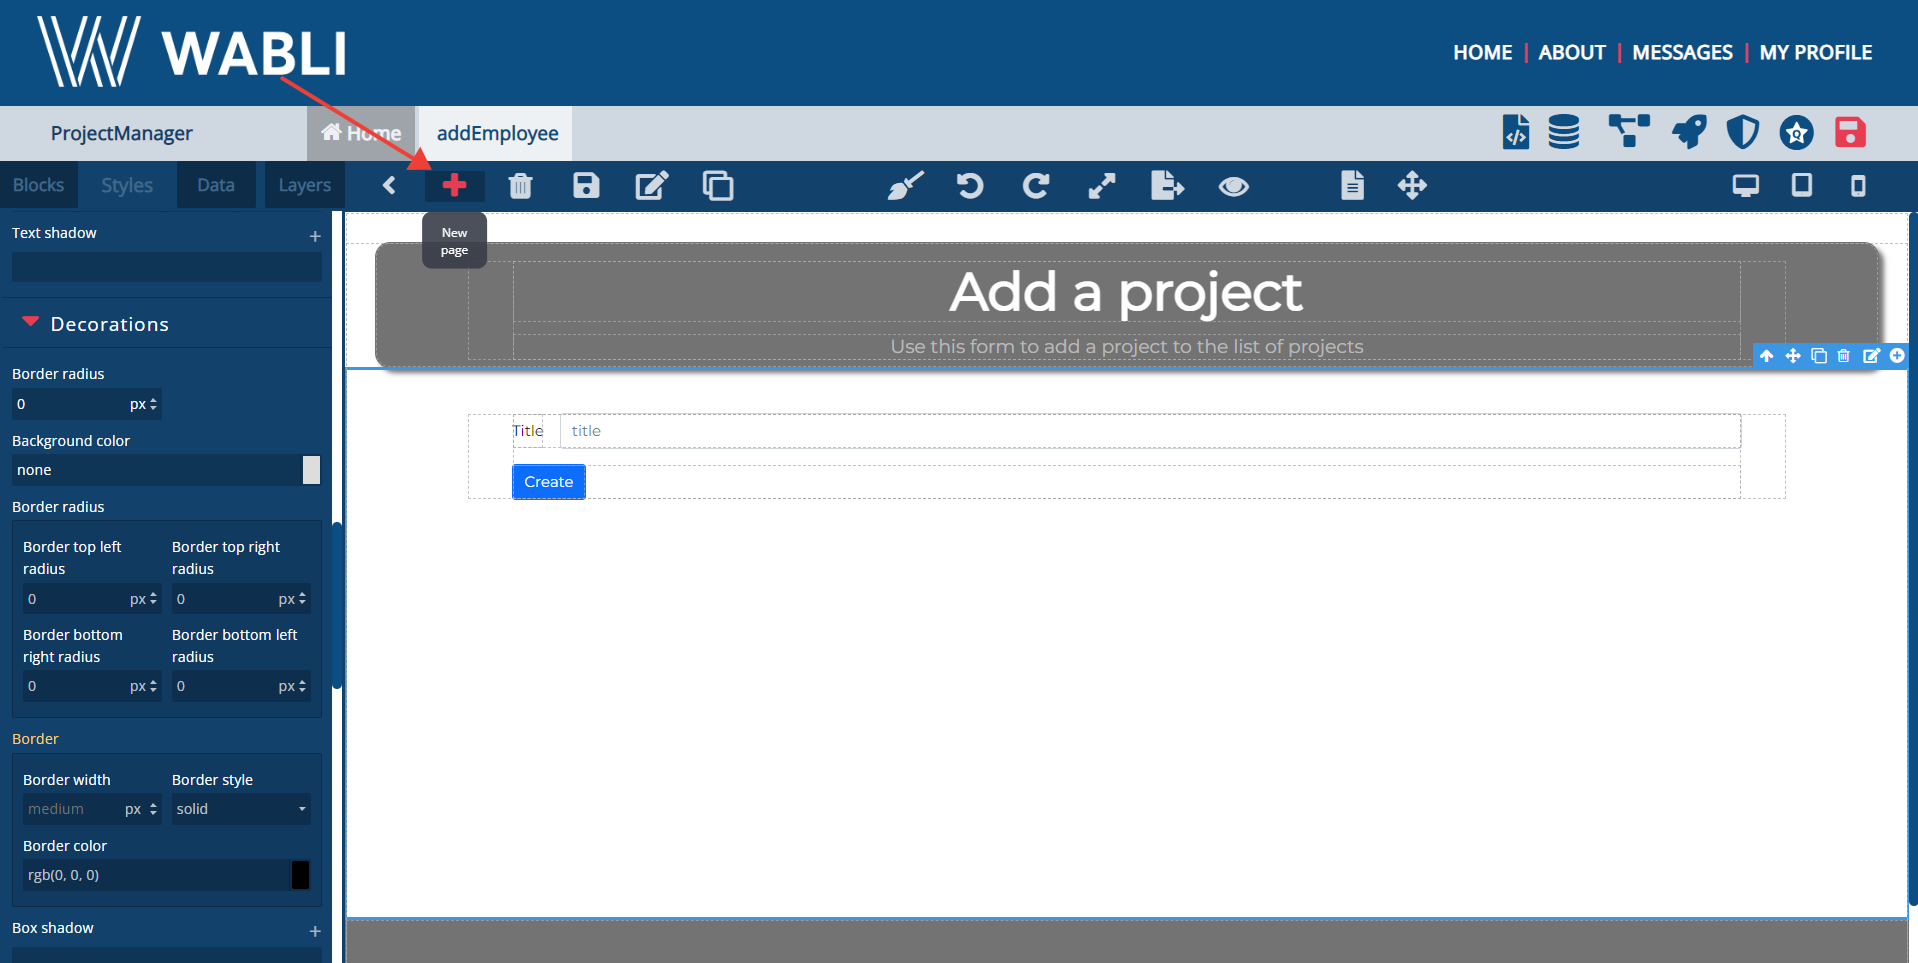
Click on 'New page' button to create a new page. On the prompt that appears, enter the name of the page and click 'Create'.
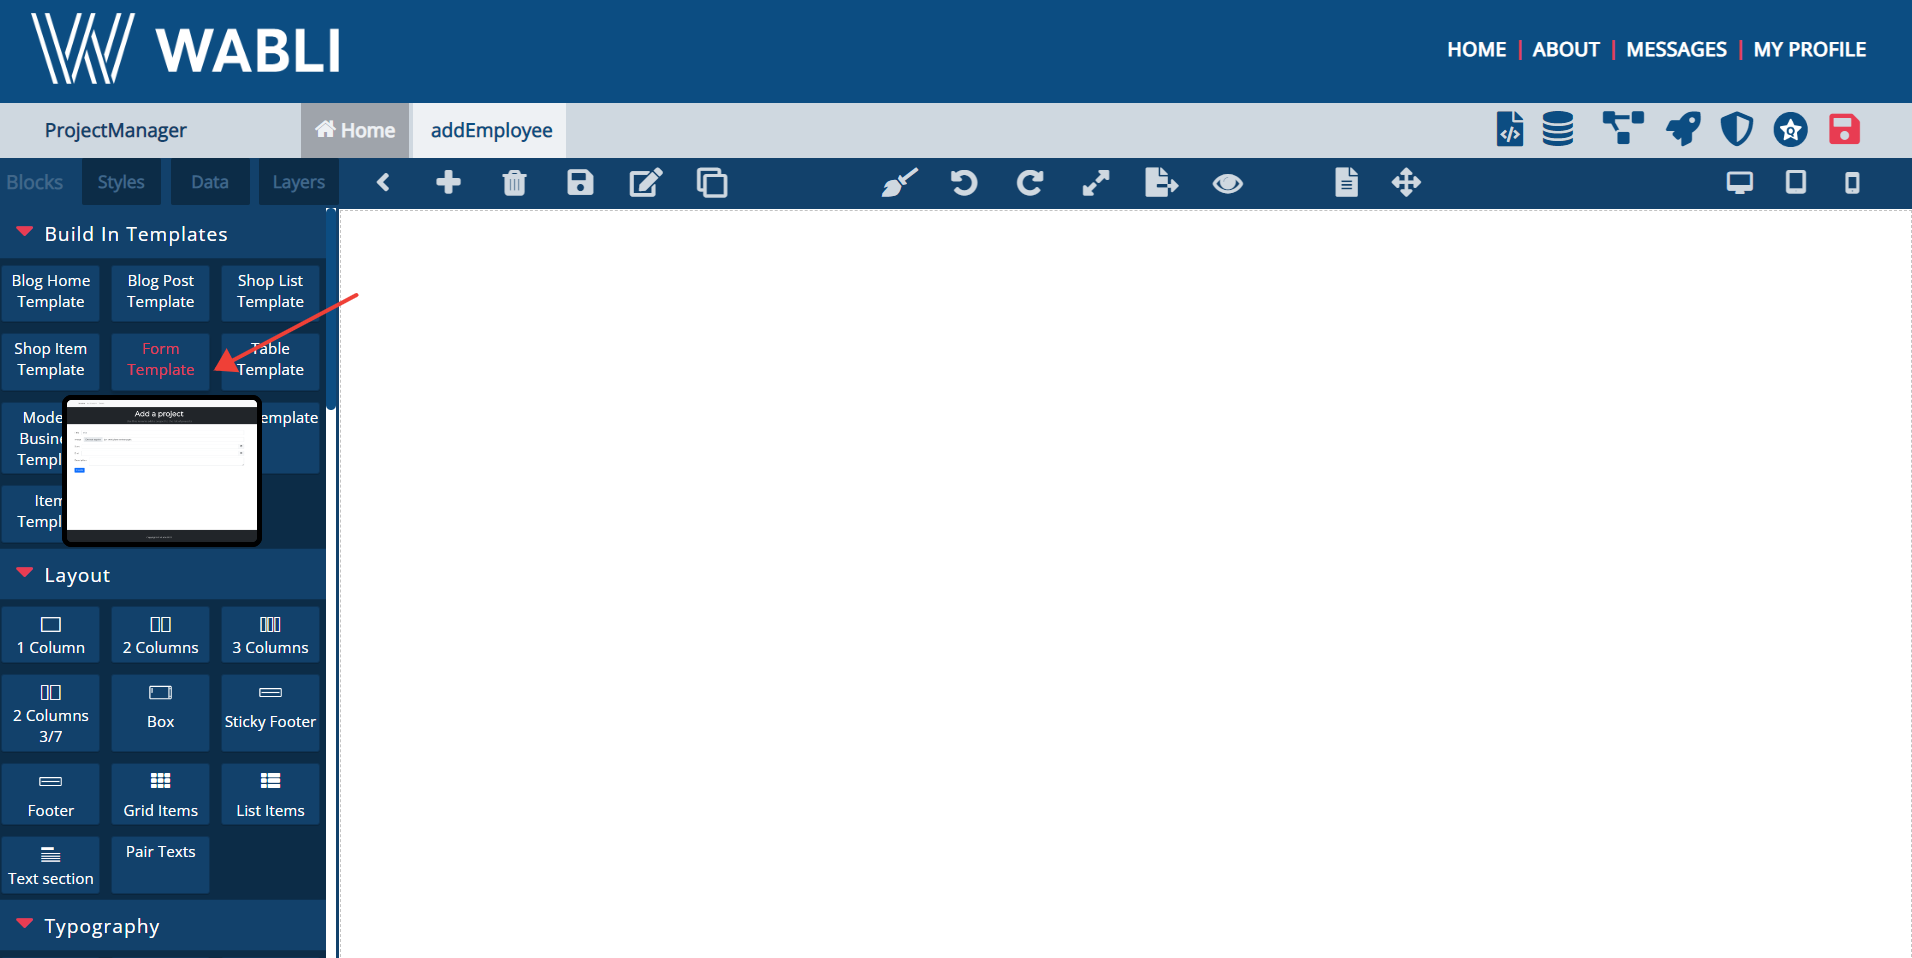
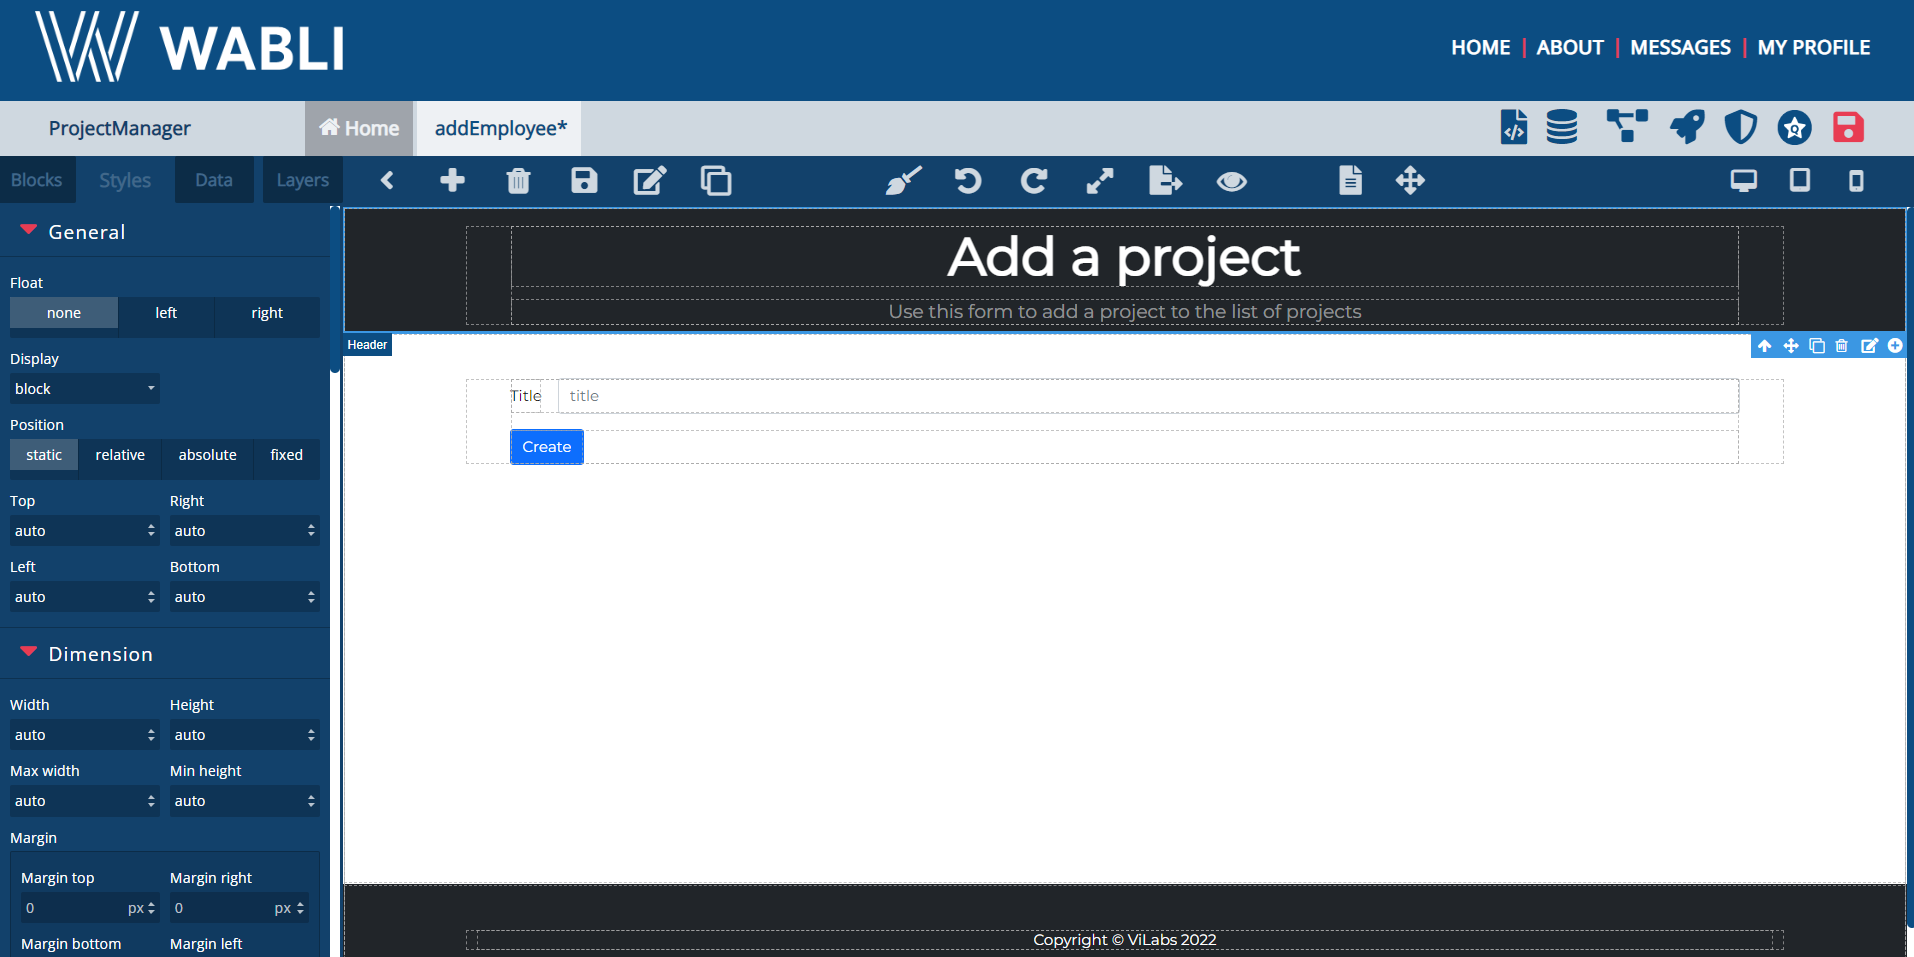
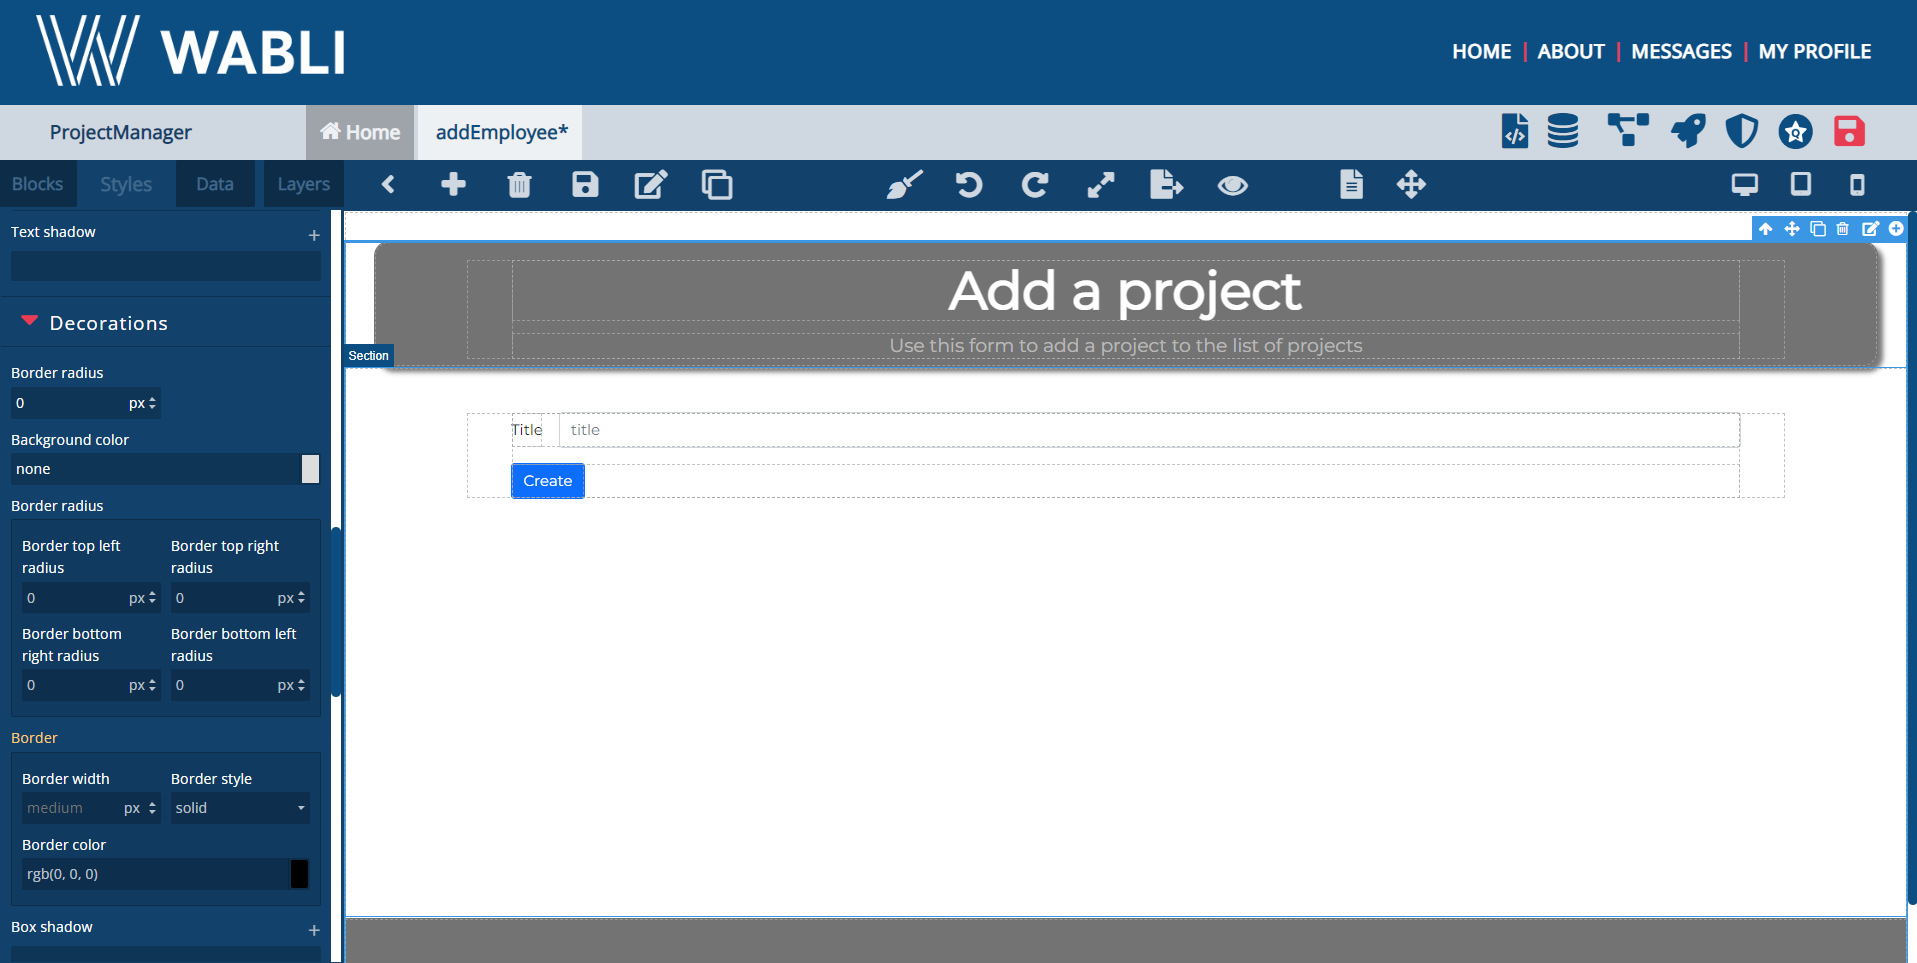
On the new page, drag and drop a Form Template.
As you did before, you can select the cells you don't need and delete them by clicking on the "Delete" button.
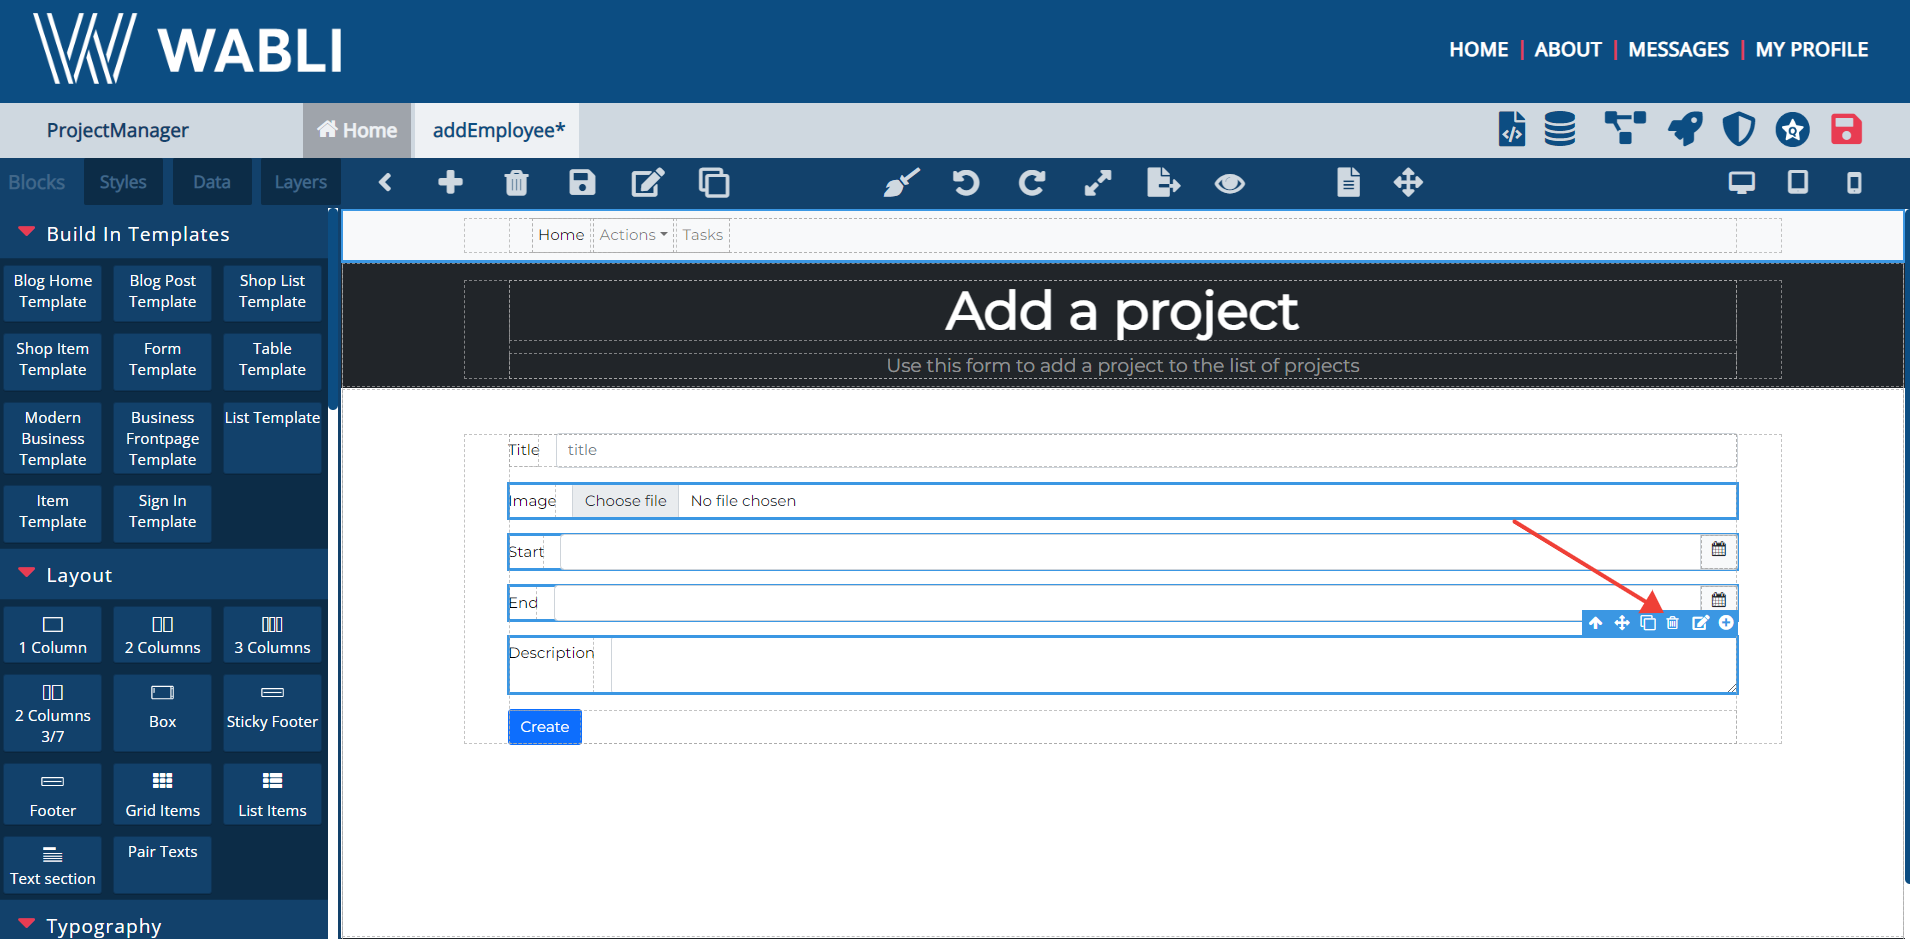
Change the context and the styling of the header to make it look better. We added a background-color, 'border-radius' = 15px and 'margin' = 30px.
Click on 'New page' button to create a new page. On the prompt that appears, enter the name of the page and click 'Create'.
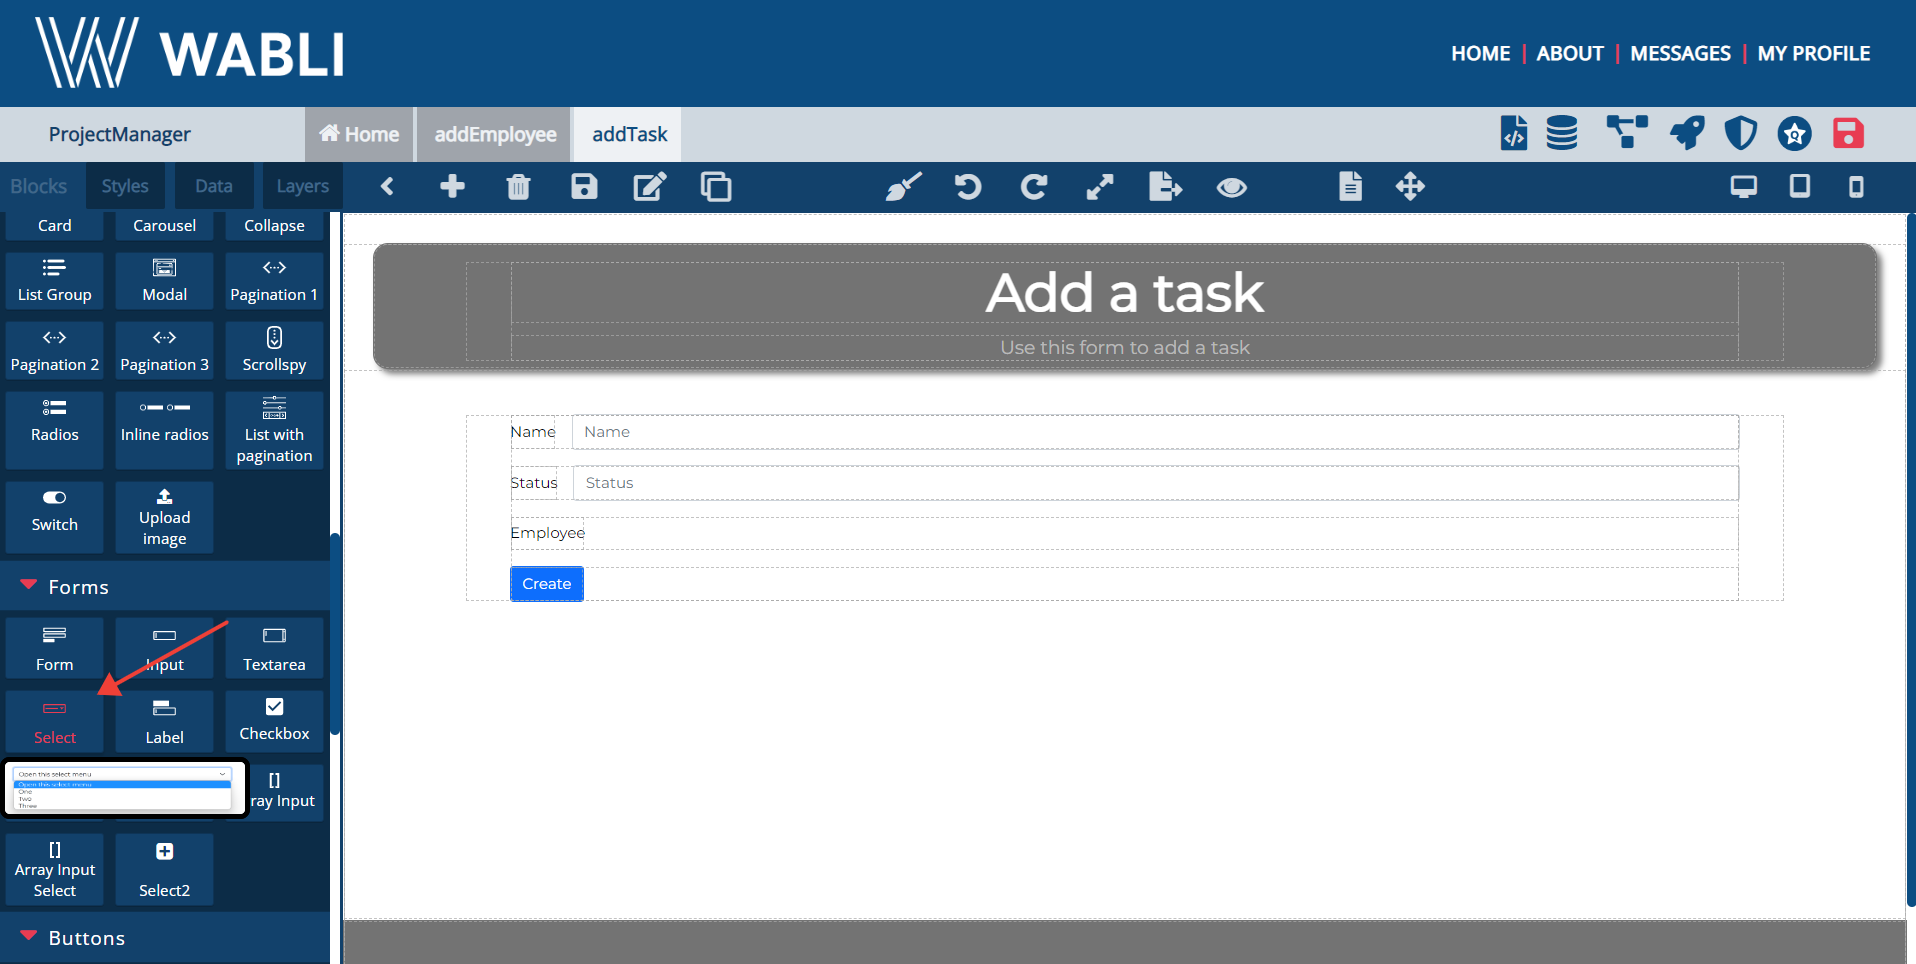
On the new page you can do the same exact procedure, in order to create a similar page.
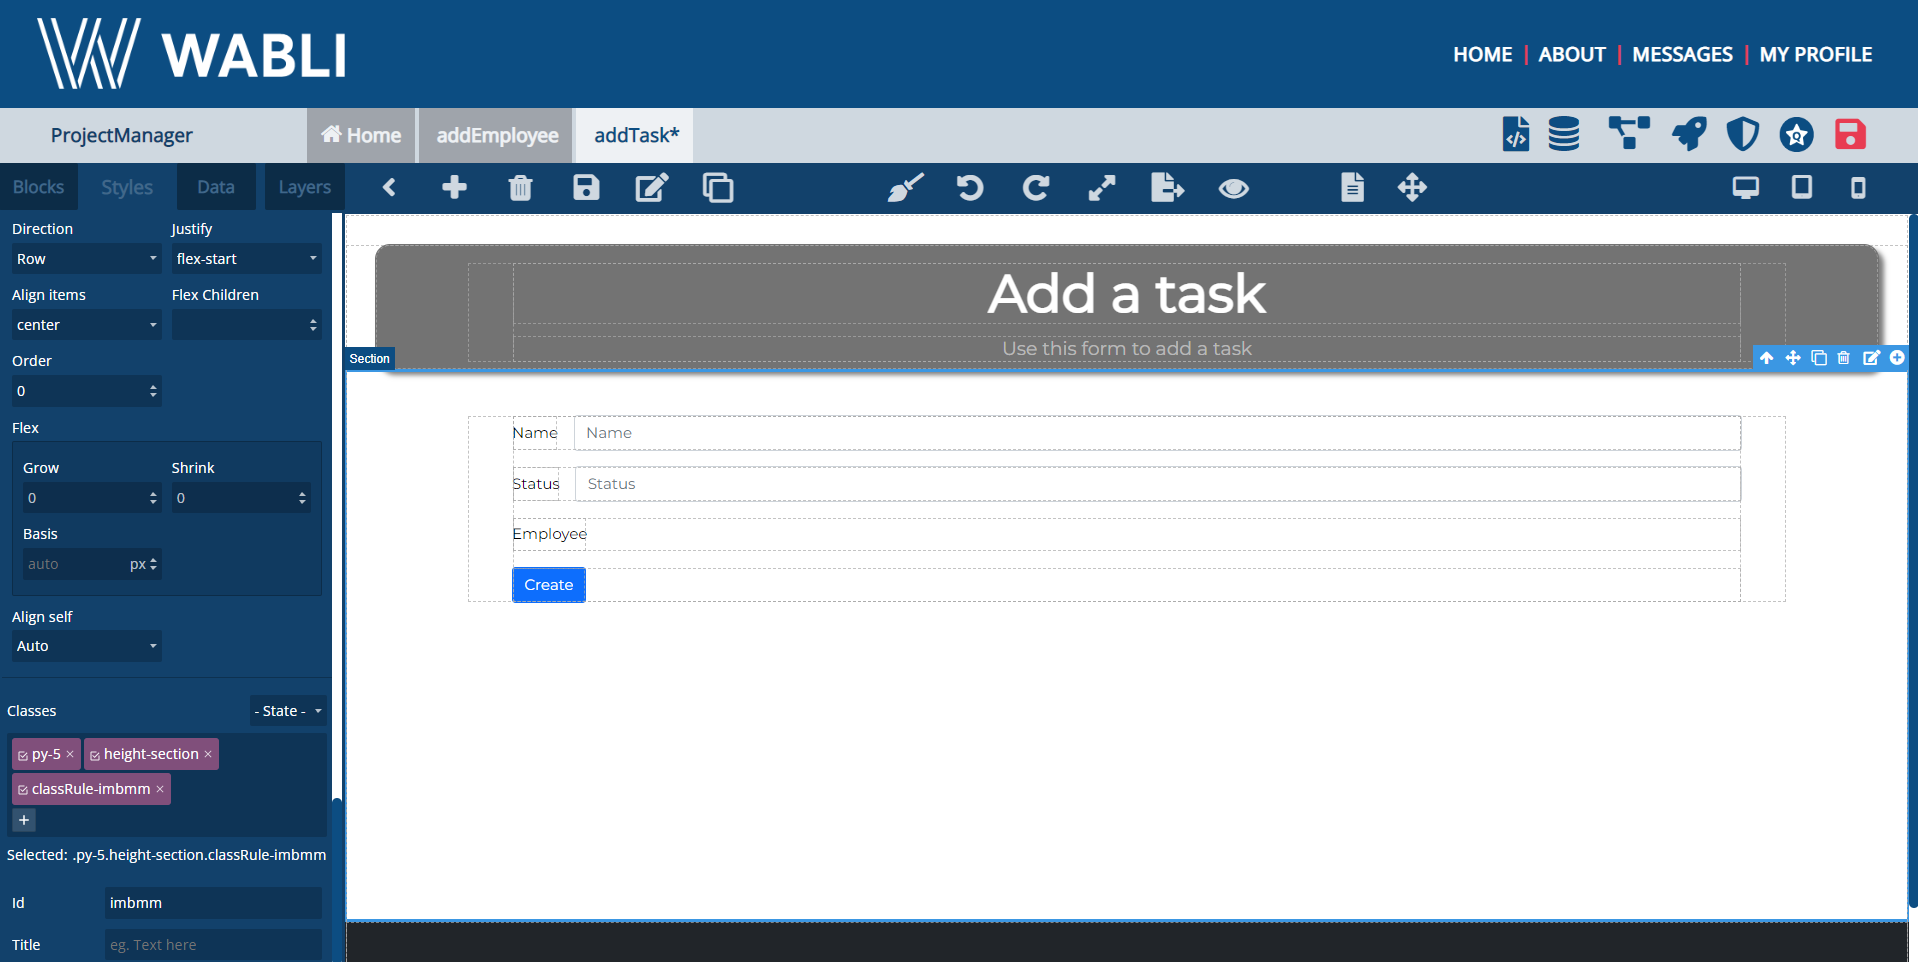
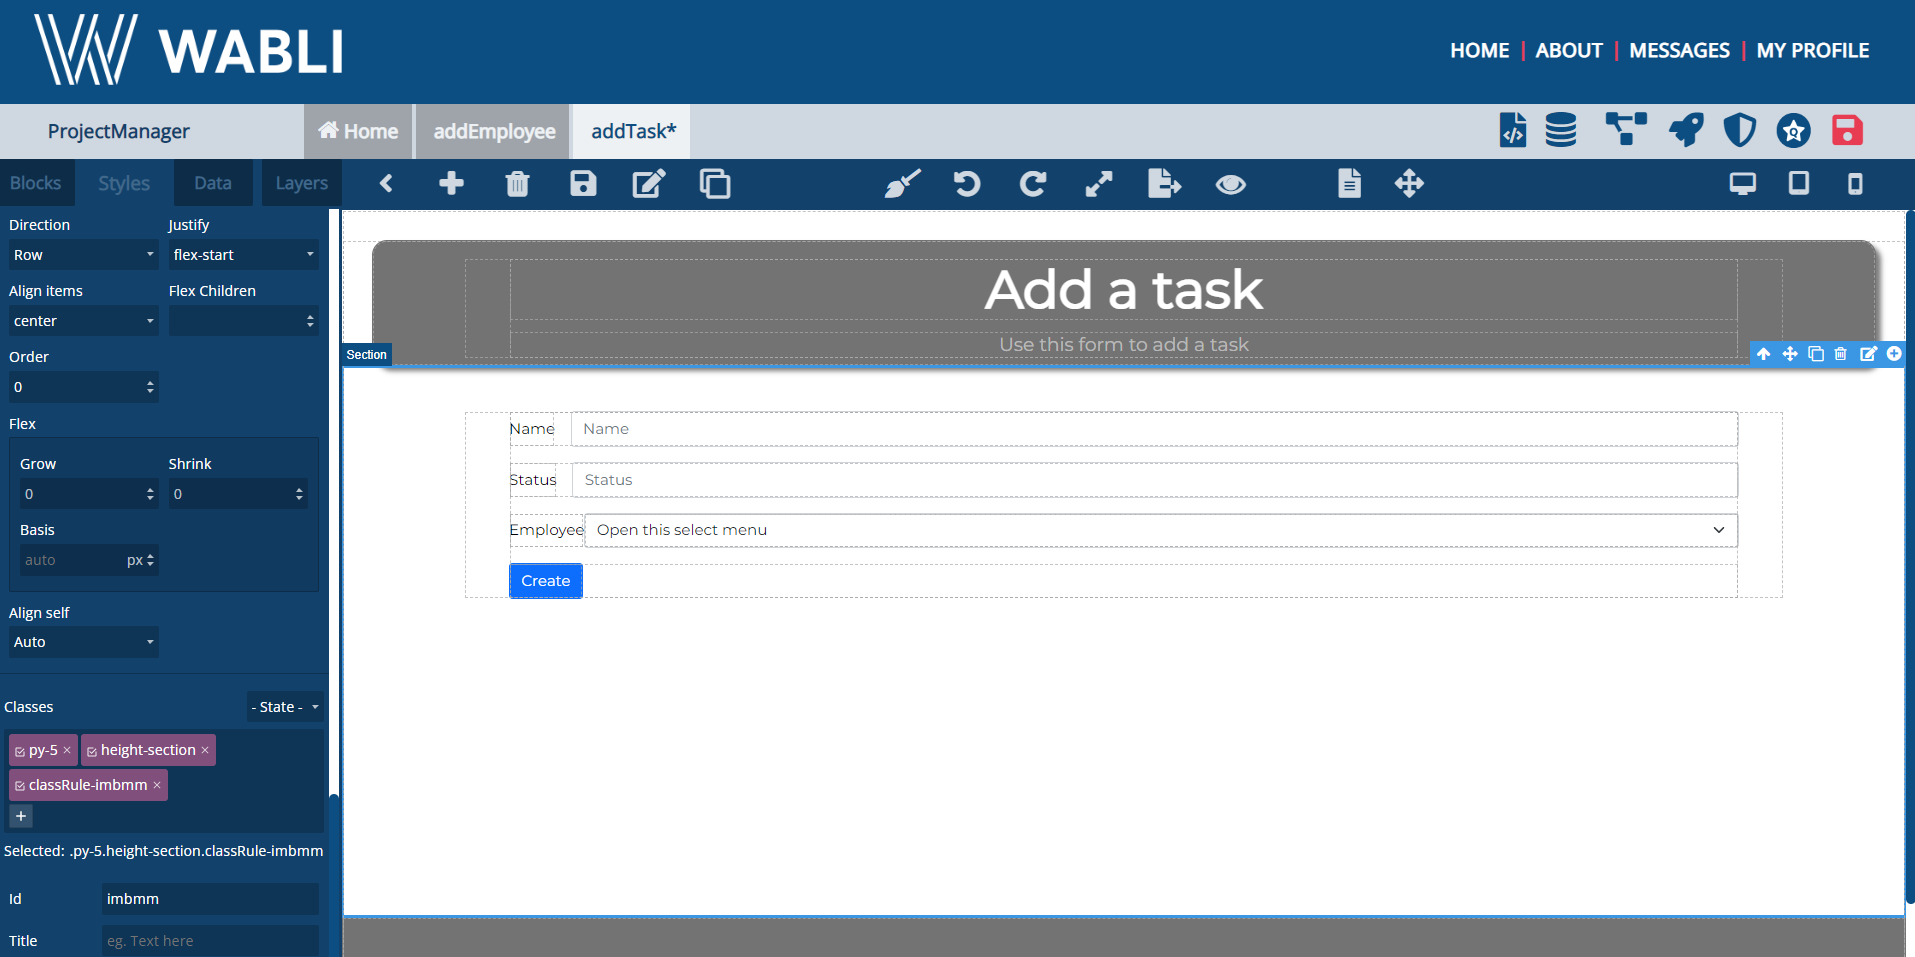
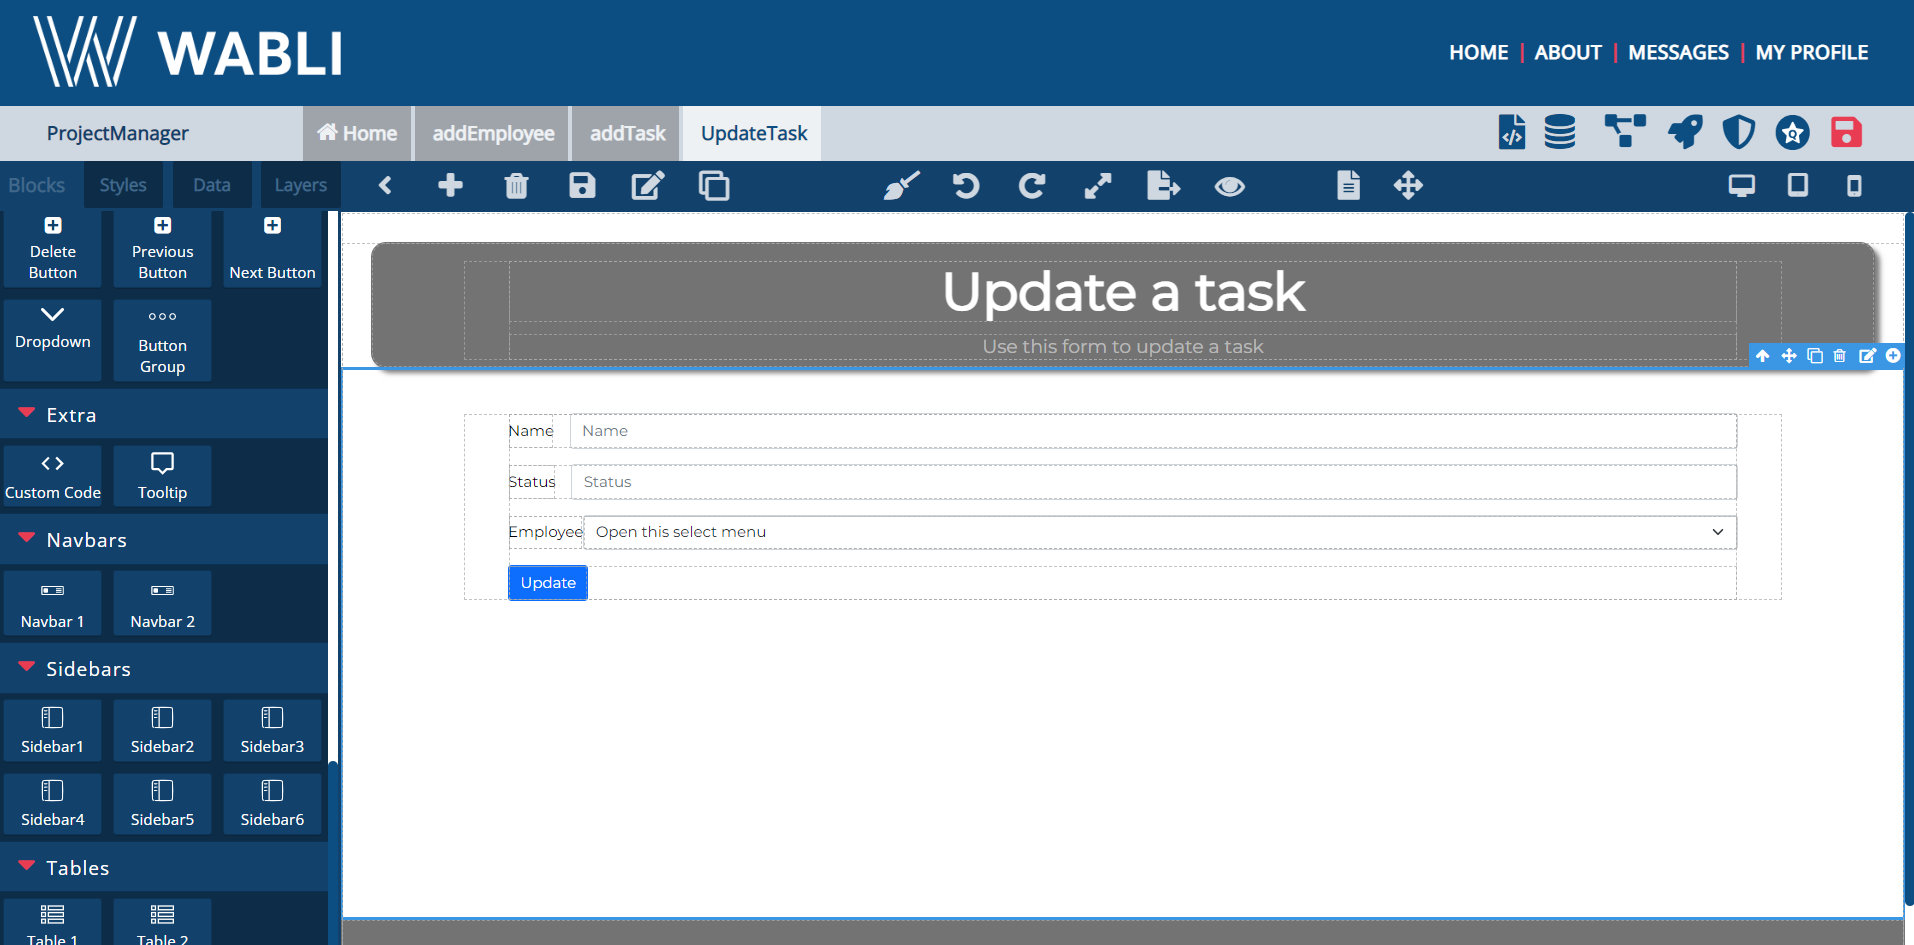
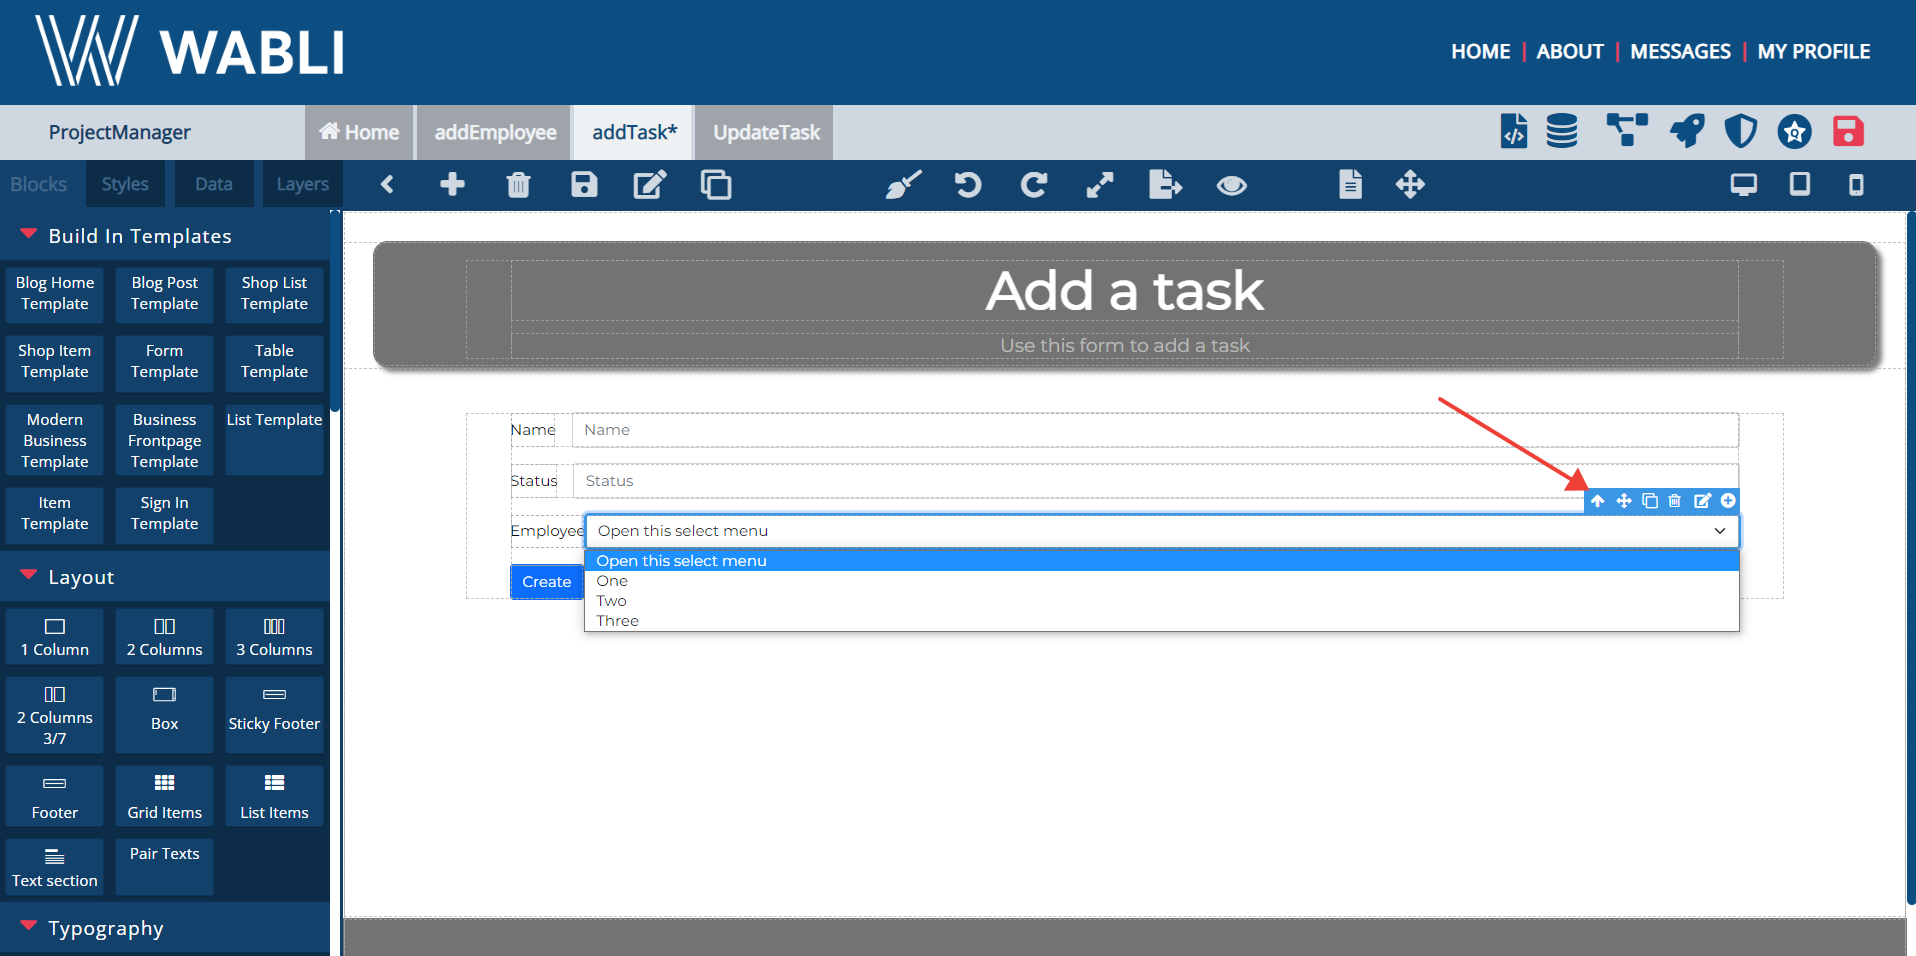
Drag and drop a 'Select' block next to a label. We will use this to select which employee is responsible for each task.
Click on 'Duplicate page' button to duplicate the page. On the prompt that appears, enter the name of the page and click 'Create'. This way, you can create as many pages as you want, without having to create them from scratch.

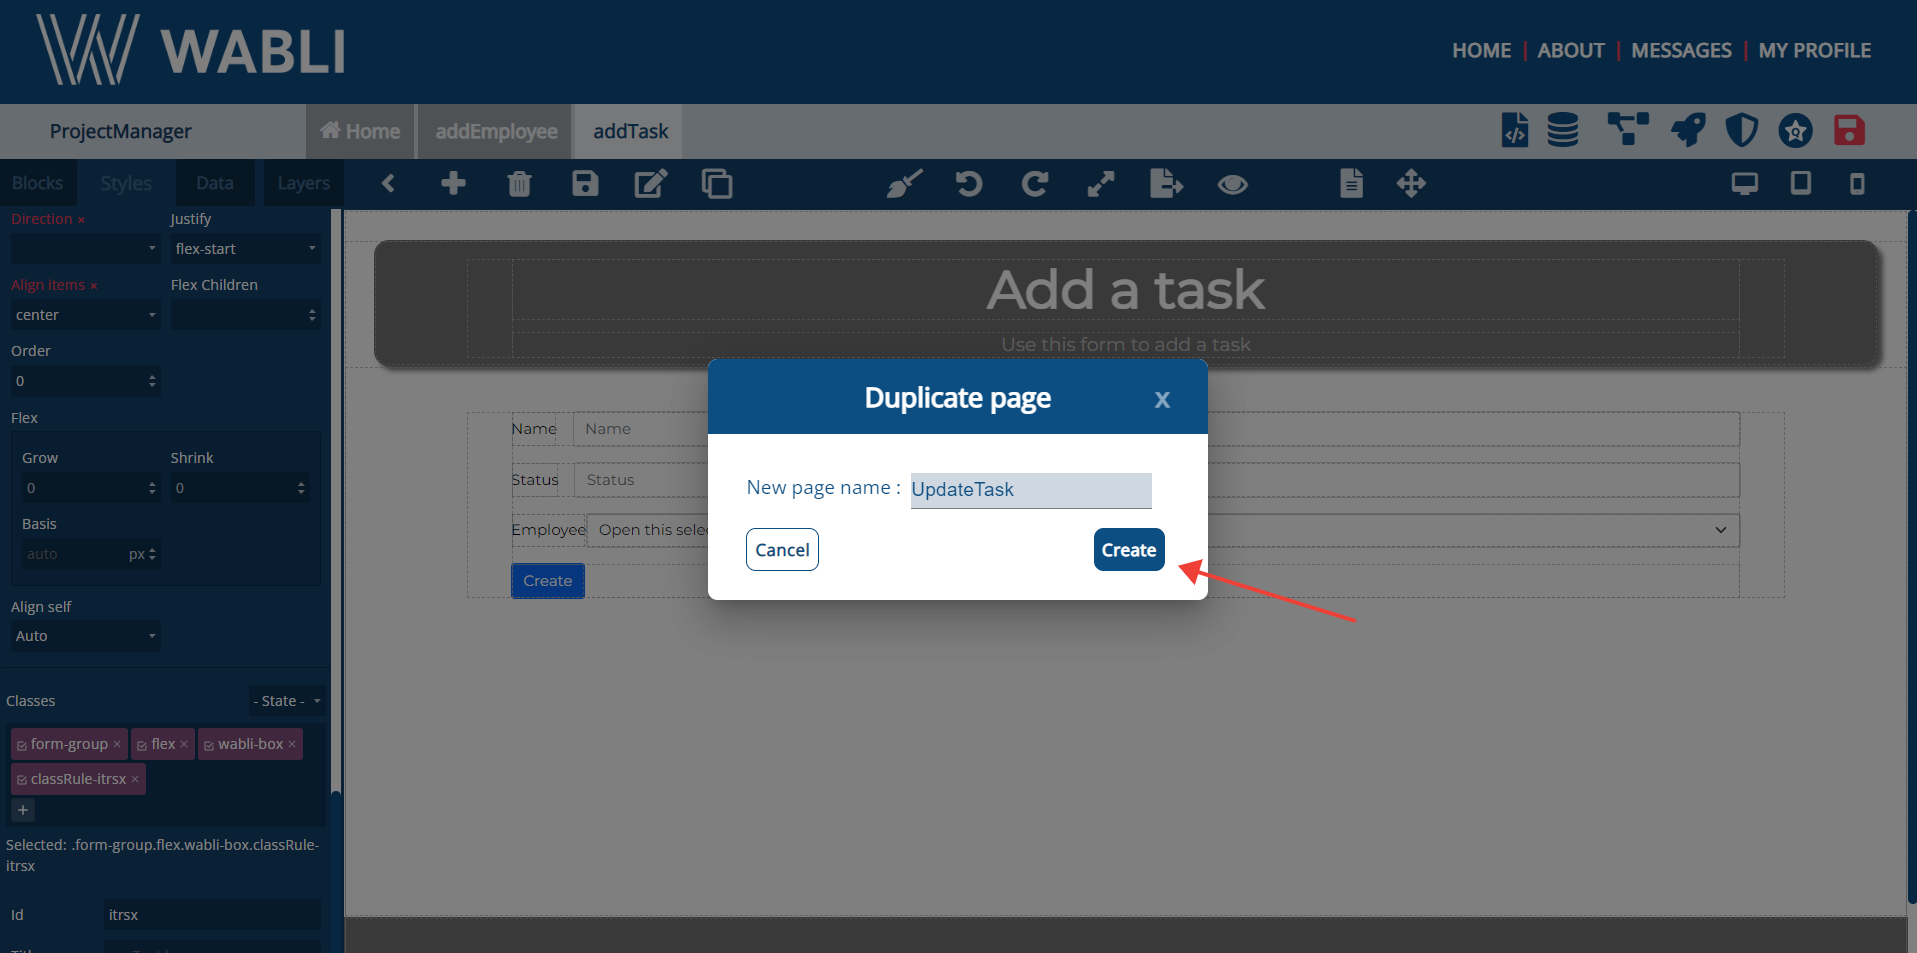
On the generated page, you can simply change the texts and the Update Page will be ready.
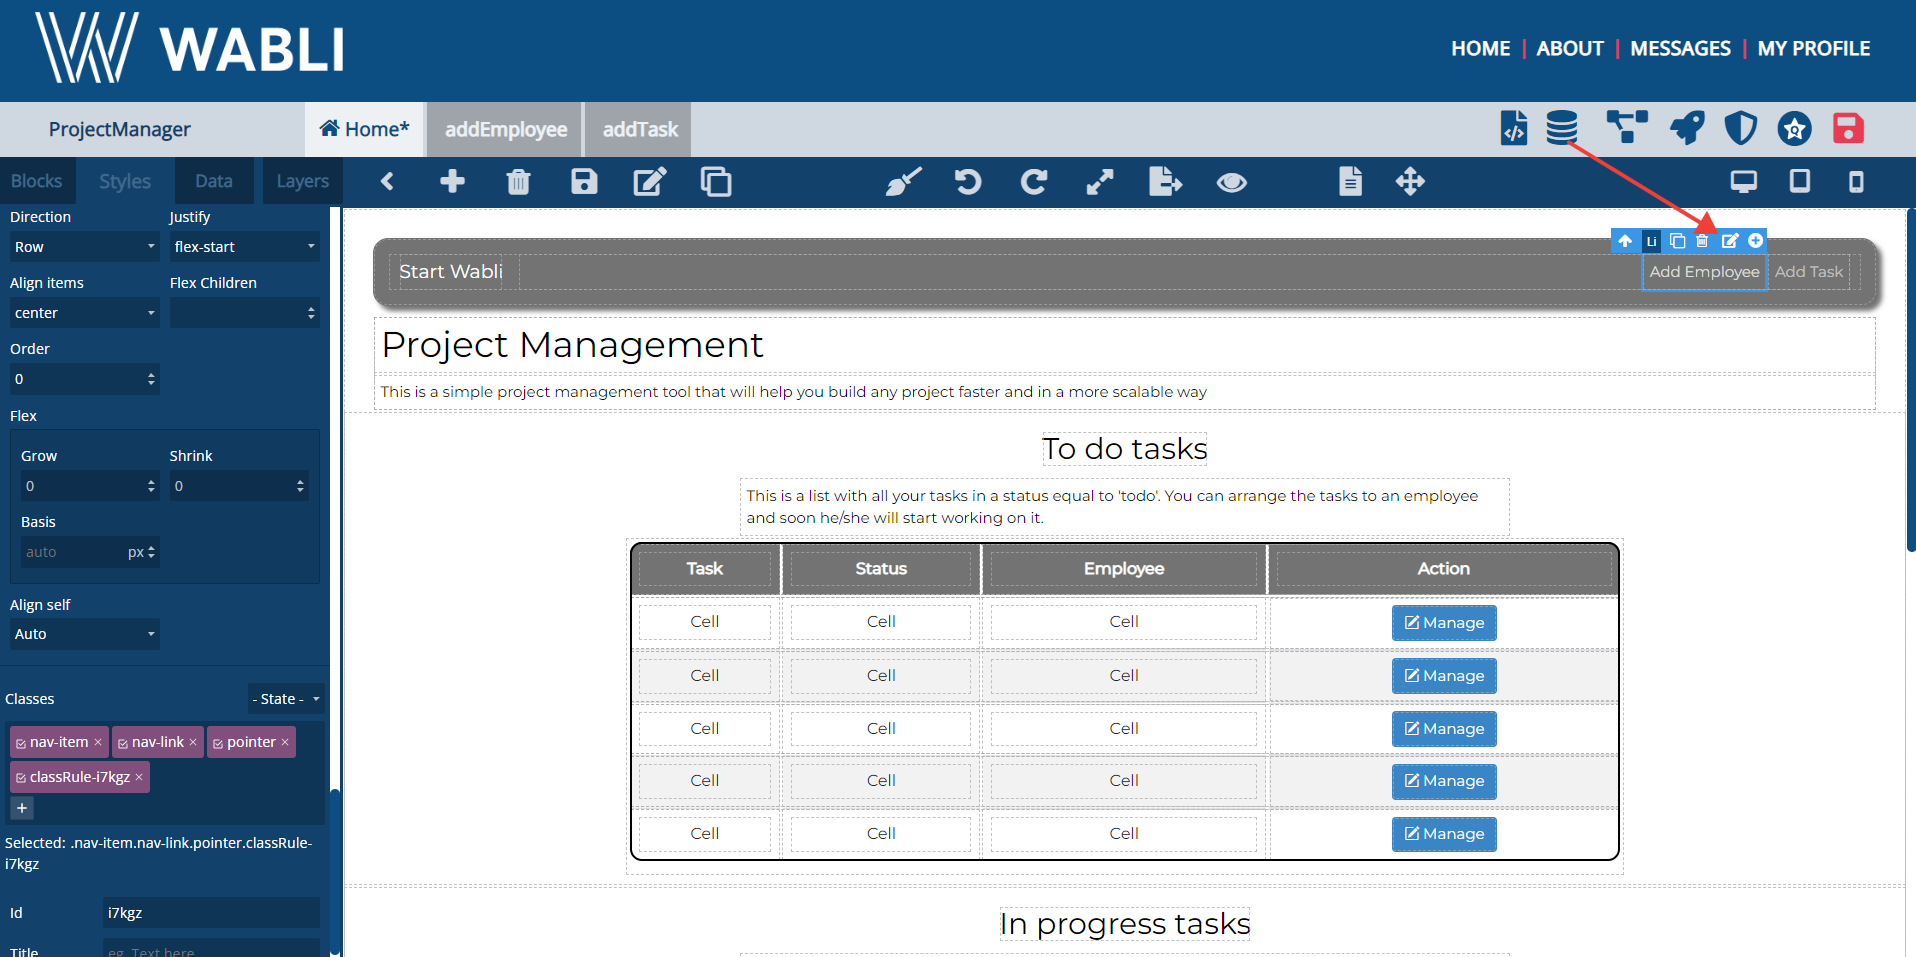
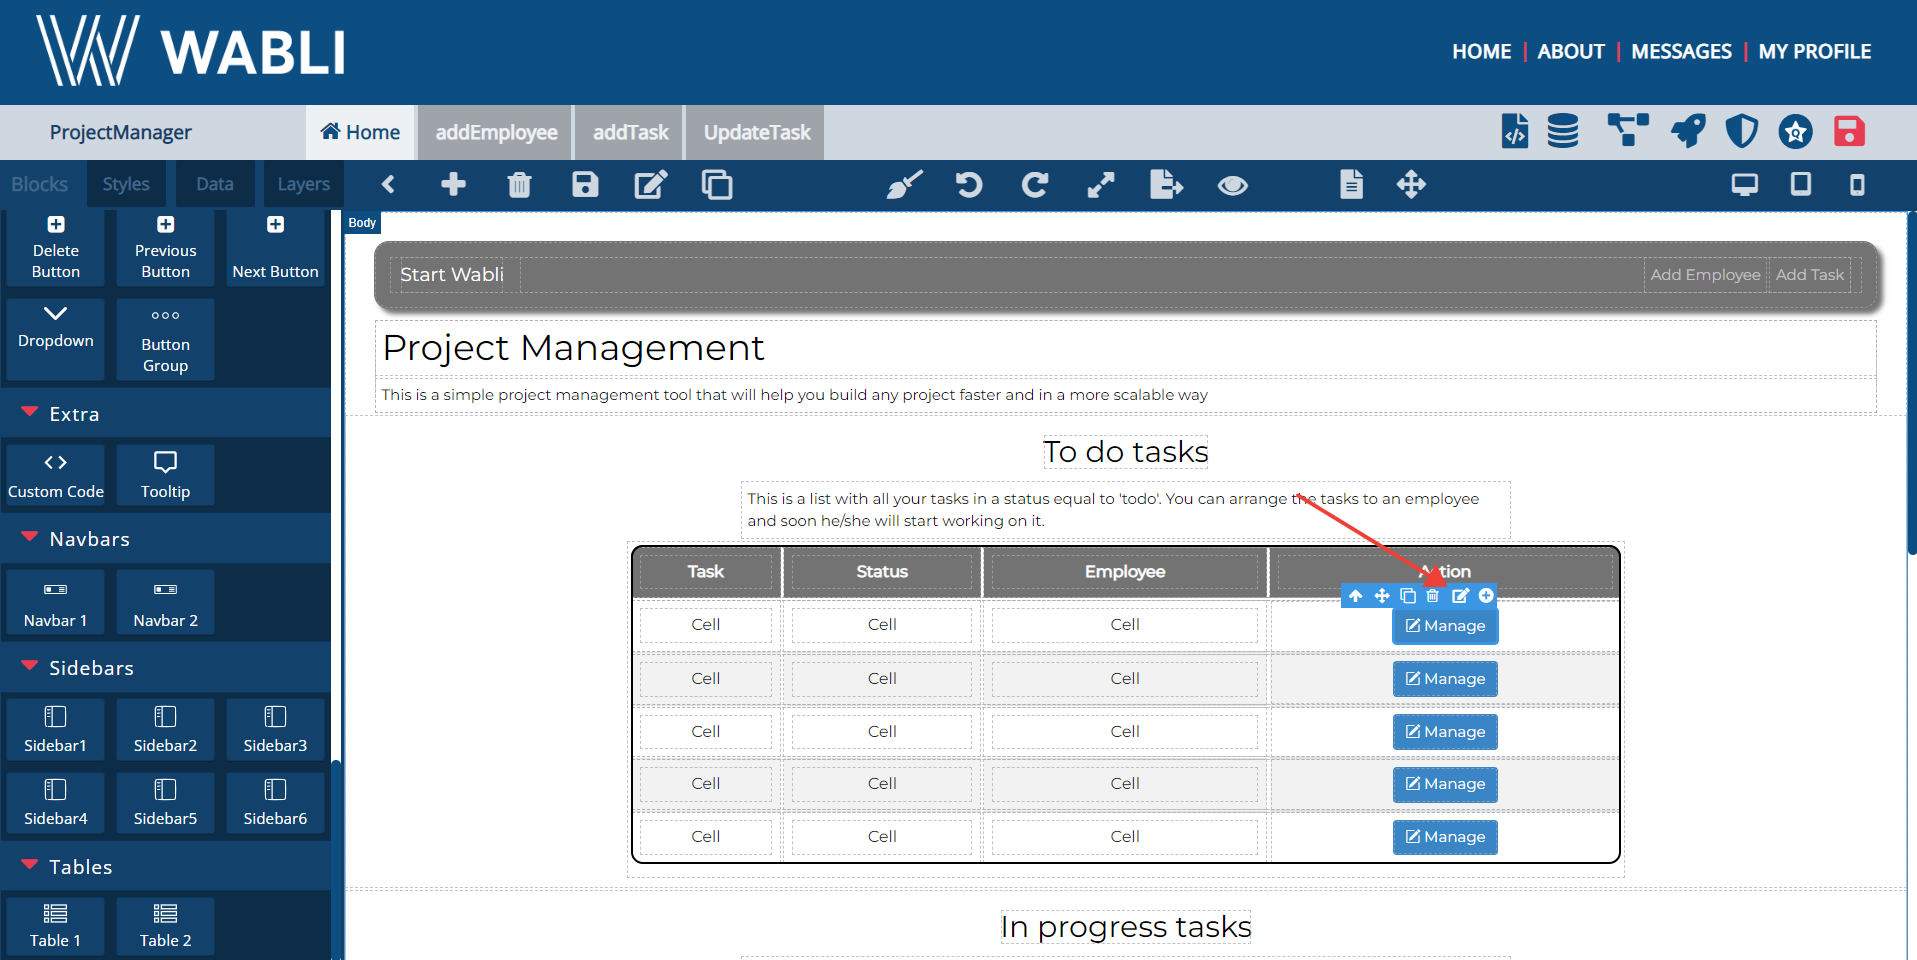
You can add links between your pages. To do so, please select an item that you want to link and click on the Edit icon.
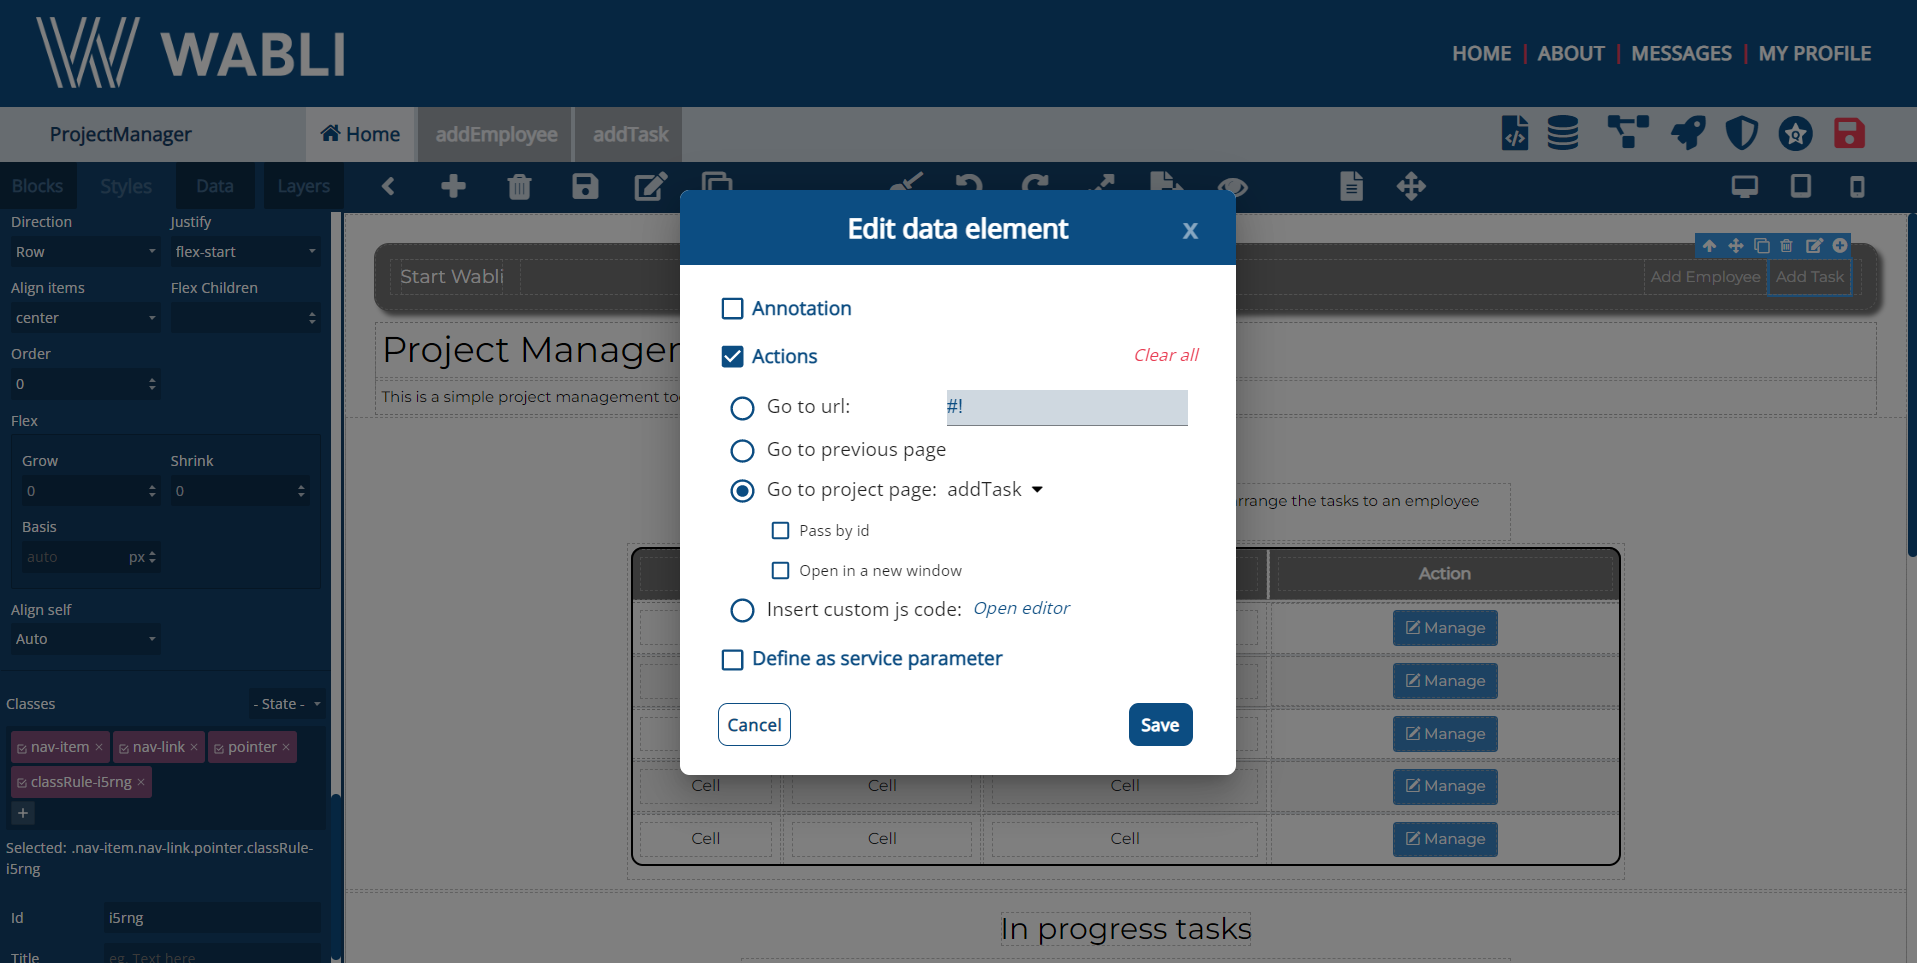
Select the "addEmployee" page from the "Go to project page" section.

Do the same for the "addTask" and the "updateTask" pages. When going to an update page, don't forget to add the id of the task.

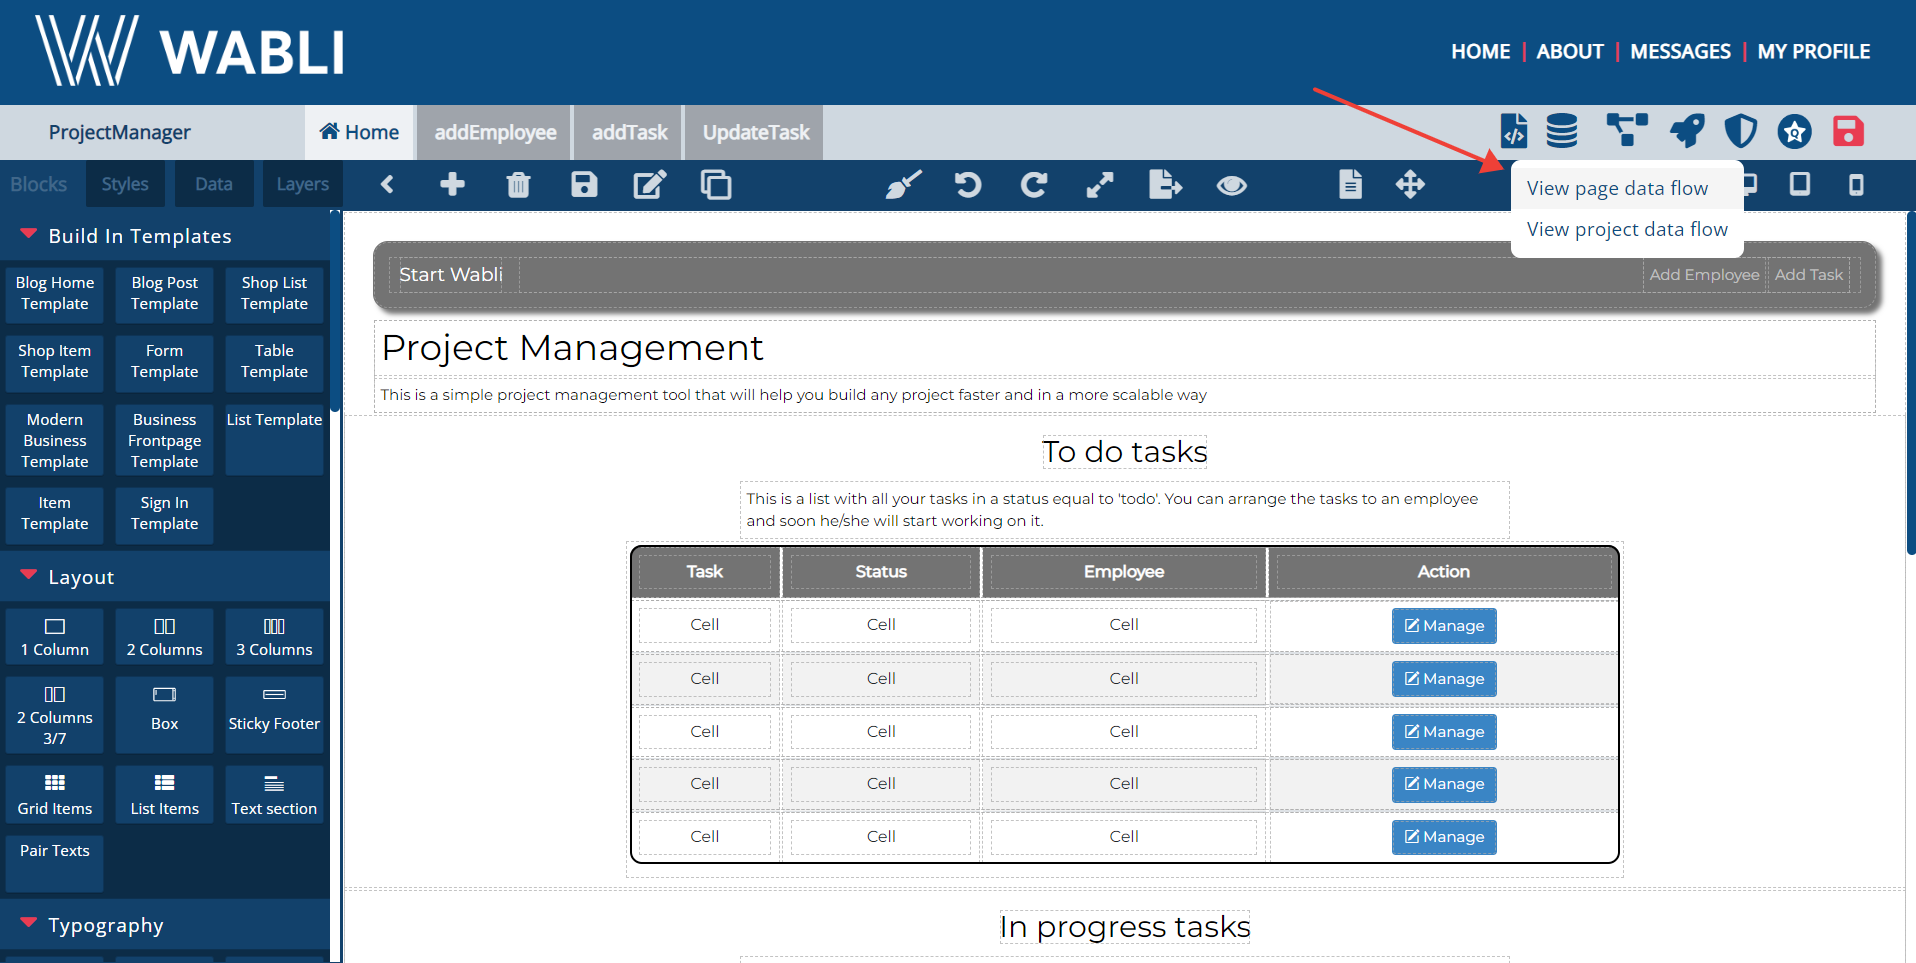
You have now created the links between your pages and you can view the page flow by selecting the "View page data flow" from the top right menu.
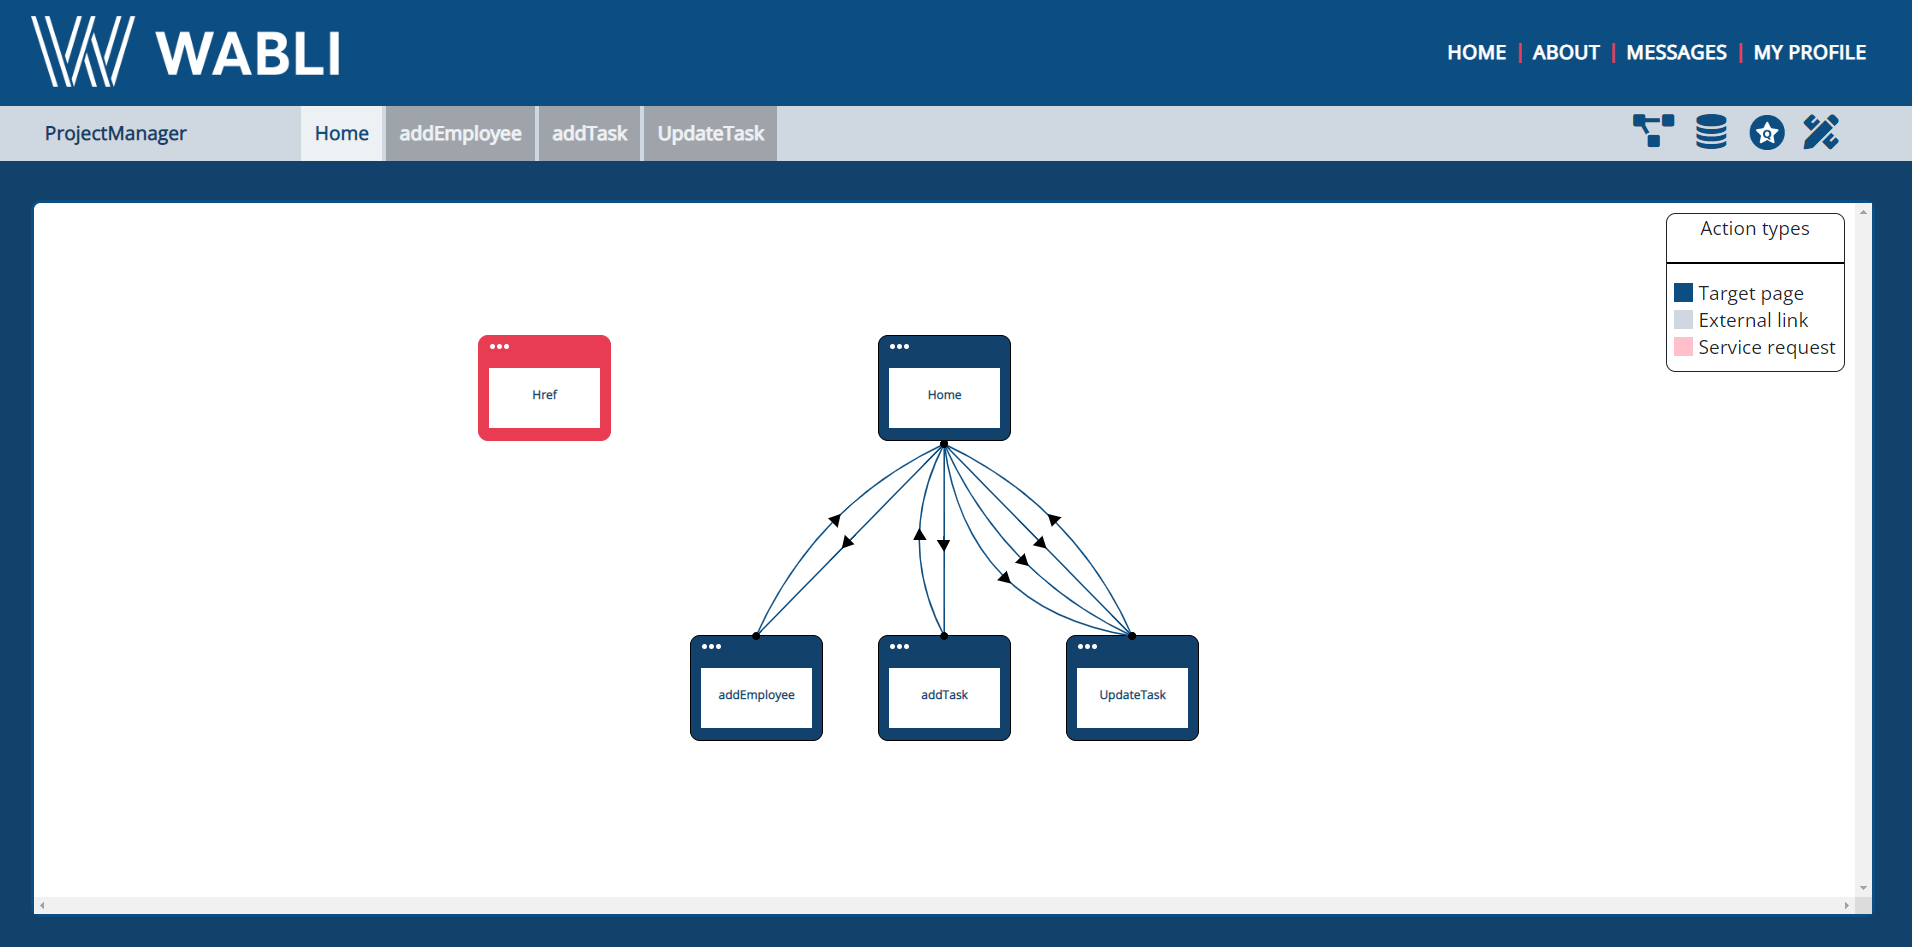
You can now see the flow of your pages. Browse through the pages to see the results.
You can now create the data model for your project.
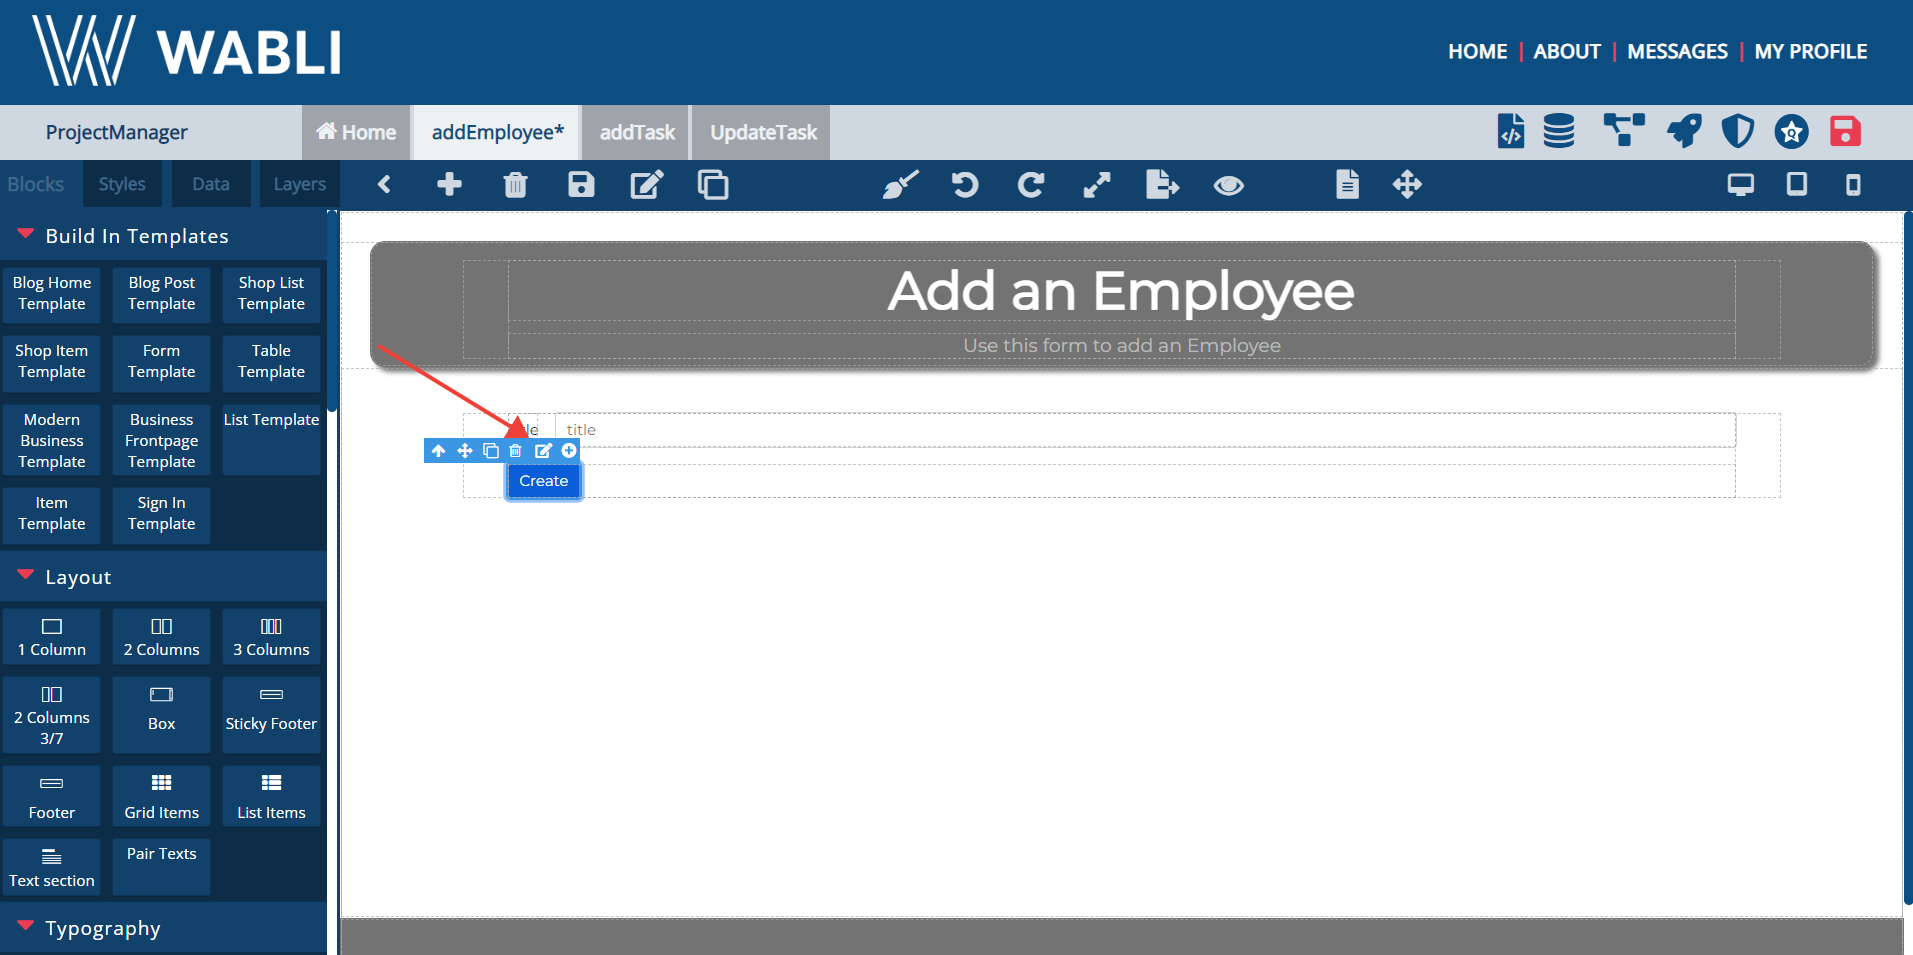
All the dynamic components of your pages need to be annotated. Firstly, go to page "addEmployee" and select the component you want to annotate.
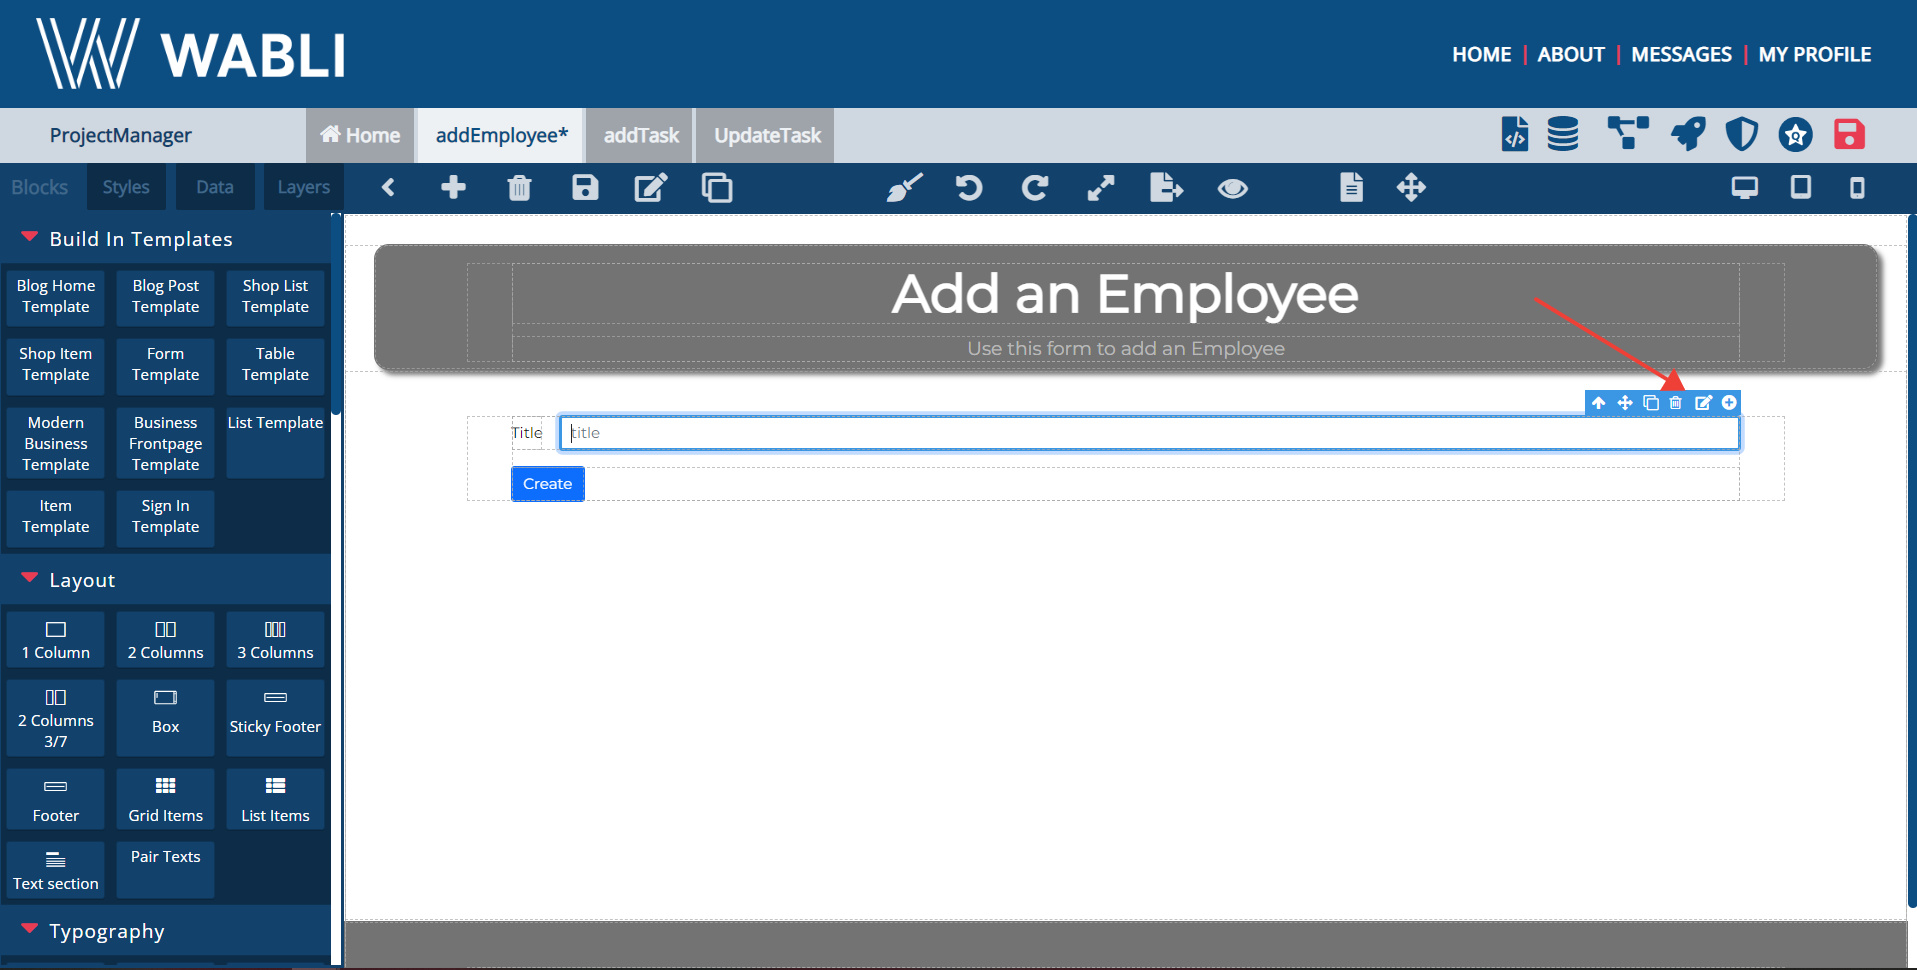
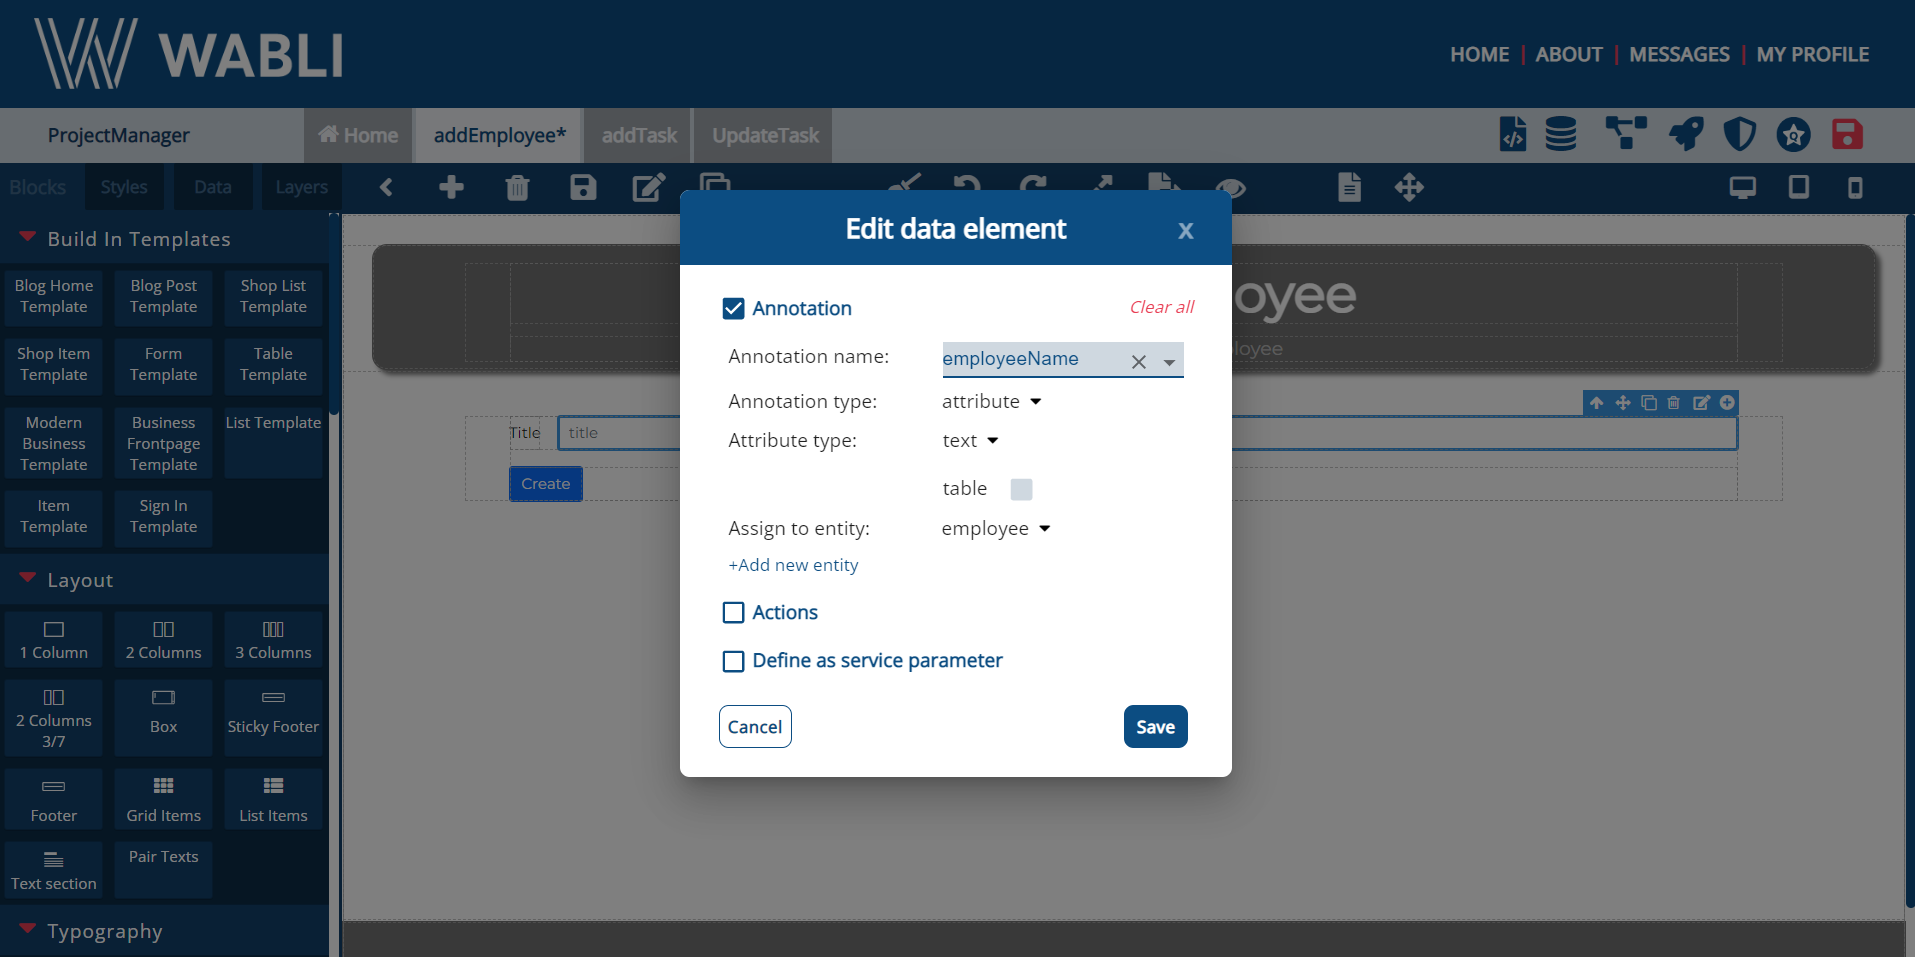
See an example below of how you can annotate the name of an Employee.
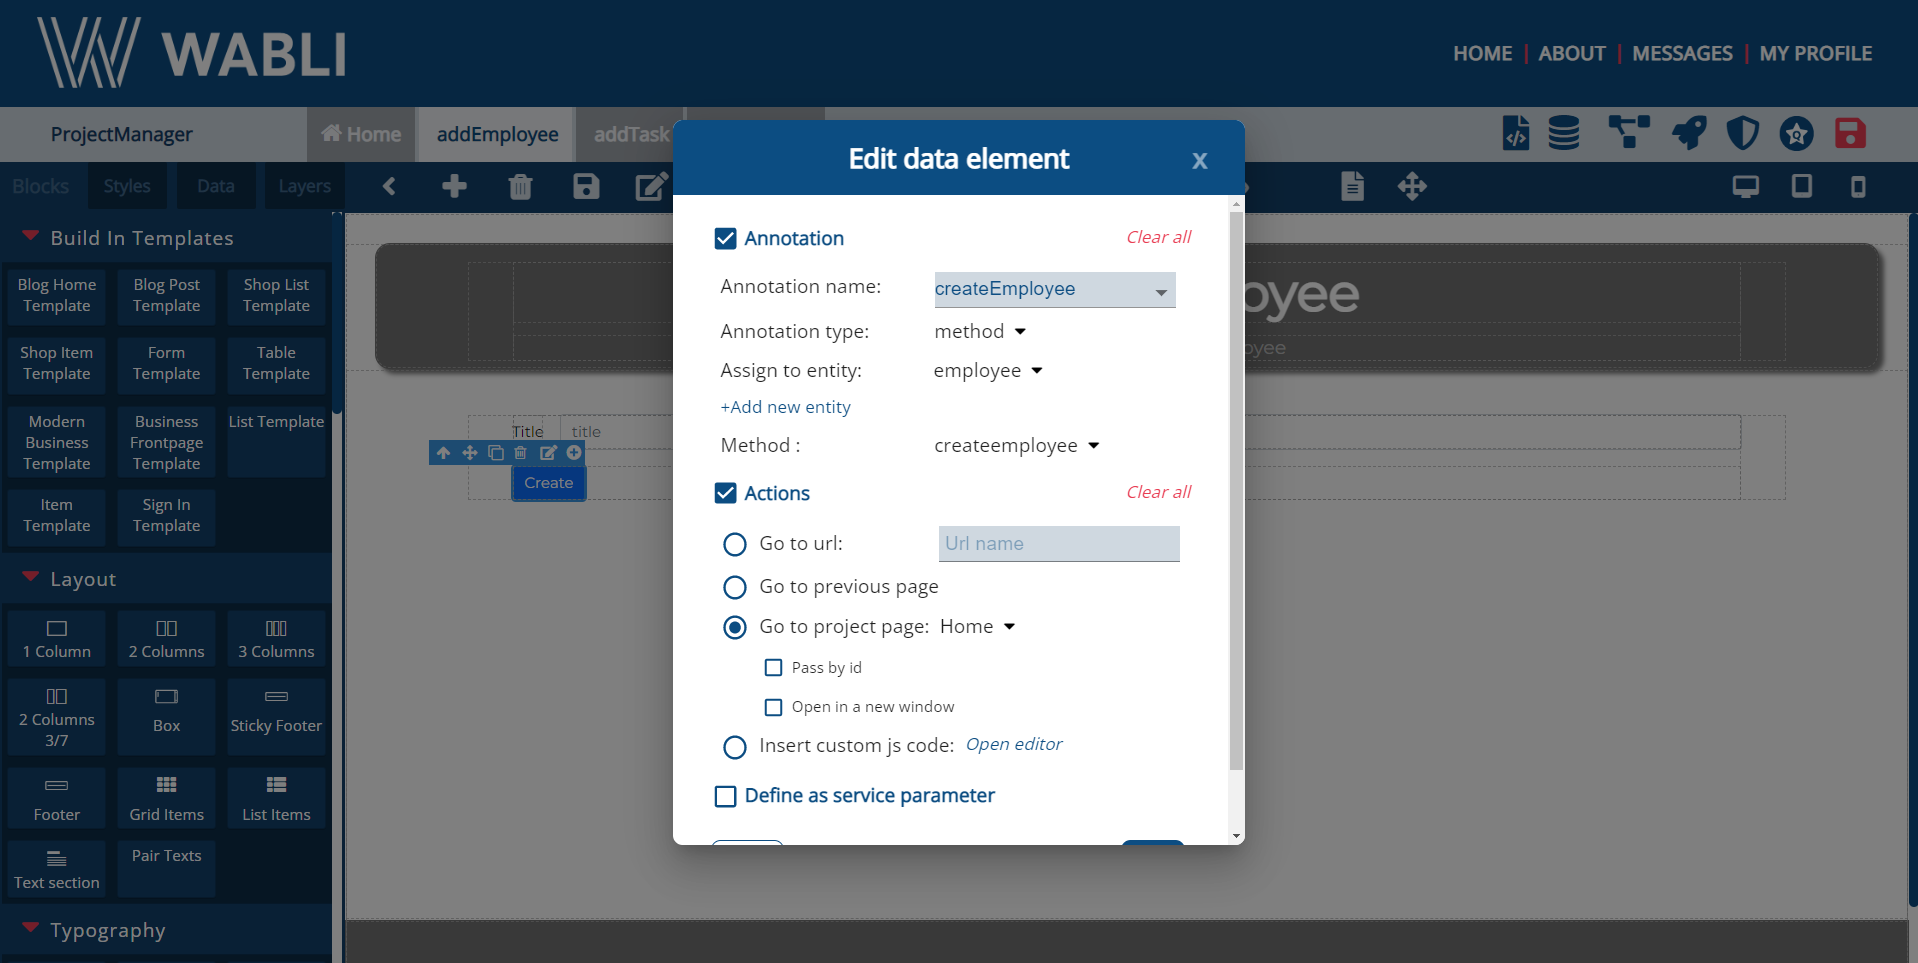
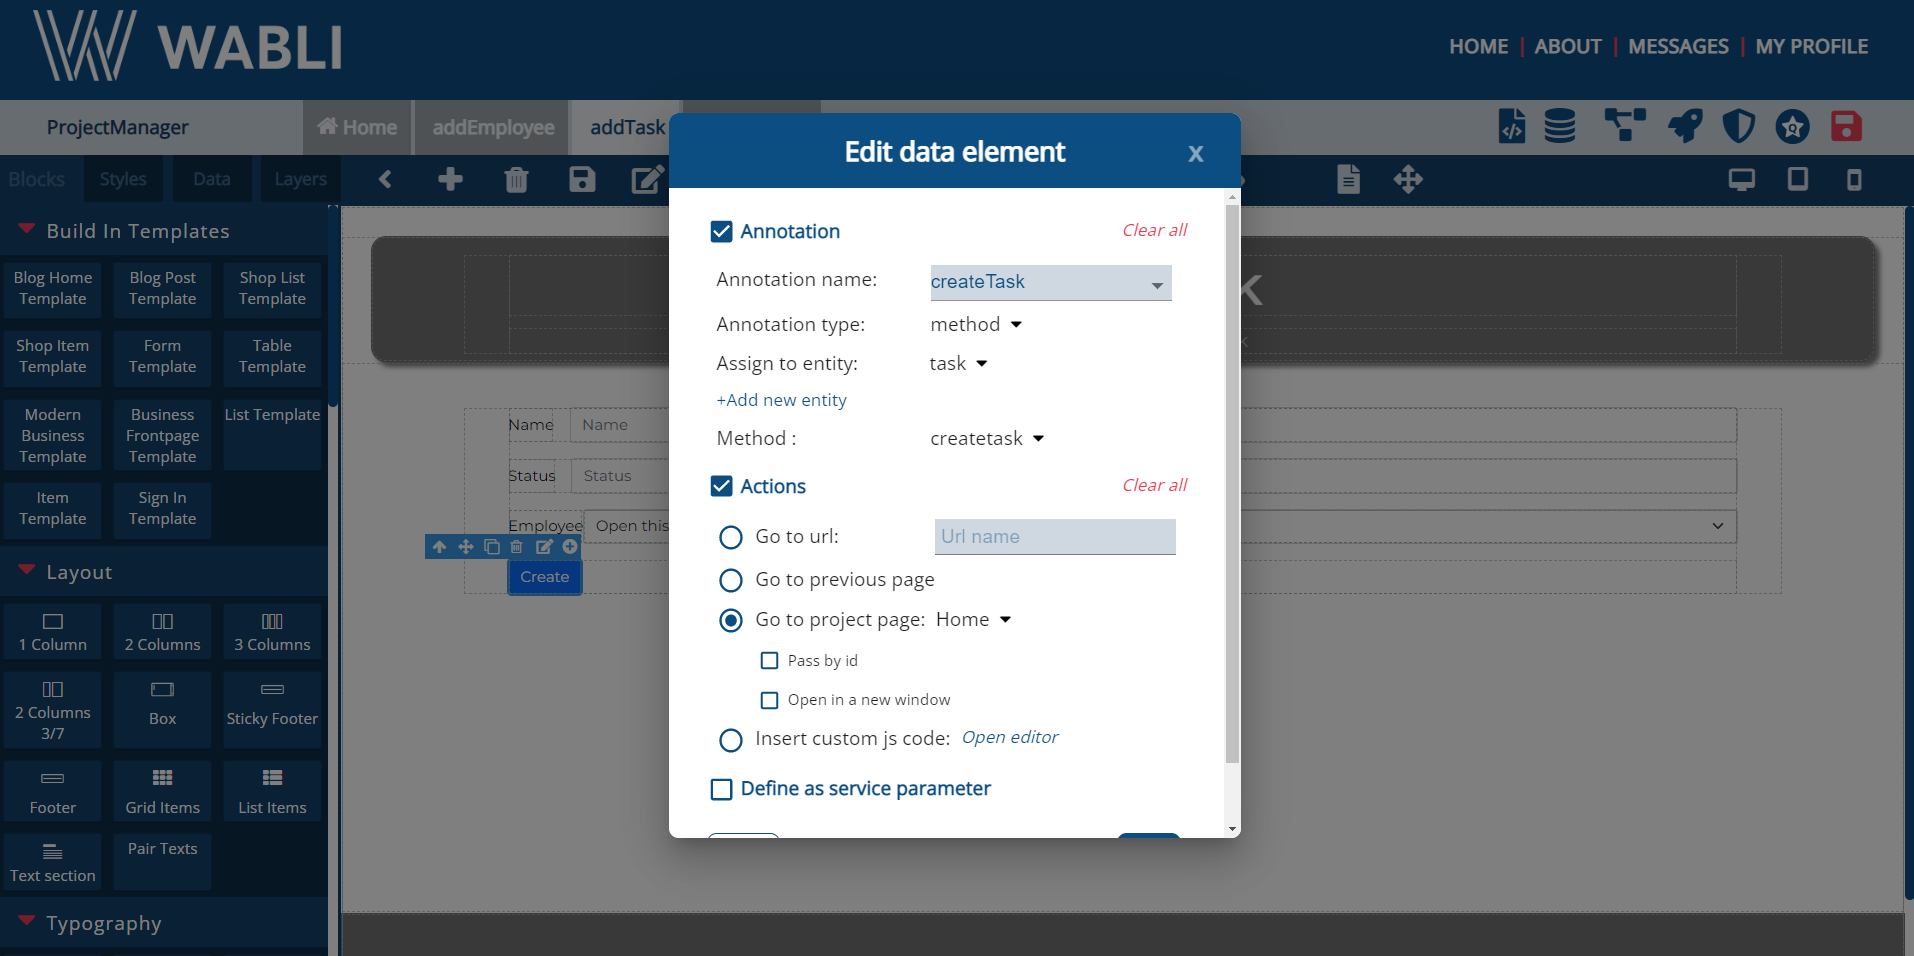
And for the create button.
You can also add CRUD (create, delete, update, read) functions to a component e.g. add to the button the ability to "create" a new employee and then navigate to page "Home".
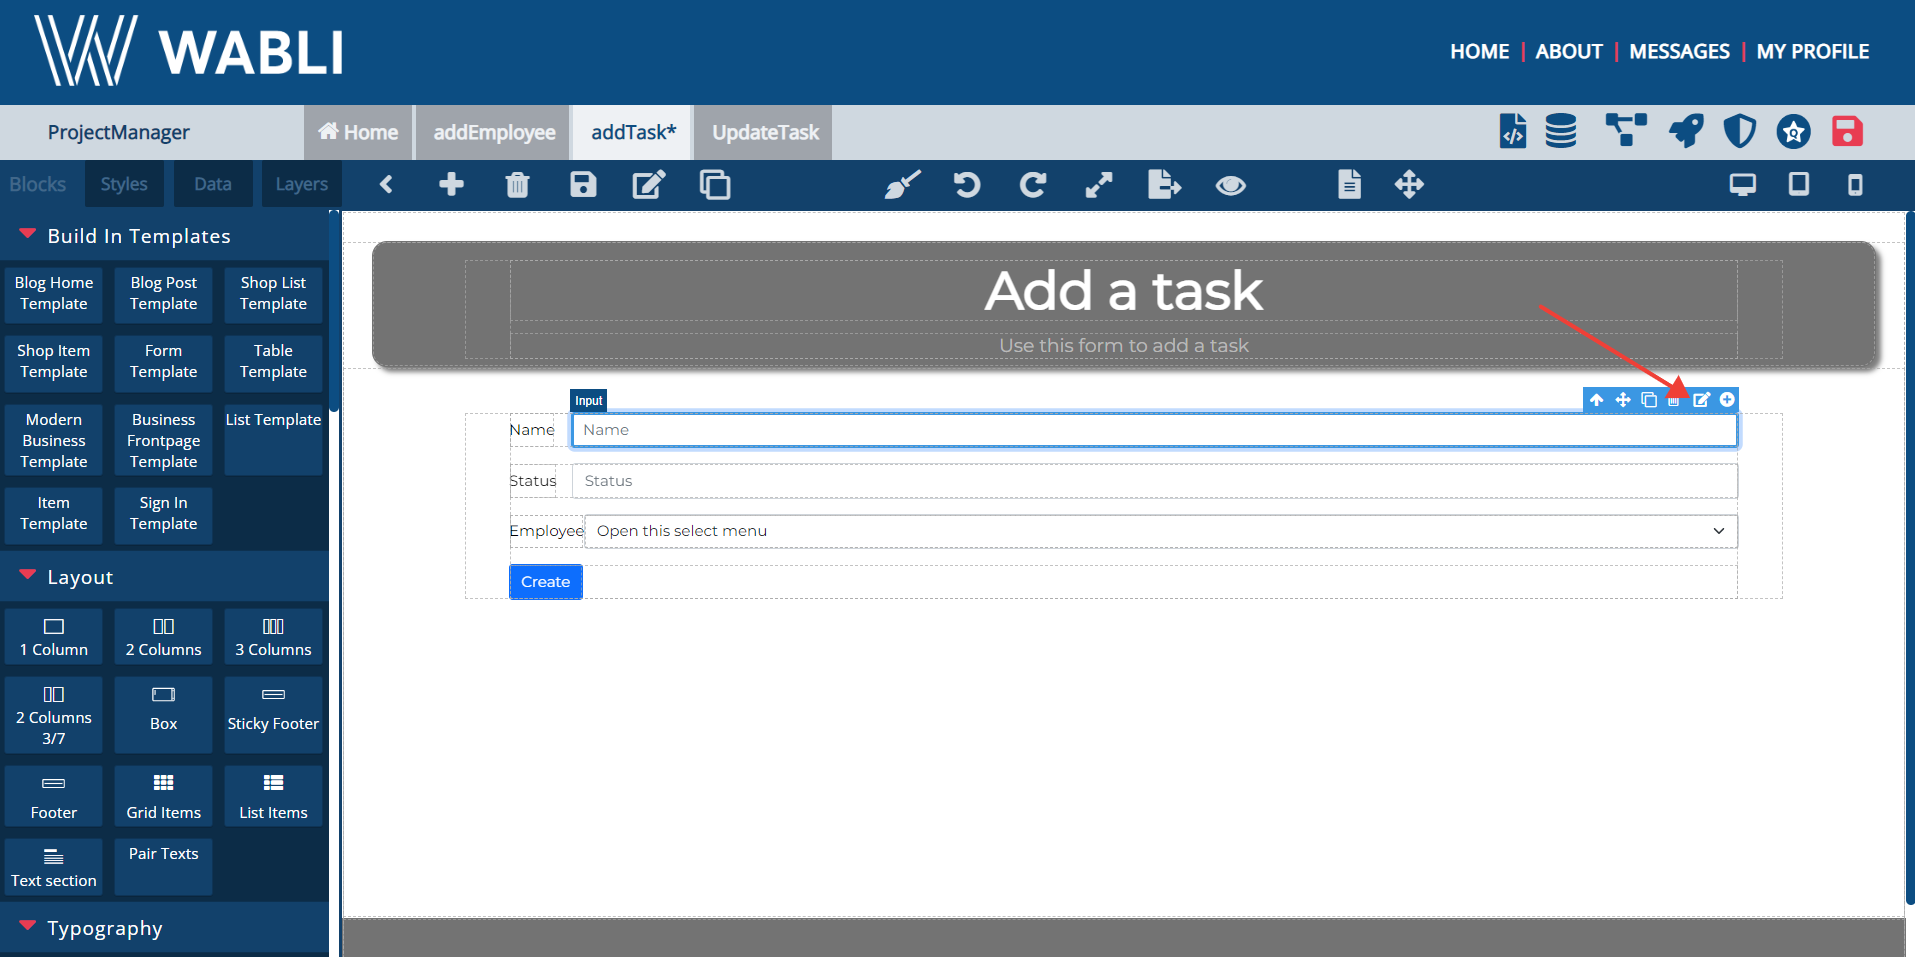
Now that you have annotated the 'Employee' entity. You can annotate the 'Task' entity. Start by annotating the name.
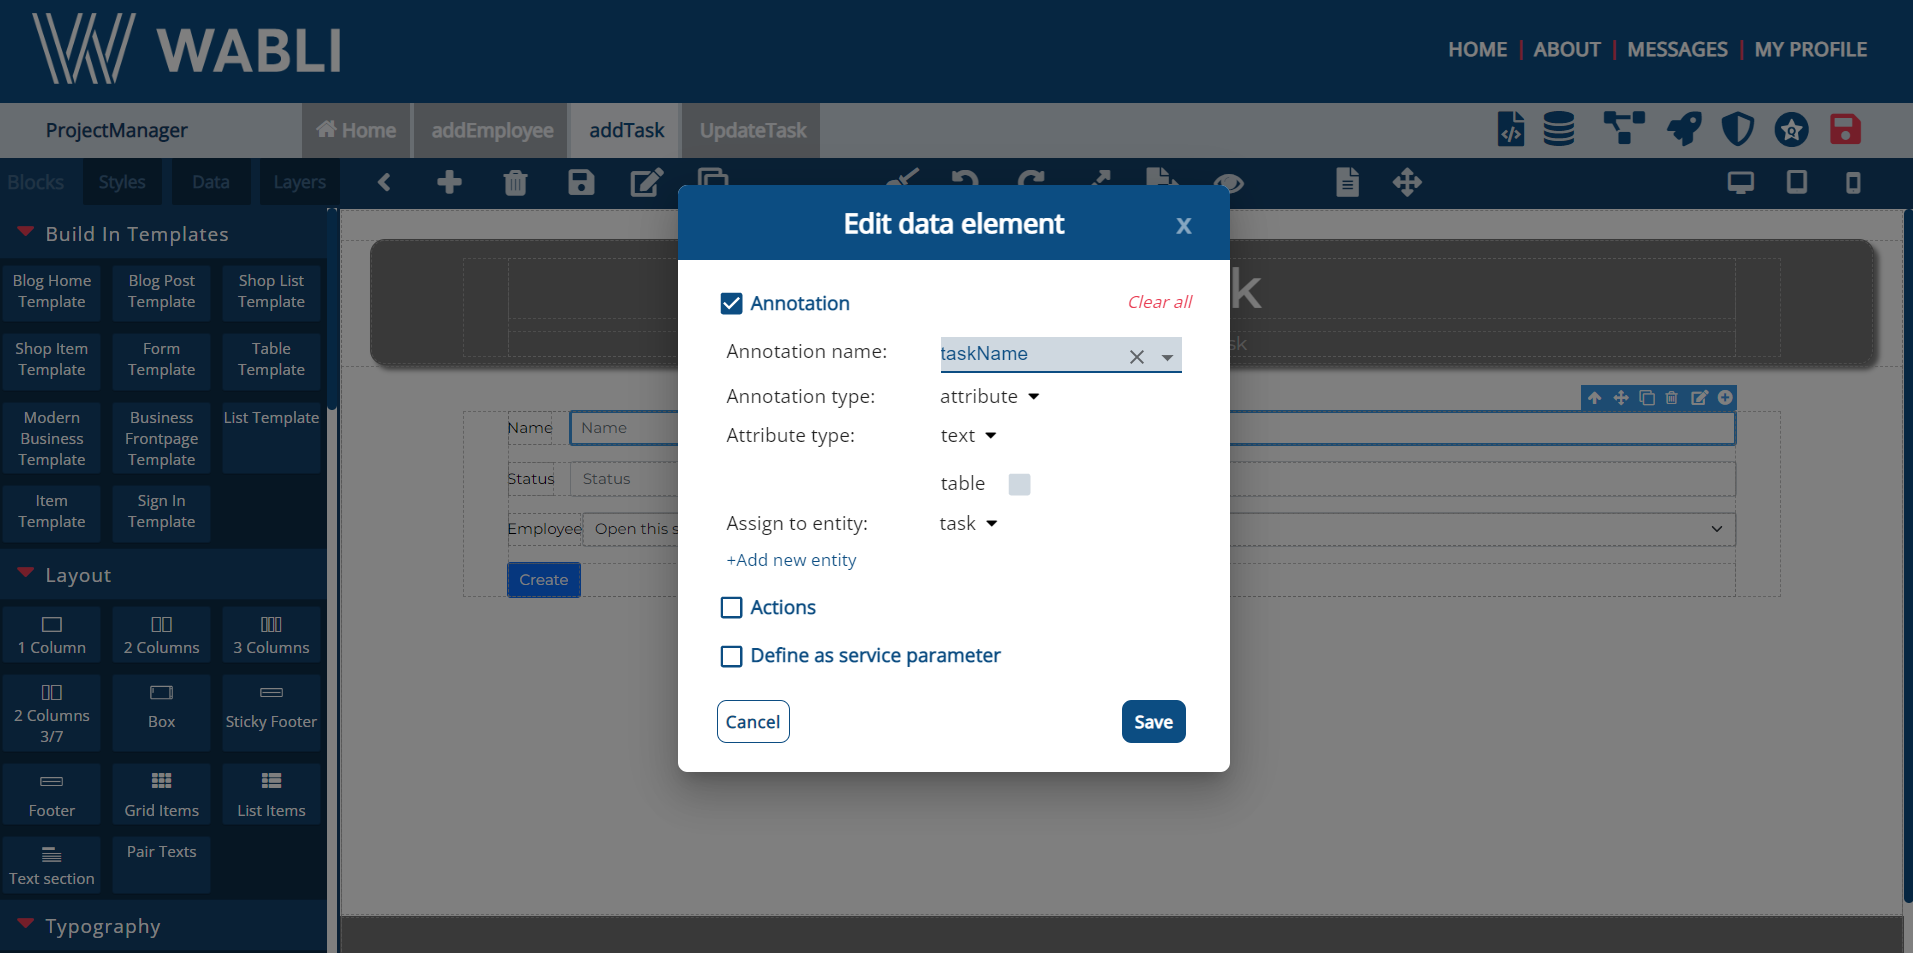
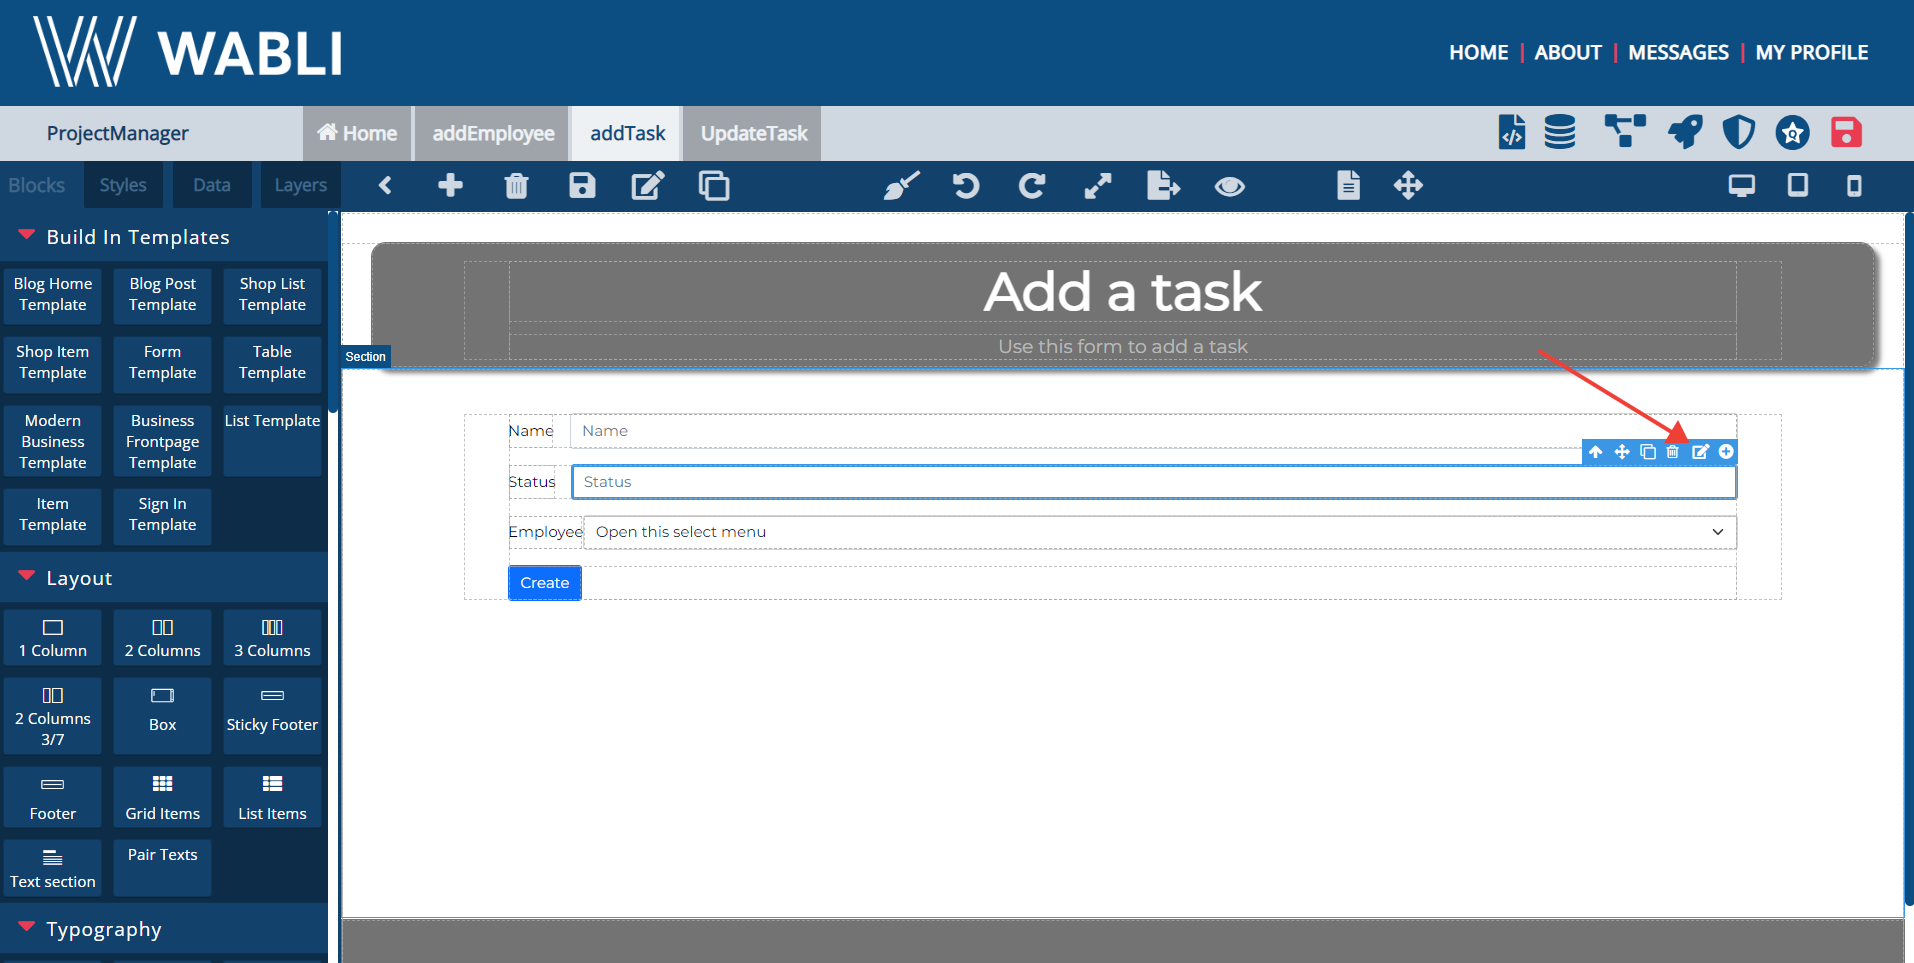
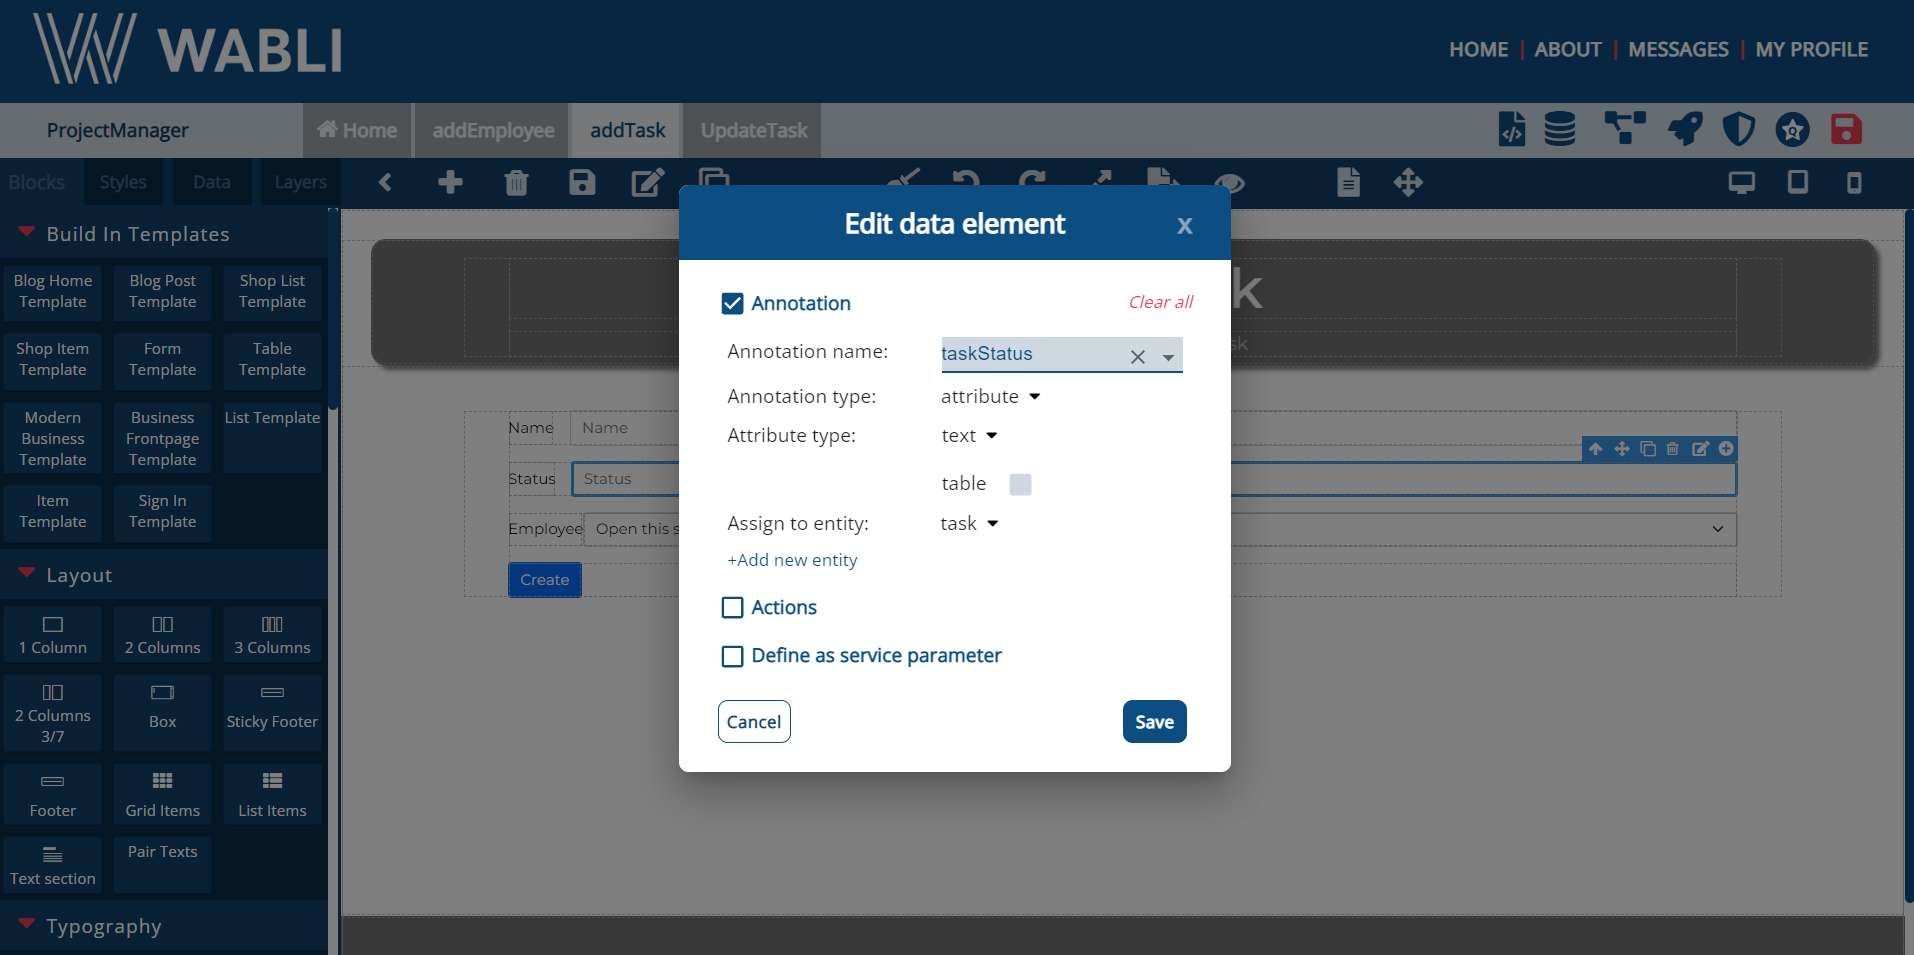
Annotate the status of the task.
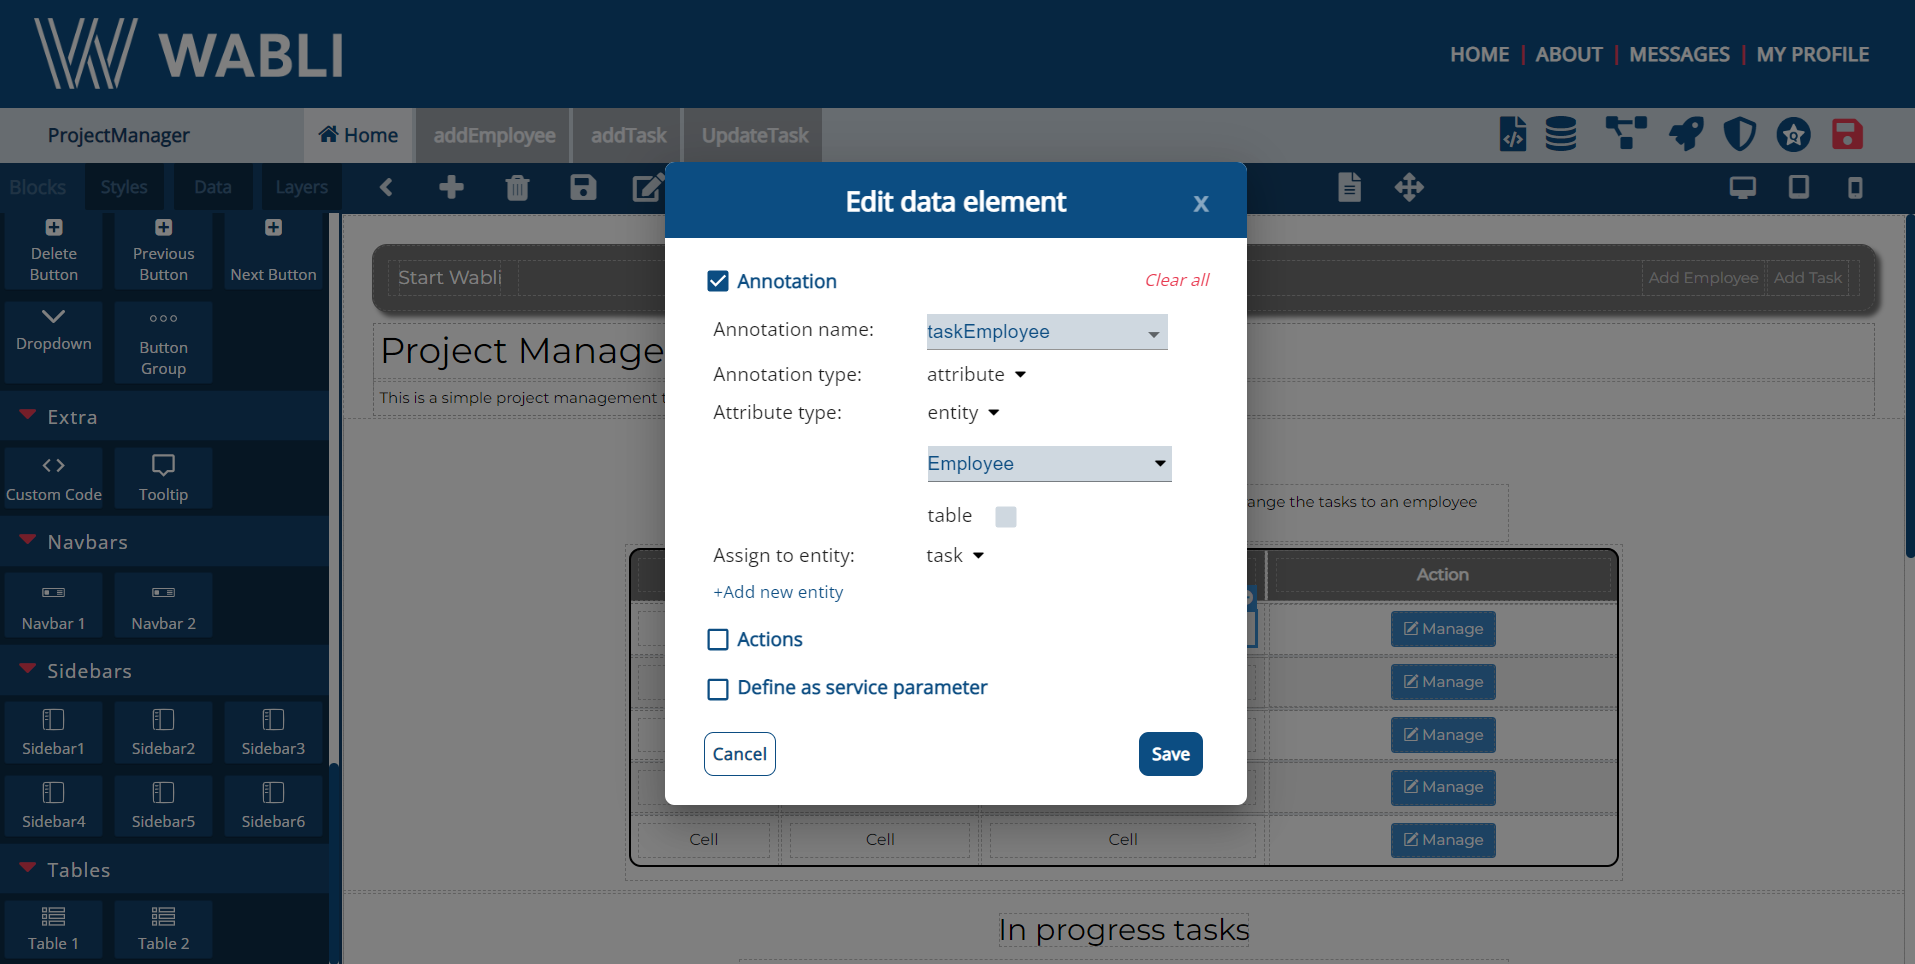
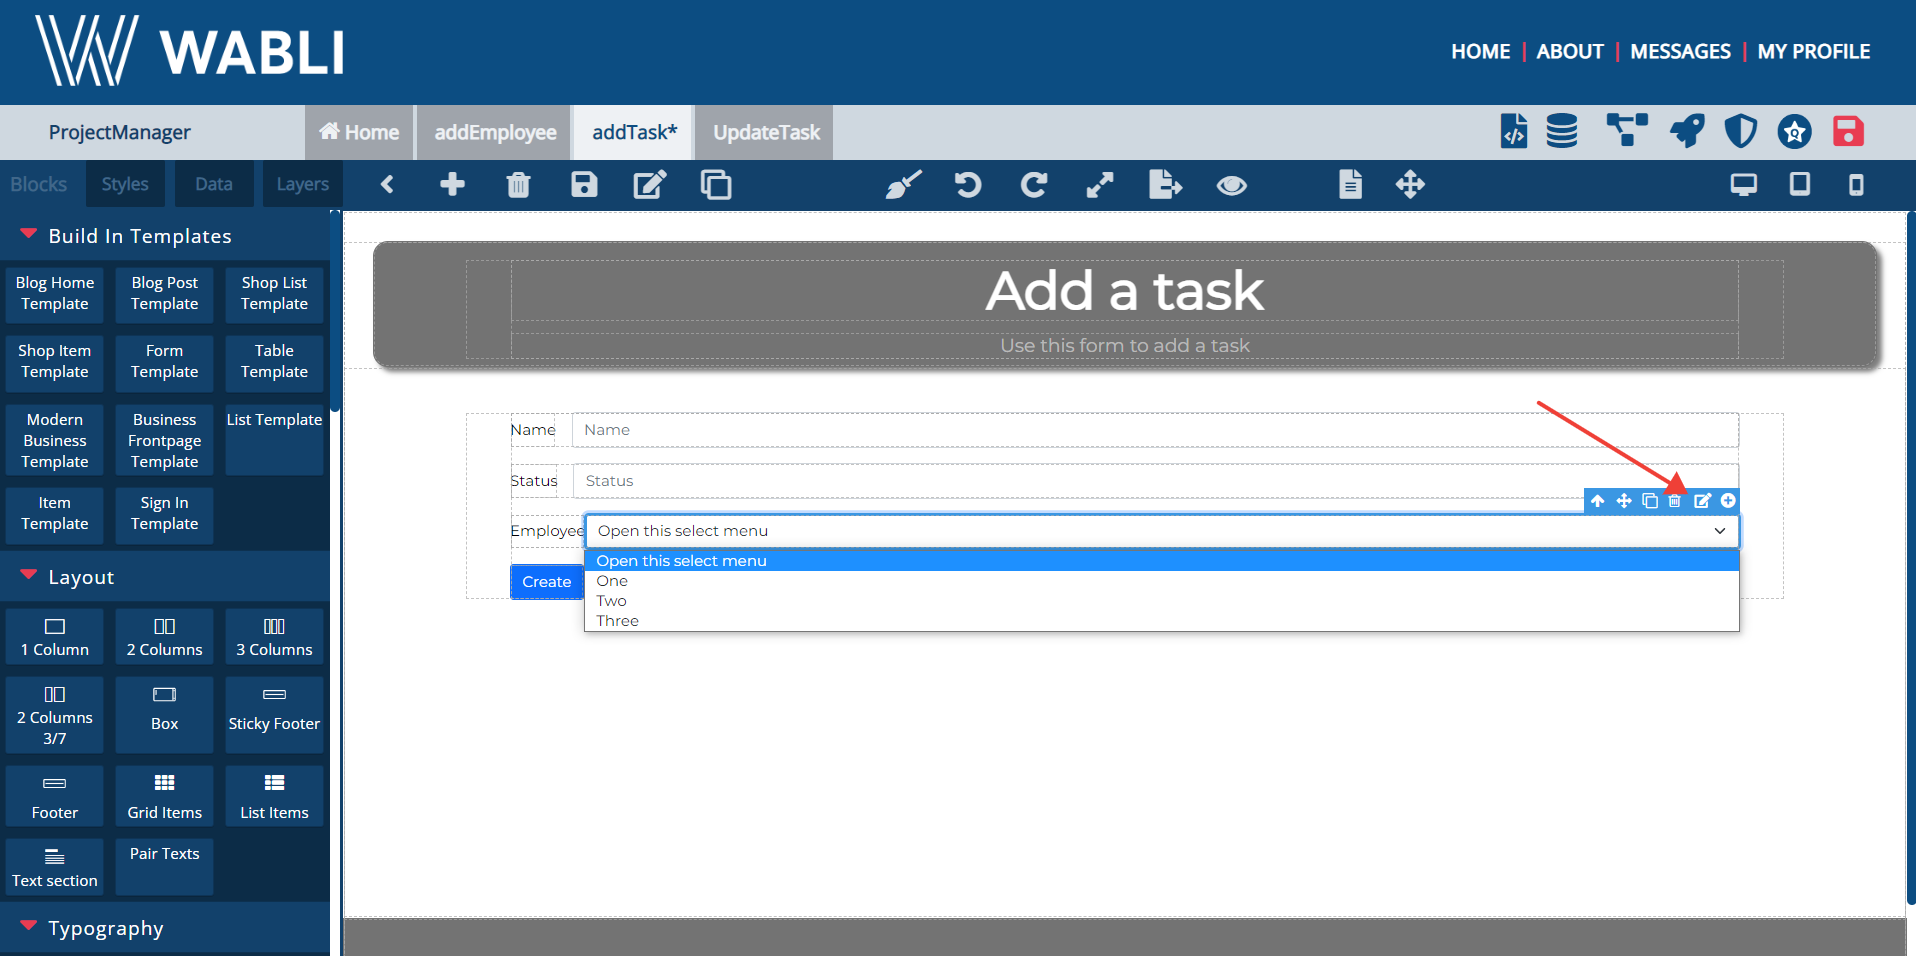
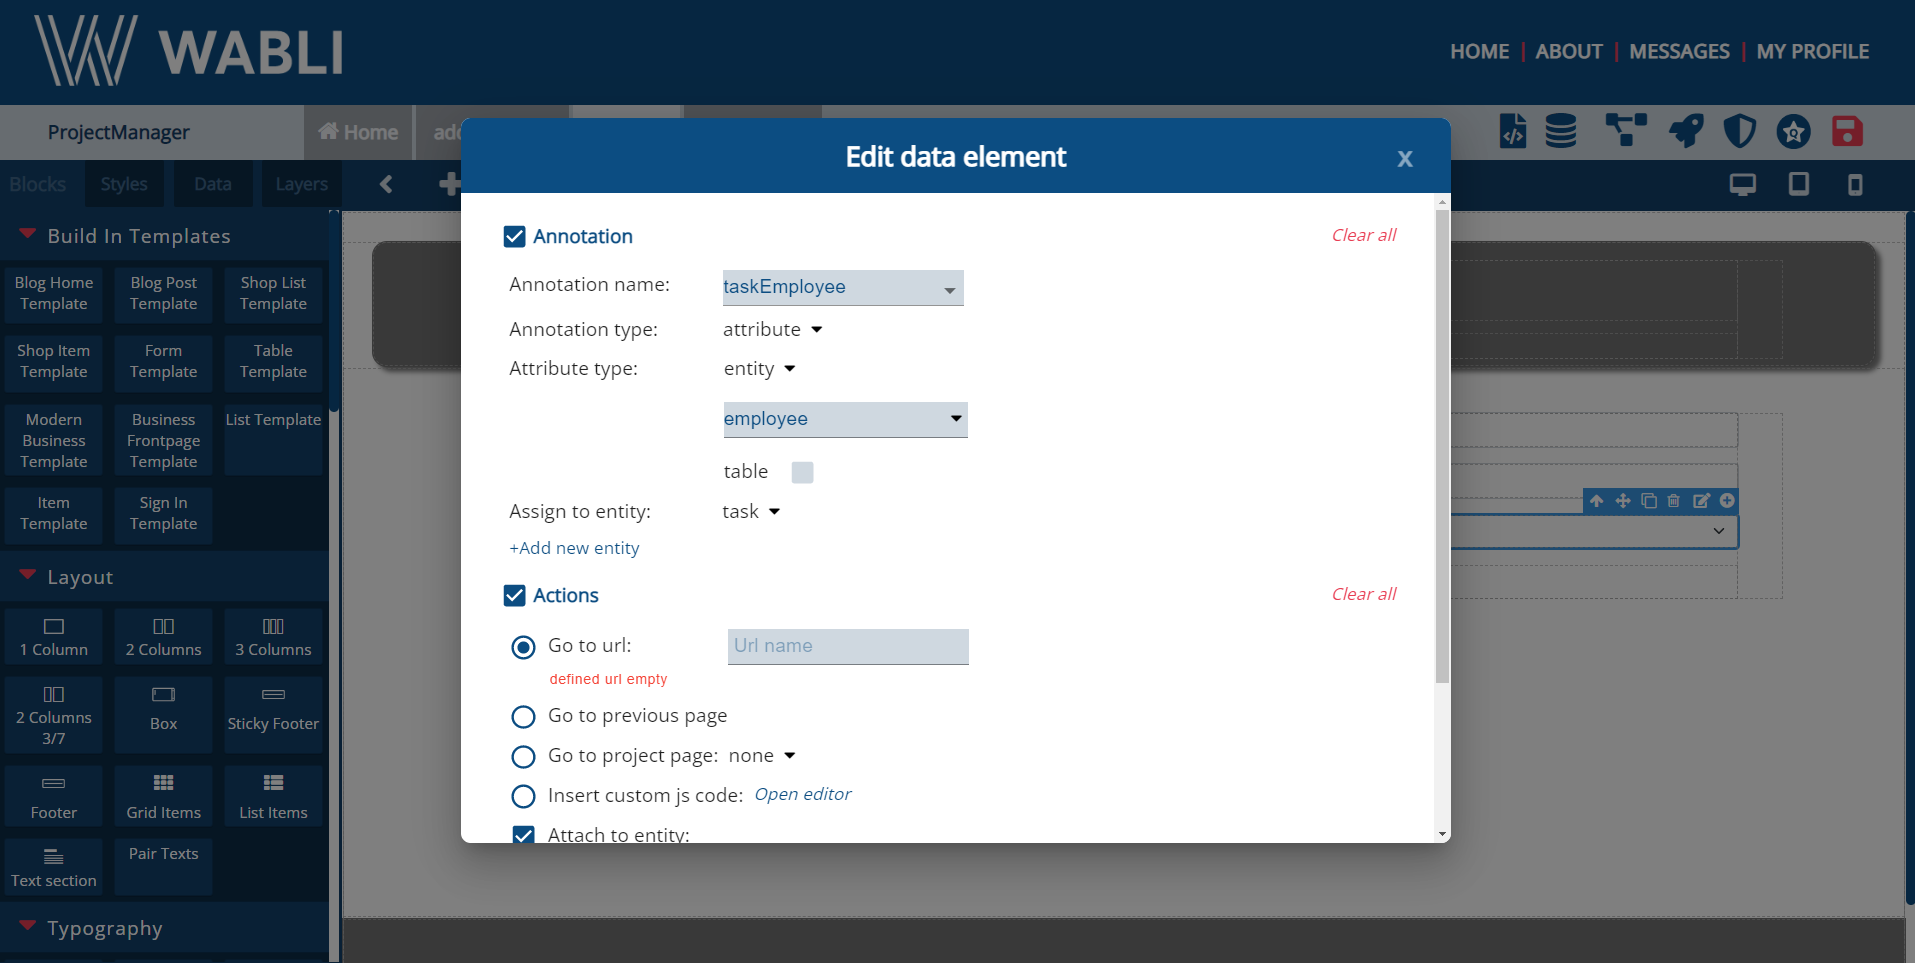
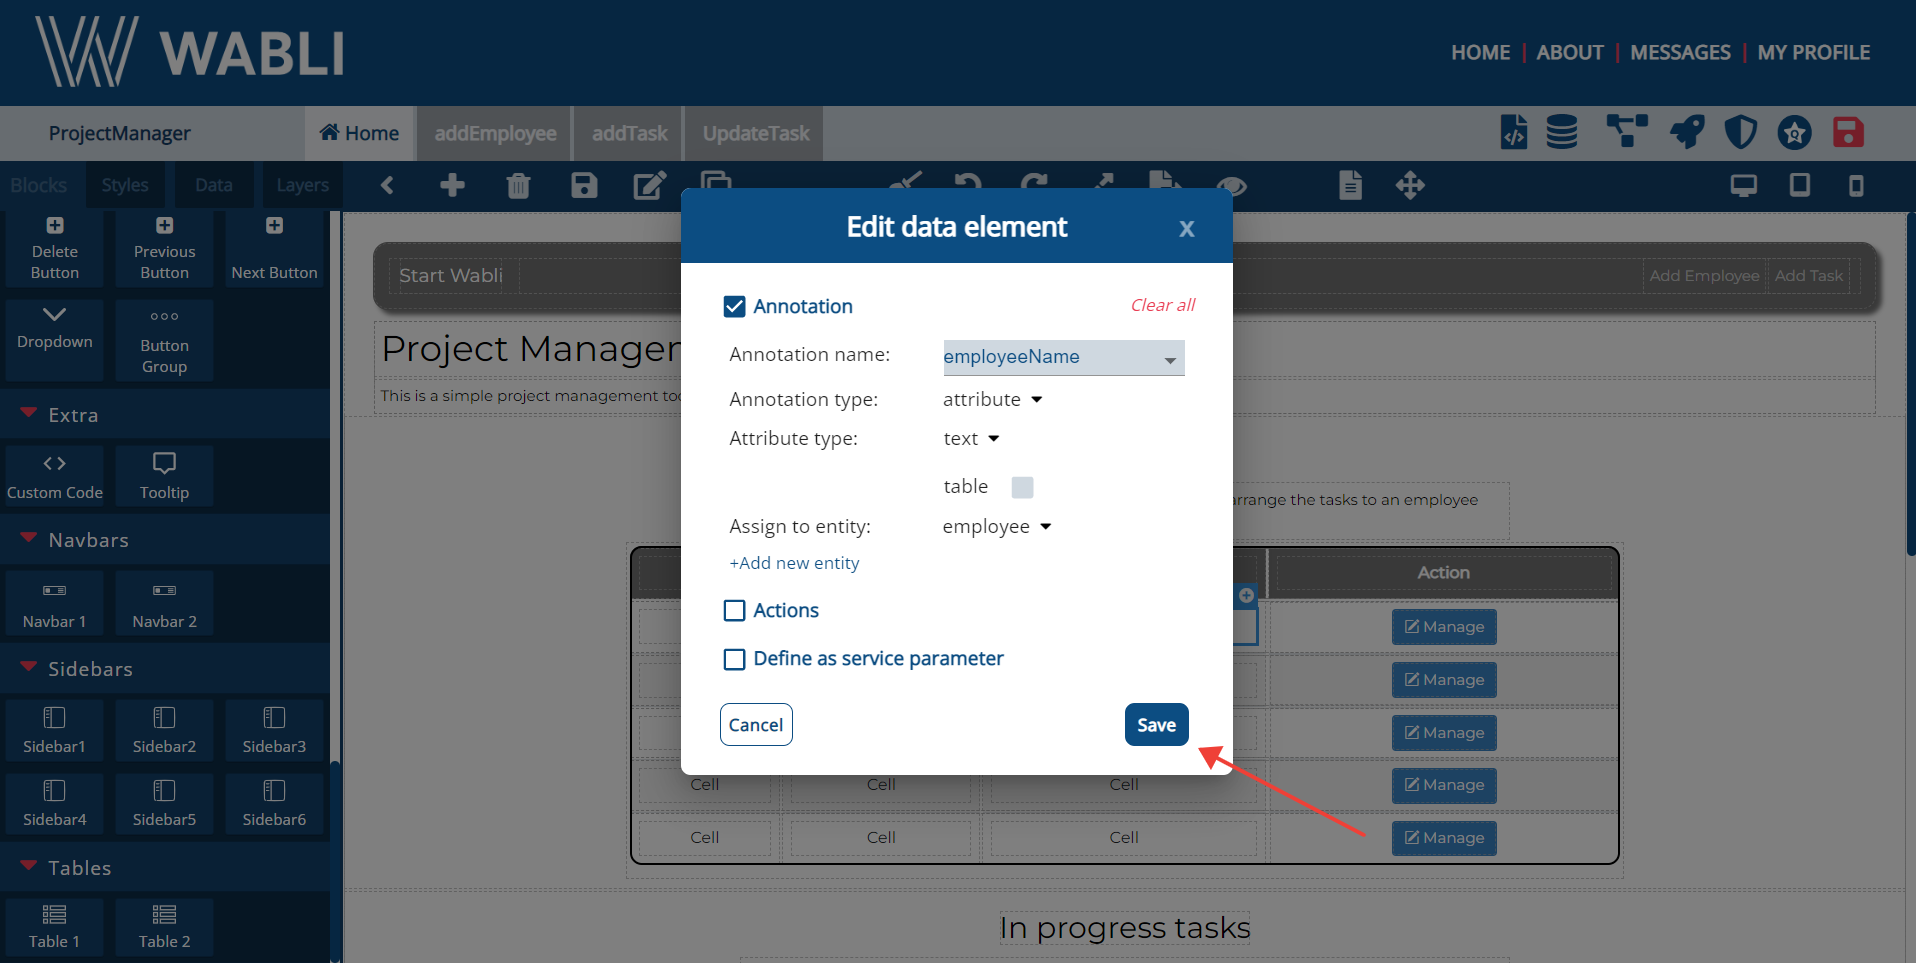
Now, because we want to be able to assign a task to an employee, we need to annotate the employee name. Employee, is another entity, so we need to select it as such in the annotation menu and also select the 'attach to entity' option.
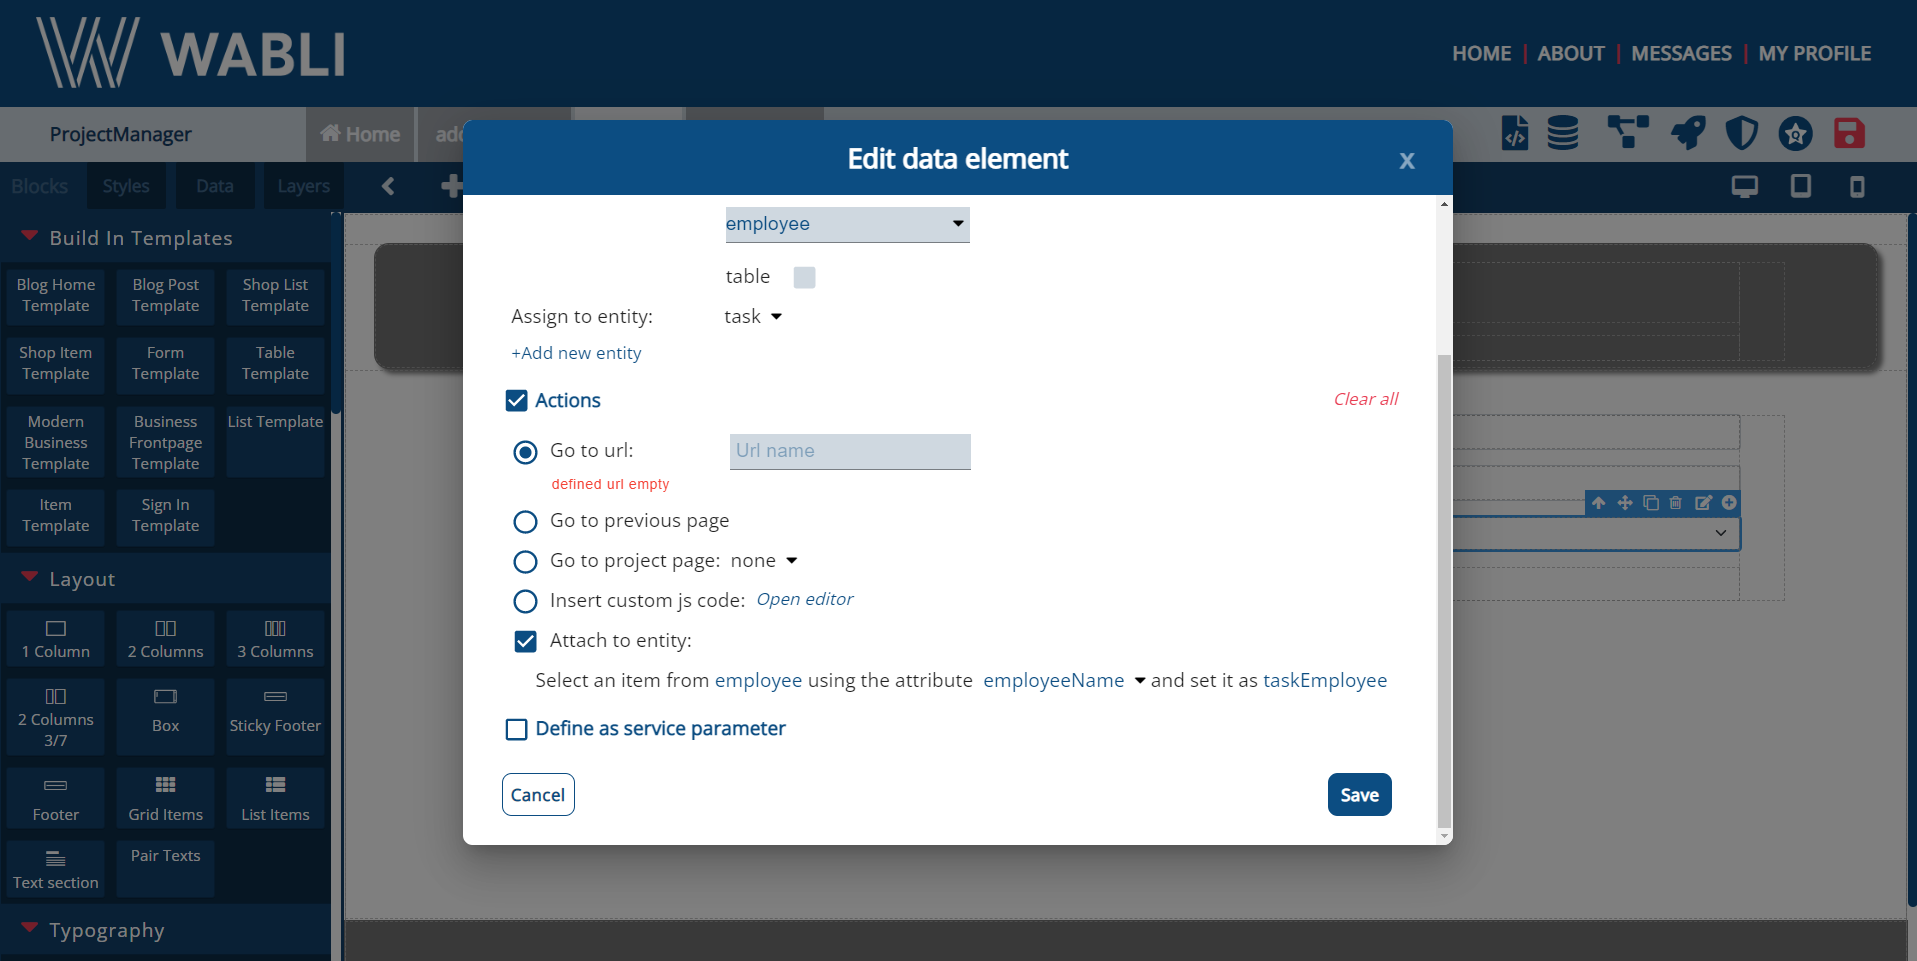
In addition, in order to be able to select
an employee from a list, we need a way to
find all the employees. In WABLI we offer
the possibility to use a function that can
read all the values of an entity. This is
the Get All method.
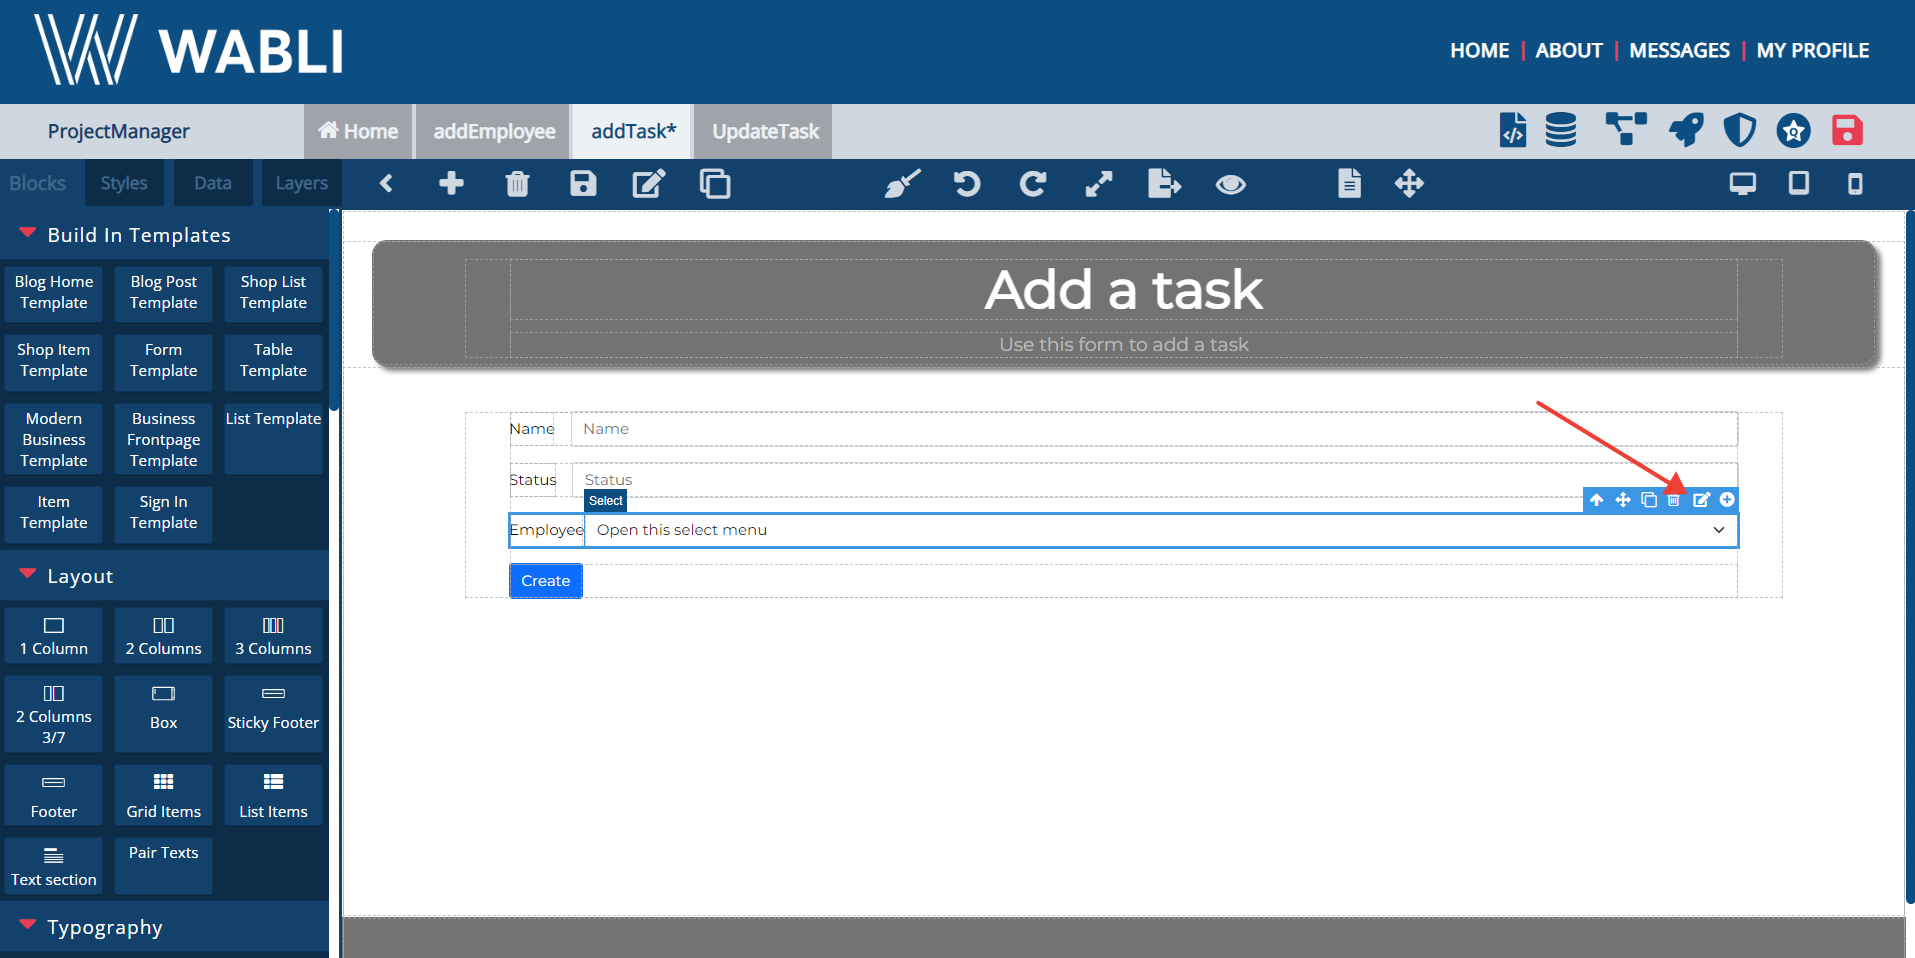
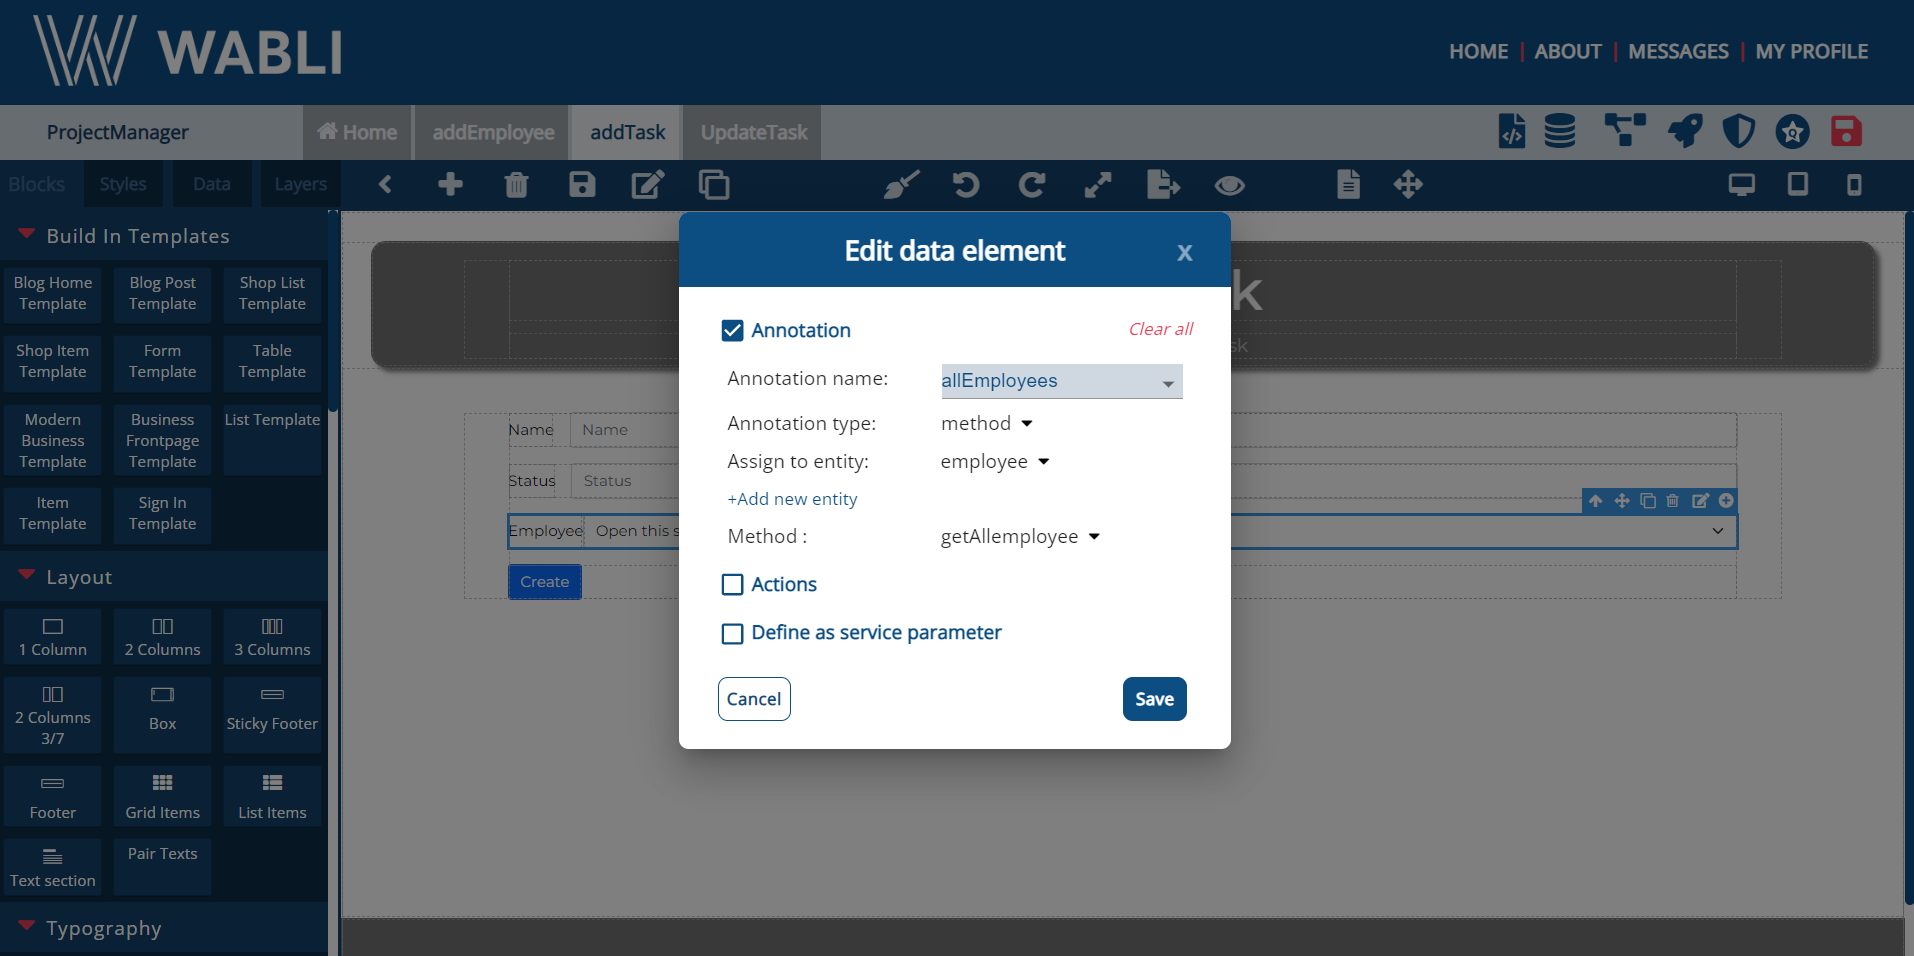
First, pick the box outside of the 'select'
by clicking the arrow icon. Then annotate it
as such.
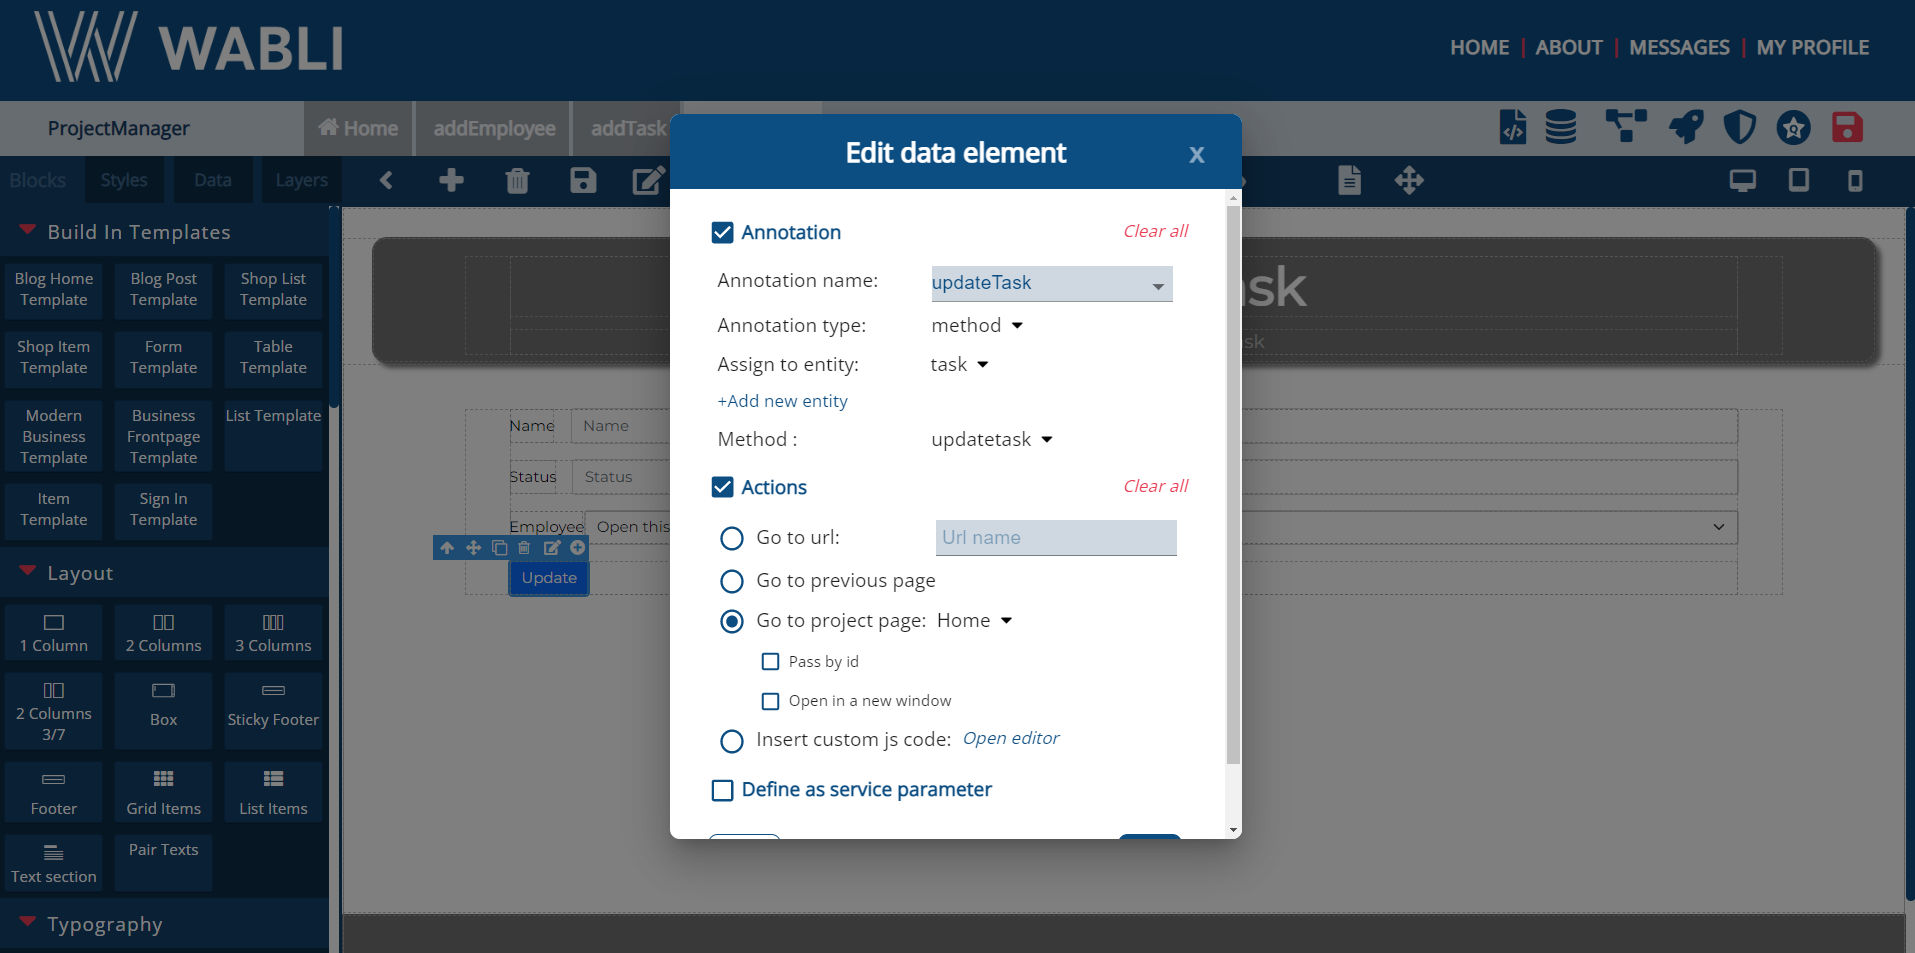
Going on, you need to annotate the 'create' button, as you did before. And follow the same procedure on the 'updateTask' page. There you should select the 'update' method.
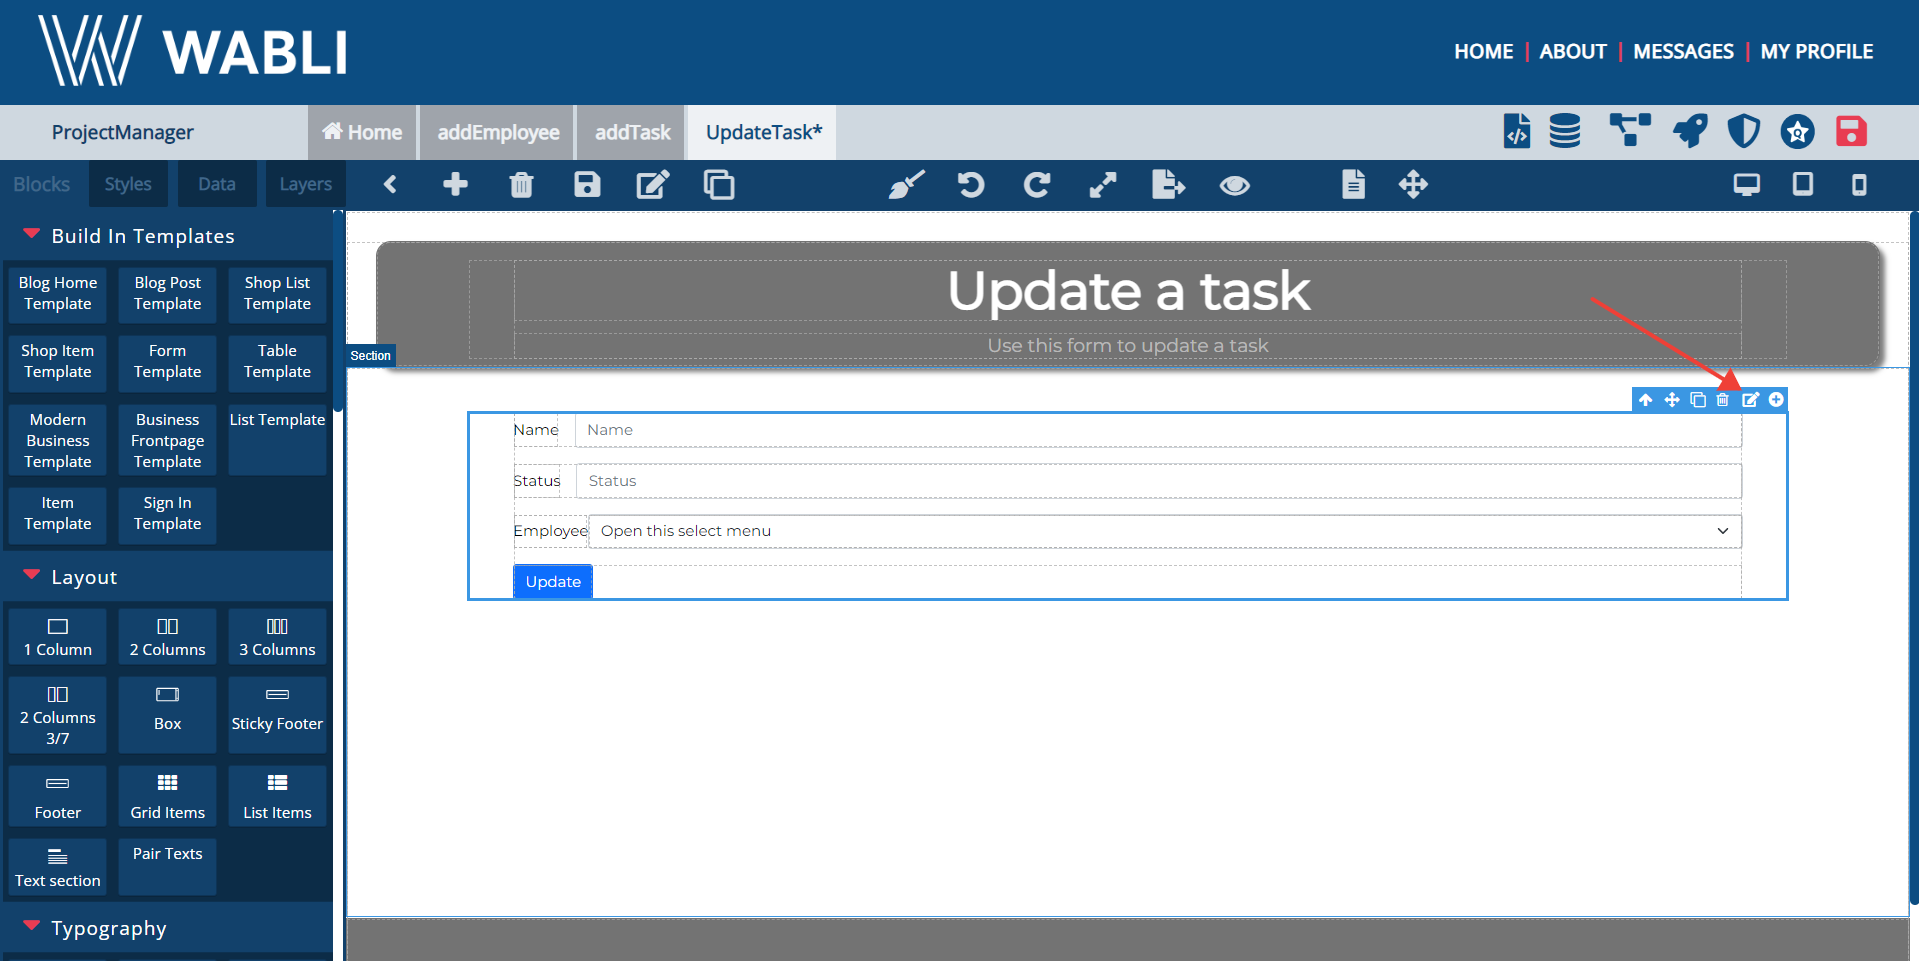
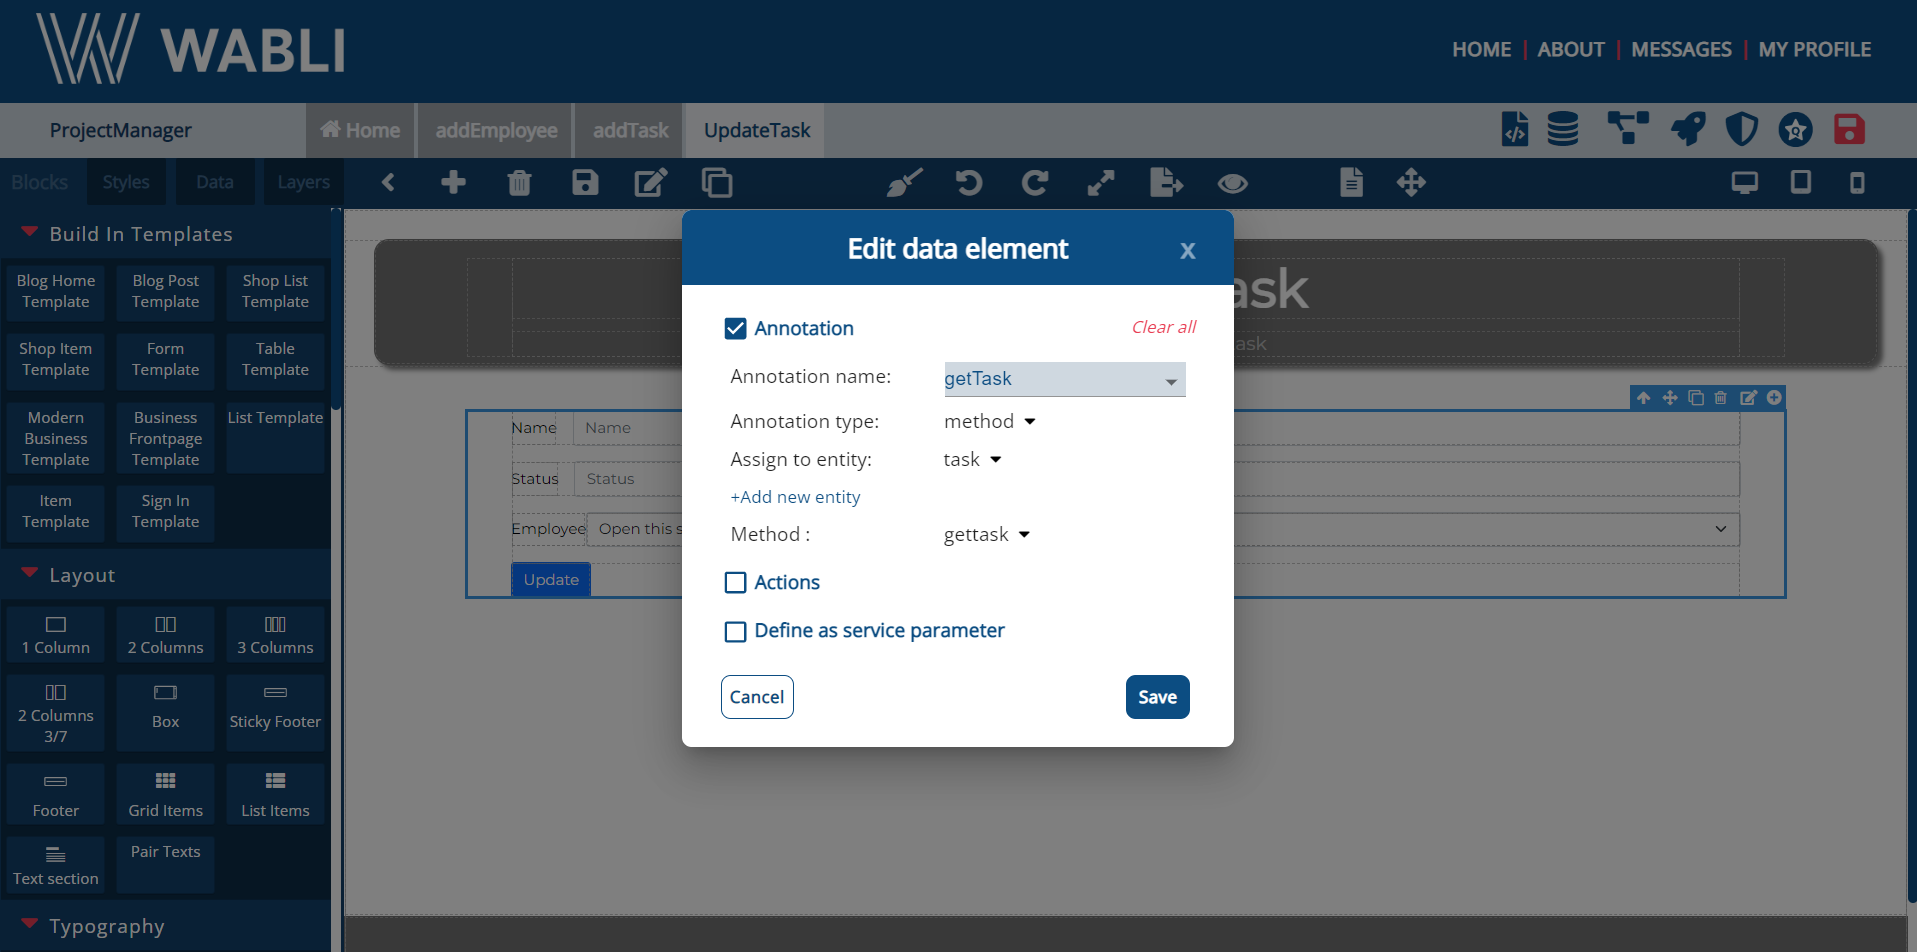
Finally, on the UpdateTask page, you need to use the get annotation method to get the task you want to update. To do so, select the box that include the form and annotate it.
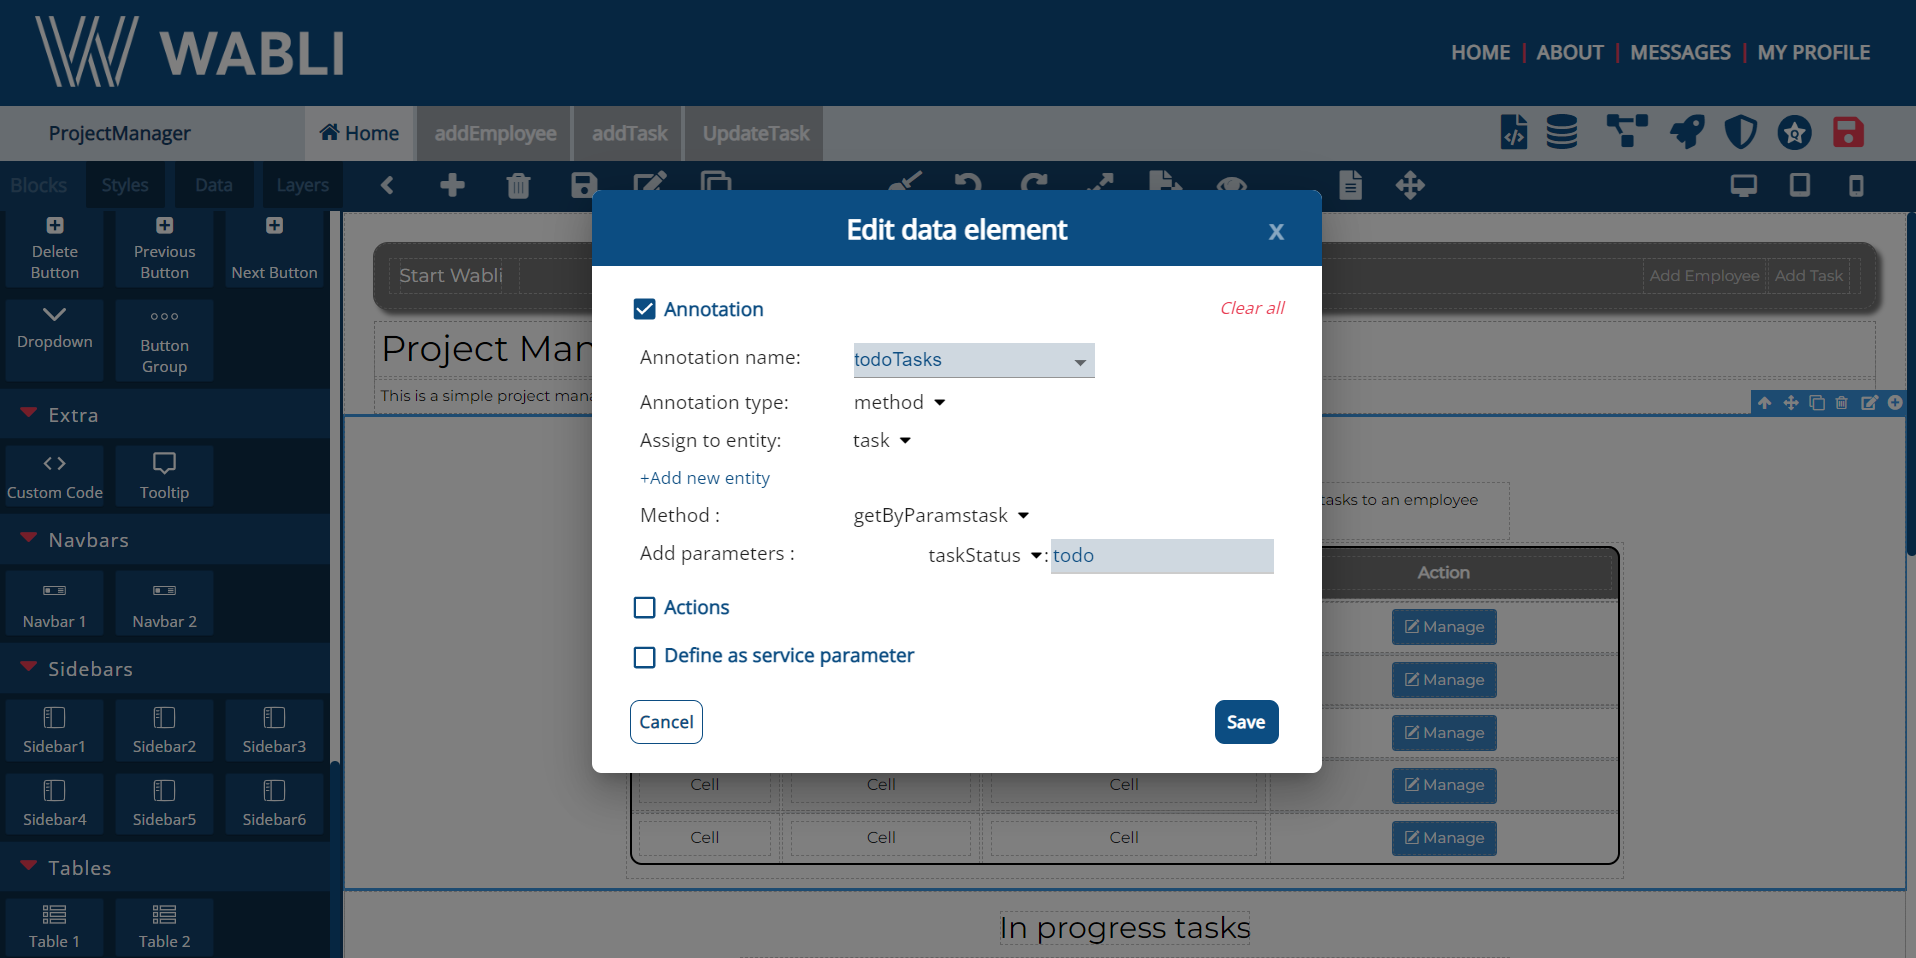
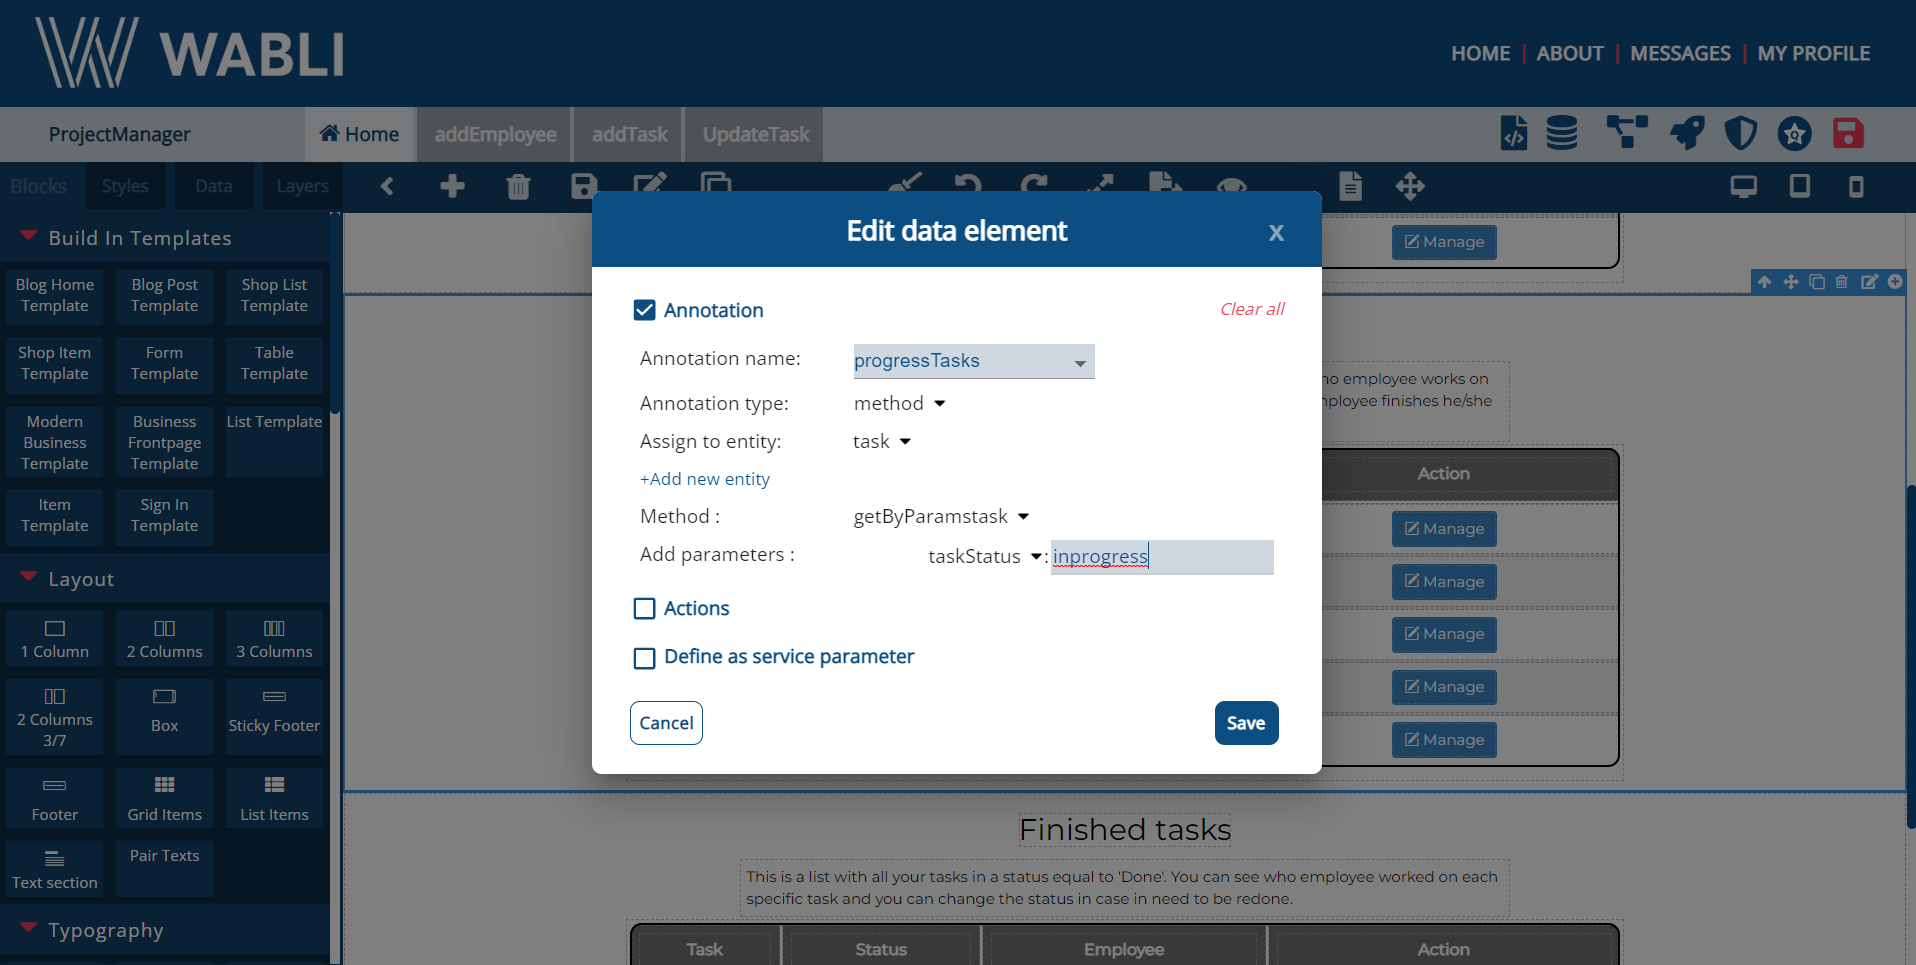
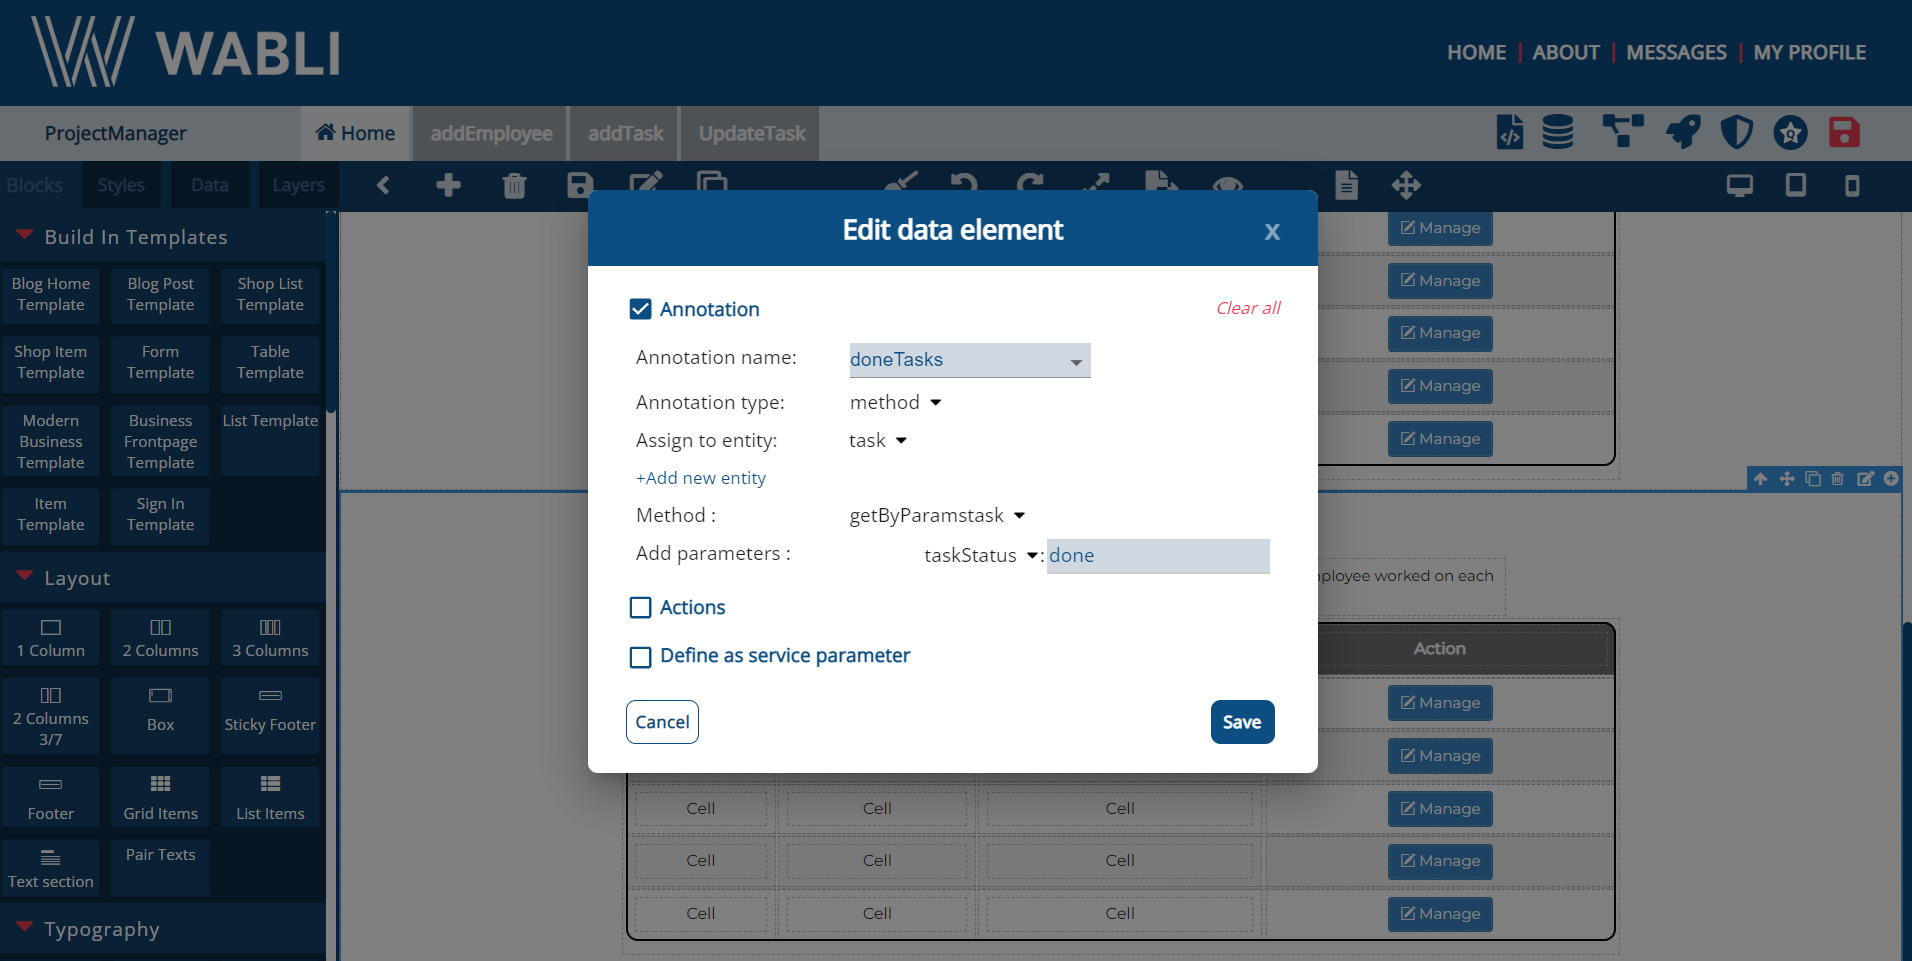
WABLI also offers the possibility to get all the results of an entity, based on an equality condition. This is the Get by params method. To use it, you need to annotate the box that includes the tables and select the condition.
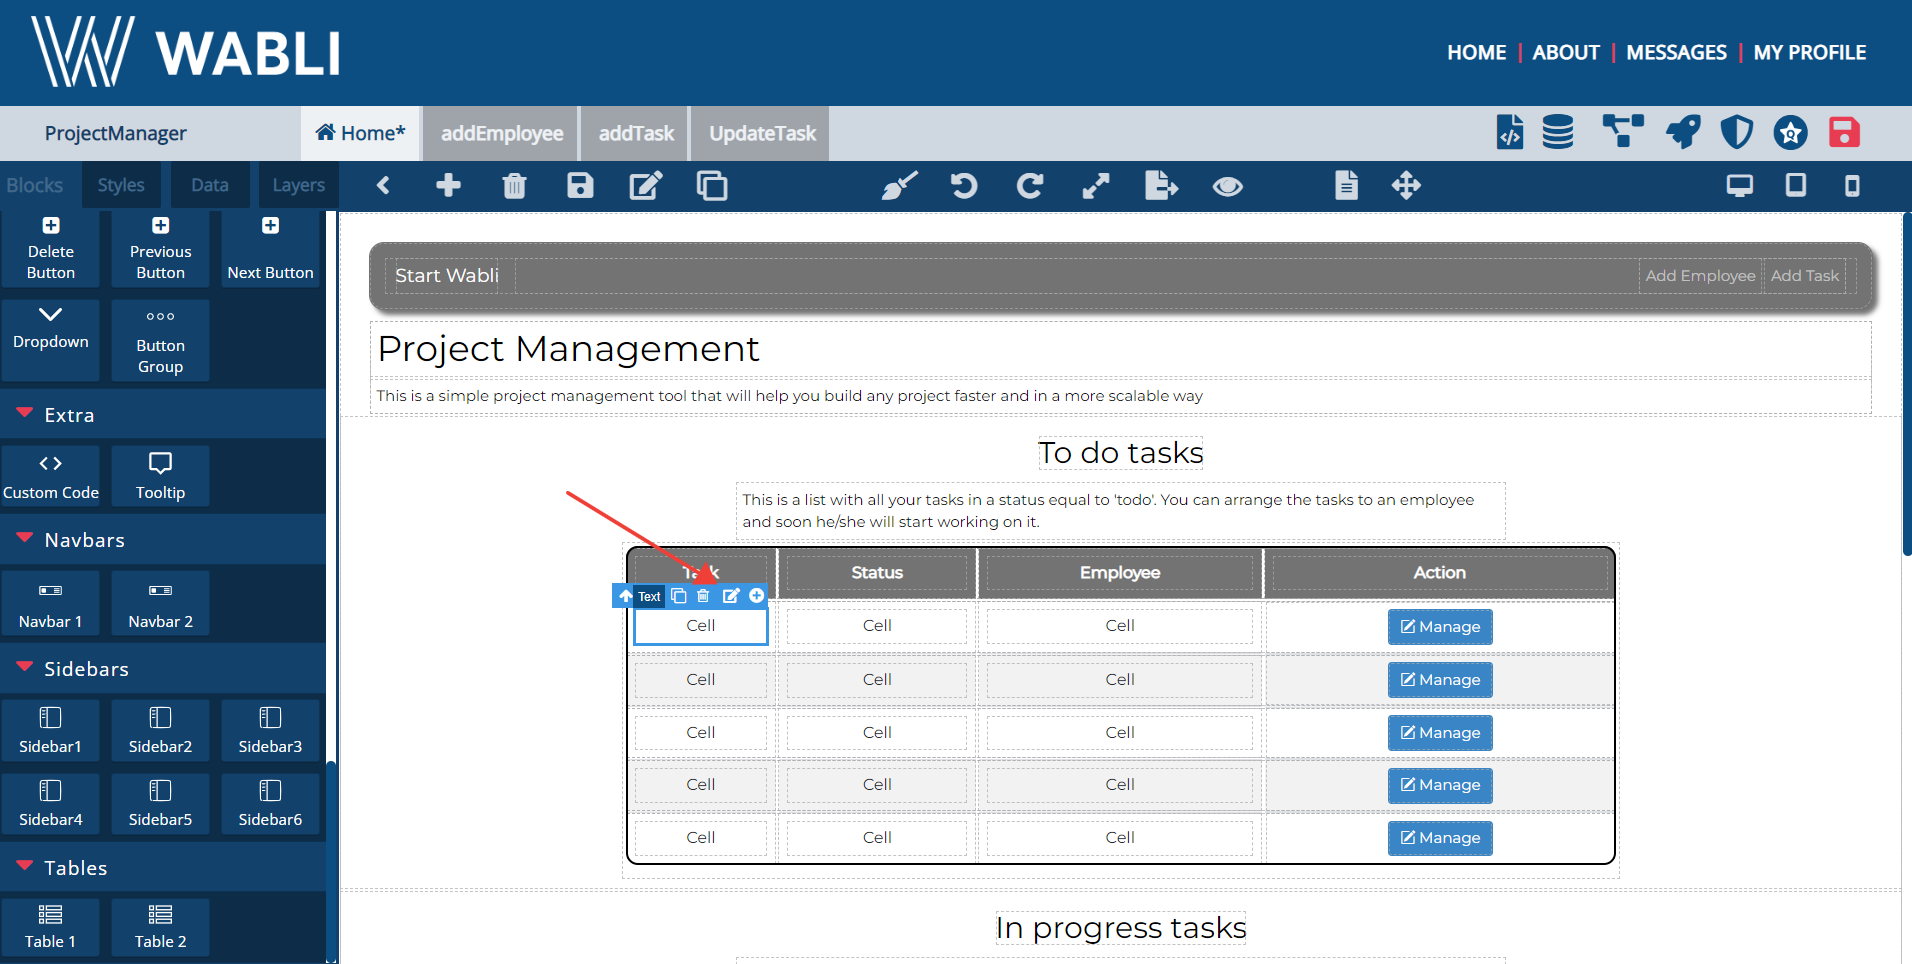
After you have annotated all the forms
needed and also annotated a table with a get
by params method, you can now show the
results to the table. To do so, you need to
annotate the table cells and select the
attributes you want to show.
Begin by selecting the first cell and
annotating it as the name of the task.

Then, select the second cell and annotate it as the status of the task.


Continue by selecting the third cell and annotate it as the name of the employee. Be careful, this cell needs to be annotated to the employee entity.
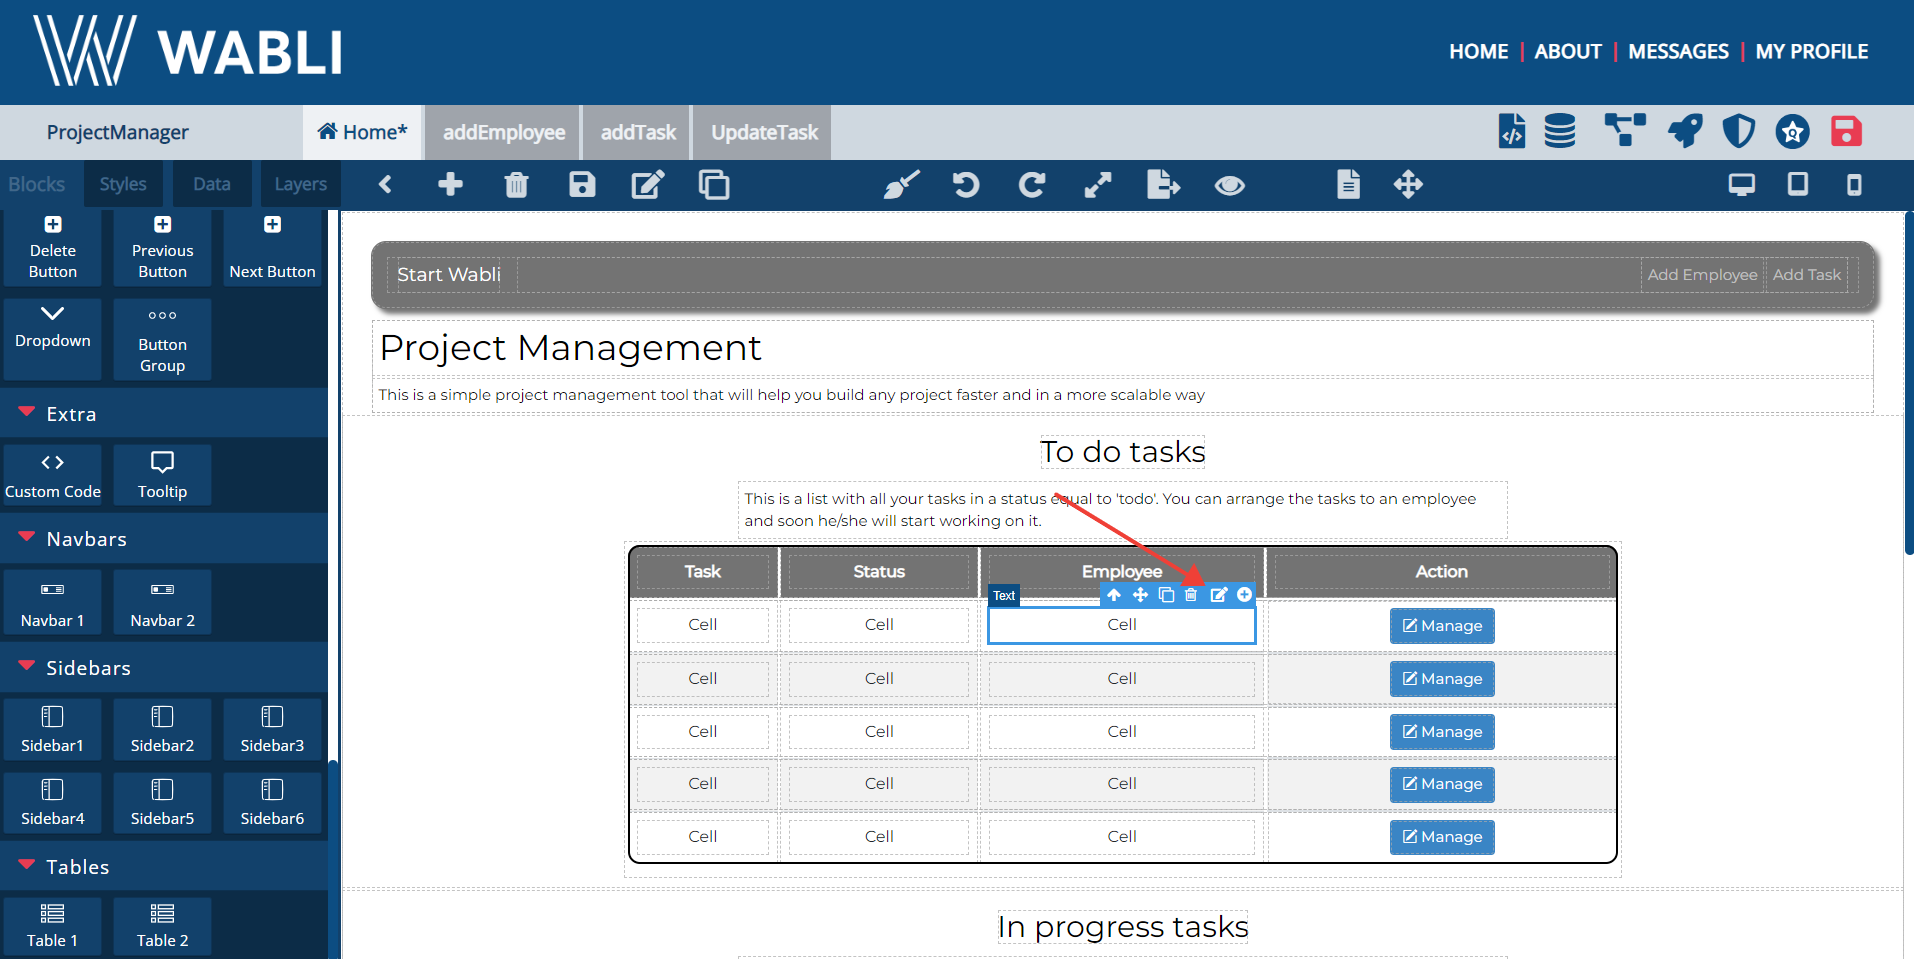
Now, select the outer box of this cell, to annotate it as the employee of the task. You are now finished and every row is updated with the annotations you made.